Rubber – it’s the unsung hero of everyday life, stretching and bouncing its way through our world.
But what if your trusty rubber loses its grip? Enter 3M 90, the adhesive superhero ready to save the day.
We’ve got all the juicy details on whether this mighty adhesive can conquer rubber’s slippery slope. Whether you’re a DIY guru, a crafting connoisseur, or just curious about the magic of adhesives, buckle up as we dig deep and uncover the truth behind this powerful bonding agent.
Get ready for a sticky adventure like no other.
What is 3M 90?
Contents
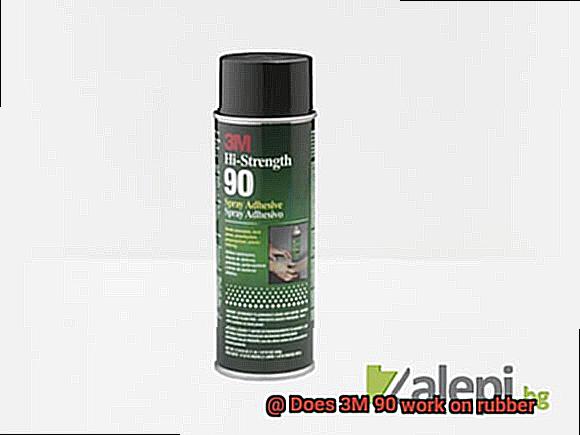
When it comes to adhesive products, 3M 90 shines as a reliable and versatile option. Produced by the renowned company 3M, this adhesive is celebrated for its exceptional bonding capabilities and wide range of applications. In this article, we will delve into the world of 3M 90 and explore why it is the perfect choice for bonding rubber surfaces.
Key Features of 3M 90:
- Versatility: From rubber to plastics, metals, and fabrics, 3M 90 is designed to bond various materials together. Its ability to create a lasting bond on different surfaces makes it a go-to choice for industries such as automotive, construction, and crafts.
- Strong Bonding Capabilities: The star quality of 3M 90 lies in its exceptional bonding strength. When it comes to bonding rubber surfaces, this adhesive creates a secure and durable bond that withstands temperature changes, moisture, and vibrations.
- Easy Application: With its convenient aerosol packaging, applying 3M 90 is a breeze. The aerosol form ensures uniform coverage and easy distribution of the adhesive onto the desired surface.
- Quick Drying Time: Time is precious in any project. Thankfully, 3M 90 offers a fast drying time, allowing you to move forward with your work efficiently.
- Temperature Resistance: Whether you’re working in freezing temperatures or scorching heat, 3M 90 has got you covered. This adhesive exhibits good temperature resistance and can withstand both low and high temperatures without compromising its bond.
Tips for Bonding Rubber with 3M 90:
- Start by properly cleaning the rubber surface before applying the adhesive to ensure optimal bonding.
- Apply a thin, even coat of 3M 90 using a brush or roller.
- Allow the adhesive to dry until it becomes tacky before pressing the rubber surfaces together firmly and evenly.
- Use clamps or weights to hold the bonded surfaces in place while the adhesive cures.
- Follow the manufacturer’s instructions for curing time, typically at least 24 hours for full bond strength.
Does 3M 90 Work on Rubber?
If you’ve ever found yourself wondering whether or not 3M 90 works on rubber, then look no further. As an expert in adhesive products, I am here to provide you with all the information you need. So let’s dive in and uncover the truth.
First and foremost, it is crucial to note that while 3M 90 is not explicitly designed for rubber bonding, it can still be used on certain types of rubber with proper preparation and application techniques. So don’t despair just yet.
To get started, you must ensure that the rubber surface is clean and free from any dirt, grease, or other contaminants that may hinder the adhesive bond. A simple wipe down with a suitable cleaning agent or solvent should do the trick. Imagine the rubber surface gleaming, ready to embrace the adhesive’s power.
Next, consider roughening up the surface of the rubber to enhance the bond. This can be achieved by lightly sanding the surface, creating a textured landscape for the adhesive to grip onto. Alternatively, you can opt for a specialized primer or adhesion promoter designed specifically for rubber bonding. Picture tiny footholds for the adhesive to firmly grasp.
Once the surface is primed and prepped, it’s time to apply the adhesive. The key here is to apply it evenly on both surfaces, ensuring a symphony of adhesion. Too much adhesive may result in excessive squeeze out or oozing, while too little may lead to a feeble bond. Balance is key.
Now comes the waiting game. Patience is required as you allow sufficient time for the adhesive to cure. The curing time may vary depending on factors such as temperature and humidity, so consult the manufacturer’s instructions for specific guidance. Picture time standing still as the adhesive solidifies its grip.
After the adhesive has cured, it’s time to put it to the test. Apply a gradual force or tension to the bonded area, checking for any signs of separation or failure. The bond should withstand the test, holding strong like a heroic knight protecting its kingdom.
In some cases, you may need additional measures to enhance the bond strength between 3M 90 and rubber. Consider using mechanical fasteners such as screws or rivets in conjunction with the adhesive. Alternatively, explore other adhesives specifically formulated for rubber bonding. The possibilities are endless.
Remember, the effectiveness of 3M 90 on rubber may vary depending on the specific rubber material and application. To ensure success, it is always a good idea to test the adhesive on a small, inconspicuous area before proceeding with a full-scale bonding project. Take that extra step to guarantee triumph.
Preparing the Rubber Surface for Bonding
Achieving a strong and durable bond when working with rubber surfaces requires proper preparation. In this comprehensive guide, we will explore the secrets of preparing rubber surfaces for bonding using adhesives like 3M 90. By following these steps and taking proper precautions, you can unlock the true potential of your adhesive and conquer any rubber surface.
Step 1: Cleaning the Rubber Surface
Thoroughly cleaning the rubber surface is essential before applying any adhesive. Use a mild detergent or solvent like isopropyl alcohol to remove dirt, grease, or contaminants. Ensure that the surface is completely dry before proceeding to the next step.
Step 2: Roughening up the Surface
To enhance the adhesive’s grip on the rubber, gently roughen up the surface using fine-grit sandpaper or a wire brush. This creates a slightly rough texture that promotes better adhesion. However, it’s important to note that not all rubbers can be easily roughened. In such cases, a primer designed for bonding rubber may be necessary.
Step 3: Primer Application (if required)
If the rubber surface is smooth or non-porous, applying a primer can help create a chemical bond between the rubber and adhesive. Follow the manufacturer’s instructions carefully and apply the primer evenly using a brush or applicator. Allow it to dry completely before moving on to the next step.
Step 4: Choosing the Right Adhesive
Using an adhesive suitable for bonding rubber surfaces is crucial. Certain adhesives are formulated to provide superior bonding strength for specific materials or surface types. Be sure to select an adhesive that is compatible with rubber and follow the manufacturer’s recommendations for application.
Step 5: Applying the Adhesive
Now comes the exciting part – applying the adhesive. Apply it evenly on both surfaces, finding that perfect balance between too much and too little. Imagine a symphony of adhesion in action. Ensure that the adhesive is spread evenly to maximize contact with the rubber surface.
Step 6: Temperature and Humidity Considerations
Pay attention to temperature and humidity conditions during the bonding process. Extreme temperatures and high humidity can affect the adhesive’s performance and curing time. Work in a controlled environment within the recommended range specified by the adhesive manufacturer.
Step 7: Pressure and Curing Time
Proper pressure and curing time are crucial for optimal bonding results. Apply even and consistent pressure to the bonded surfaces using clamps or weights. This ensures better adhesion. Follow the adhesive manufacturer’s recommendations for curing time, allowing it to fully set and develop maximum strength.
Applying 3M 90 onto the Rubber Surface
Look no further. In this article, we will explore the benefits of using 3M 90 adhesive on rubber surfaces. Known for its versatility and strength, 3M 90 is a popular choice for various bonding applications. So, let’s dive in and discover the true potential of this adhesive.
Superior Adhesion:
One of the key benefits of applying 3M 90 onto rubber surfaces is its superior adhesion properties. The adhesive creates a strong bond that withstands stress and load, ensuring a durable connection between rubber materials. Whether you’re repairing rubber products or working on DIY projects, 3M 90 provides the reliability you need.
Versatility:
Another advantage of using 3M 90 is its versatility. This adhesive is suitable for bonding a wide range of rubber surfaces, including natural rubber, synthetic rubber, and even elastomers. From rubber gaskets and seals to automotive parts and footwear, 3M 90 can handle various applications with ease.
Easy Application Process:
Applying 3M 90 onto a rubber surface is a straightforward process that requires minimal effort. With proper surface preparation and careful application, you can achieve optimal bonding results. The step-by-step process includes cleaning the surface, creating texture through light sanding, shaking and spraying the adhesive in an even layer, allowing it to become tacky, aligning and pressing the surfaces together, and providing sufficient curing time.
Time Efficiency:
Thanks to its fast-drying formula, 3M 90 allows for efficient project completion. Once the adhesive becomes tacky, you can proceed with aligning and pressing the rubber surfaces together. The curing time may vary depending on environmental conditions, but it typically ranges from several minutes to several hours. This means you can move forward with your project without unnecessary waiting.
Compatibility Testing:
While 3M 90 is known for its strong bond, it’s always a good idea to conduct a compatibility test before tackling a larger project. This involves applying the adhesive on a sample piece of rubber to assess the bond’s strength and compatibility with the specific rubber type. By doing so, you can ensure optimal results and avoid potential issues.
Pressing the Surfaces Together and Curing the Adhesive
In this post, we’ll explore the crucial steps of pressing the surfaces together and curing the adhesive to achieve a bond that stands the test of time. Get ready to unlock the key to success in your glue game.
Cleanliness is Next to Bondiliness:
Before applying 3M 90 adhesive, cleanliness is crucial. Ensure both rubber surfaces are free from dirt, grease, and contaminants. A clean surface sets the stage for a strong bond. So roll up your sleeves and get scrubbing.
Thin is In:
When it comes to applying adhesive, less is more. A thin and even layer of 3M 90 adhesive is all you need for a robust bond. Avoid overapplying, as excess squeeze out or unevenness can compromise the integrity of the bond.
Precision Alignment:
Attention to detail is key when aligning the rubber surfaces. Take your time to ensure a perfect match, as misalignments can lead to weak spots or an uneven bond. Remember, “measure twice, bond once.”
Apply Pressure Like a Pro:
Now comes the fun part – pressing the surfaces together. Applying pressure helps spread the adhesive evenly between the two surfaces, maximizing contact and ensuring a strong bond. Whether you use your hands or a roller, make sure to press firmly for optimal results.
Time Heals All Bonds:
Patience is a virtue in the world of adhesive bonding. Allow sufficient curing time for the adhesive to work its magic. Factors like temperature and humidity can influence curing time, so consult product instructions or technical data sheets for specific guidelines.
Don’t Disturb the Peace:
Once the surfaces are pressed together, avoid disturbing or moving them until the adhesive has fully cured. Any disruption during the curing process can weaken the bond, so give your adhesive some alone time to do its thing.
Benefits of Using 3M 90 on Rubber Surfaces
Are you tired of dealing with weak bonds and unreliable adhesives when working with rubber surfaces? Look no further. In this blog post, we will unveil the ultimate secret weapon – 3M 90 adhesive. Whether you’re a professional or a DIY enthusiast, this adhesive is guaranteed to make your projects a breeze. Let’s dive into the exciting benefits of using 3M 90 on rubber surfaces.
Strong and durable bond:
When it comes to bonding rubber materials, strength and durability are paramount. With 3M 90 adhesive, you can rest assured knowing that your rubber components will stay securely in place, even under extreme conditions. From rubber hoses to gaskets, this adhesive creates unbreakable bonds that stand the test of time.
Versatile application:
No matter the project or industry, 3M 90 adhesive is your go-to solution. Its versatility allows it to bond various types of rubber materials, including natural rubber, synthetic rubber, and neoprene. So whether you’re working on automotive repairs, industrial applications, or crafting projects, you can trust 3M 90 to meet your needs.
Quick drying time:
Time is of the essence in any project. Luckily, 3M 90 adhesive has a relatively quick drying time, saving you valuable time and ensuring efficient progress. With drying times often measured in minutes, you can move on swiftly to the next step without delay.
Excellent resistance properties:
Rubber surfaces are exposed to harsh environmental factors such as moisture, heat, and chemicals. Fortunately, 3M 90 adhesive boasts excellent resistance properties against these elements. It can withstand moisture and humidity without compromising its integrity. Additionally, it remains strong even in extreme temperatures, making it ideal for both indoor and outdoor applications.
Ease of use:
Gone are the days of messy and time-consuming adhesive applications. 3M 90 adhesive comes in an aerosol can, ensuring easy and precise application. With its controlled spray nozzle, you can achieve an even distribution of the adhesive without any hassle. It’s user-friendly even for beginners, as it requires no additional mixing or preparation.
Repositionable:
Sometimes, aligning rubber surfaces perfectly can be a challenge. Thankfully, 3M 90 adhesive is repositionable, allowing you to make adjustments before the bond fully sets. This feature is particularly useful for complex projects that require precise alignment. Enjoy the flexibility without compromising the strength of your bond.
Specialty Rubbers and Highly Flexible Materials
In this blog post, we will delve into the world of adhesive bonding, exploring the considerations for selecting the ideal adhesive for successful bonding. Whether you’re a DIY enthusiast or a professional in need of expert advice, this comprehensive guide is tailored just for you.
Understanding Specialty Rubbers and Highly Flexible Materials:
Specialty rubbers, also known as elastomers, possess extraordinary elasticity, resilience, and resistance to various environmental factors. From neoprene to nitrile rubber, silicone rubber to fluorocarbon rubber, these materials are the backbone of automotive components, industrial seals, and consumer goods due to their unparalleled flexibility and durability.
Choosing the Right Adhesive:
- Compatibility: Different adhesives have distinct chemical compositions and bonding mechanisms. It is crucial to select an adhesive that is compatible with the specific type of rubber being used.
- Surface Preparation: A strong bond begins with proper surface preparation. This involves thorough cleaning to remove contaminants, roughening the surface for enhanced adhesion, and utilizing primers or adhesion promoters if necessary.
- Application Conditions: Temperature, humidity, and stress levels can impact bonding performance and long-term durability. Ensure that the adhesive is suitable for the specific application requirements.
Exploring 3M 90:
While not explicitly marketed as a rubber adhesive, 3M 90 has gained popularity for its versatility and formidable bonding capabilities with rubber materials. However, its effectiveness may vary depending on the type of rubber being bonded.
Tips for Successful Bonding:
- Follow Instructions: Optimal results are achieved by adhering to the manufacturer’s instructions.
- Conduct Small-Scale Tests: Before scaling up your project, conduct small-scale tests to determine the adhesive’s suitability for your specific rubber bonding application.
- Seek Expert Advice: If you find yourself unsure about adhesive selection or the application process, don’t hesitate to consult adhesive experts who can provide invaluable guidance.
CVfrYva1iFo” >
Conclusion
In conclusion, 3M 90 adhesive is a game-changer when it comes to bonding rubber surfaces. Don’t be fooled by its lack of explicit rubber design – this adhesive can work wonders with the right preparation and technique.
The standout features of 3M 90 adhesive make it a top choice for all sorts of applications. It’s a true jack-of-all-trades, effortlessly bonding rubber, plastics, metals, and fabrics. And let’s not forget about its incredible strength – this stuff can handle temperature changes, moisture, and even vibrations without breaking a sweat. Plus, the aerosol packaging makes application a breeze, ensuring every nook and cranny gets covered with ease. Oh, and did I mention it dries in a flash and laughs in the face of high temperatures?
But here’s the catch: if you want to unlock the full potential of 3M 90 adhesive on rubber surfaces, you’ve got to do some prep work. Think of it as laying the groundwork for an unbreakable bond. Clean that surface like your life depends on it – no dust or grime allowed. And don’t be afraid to roughen things up a bit – that extra texture will give the adhesive something to hold onto. Once you’ve prepped your surface like a pro, apply the adhesive evenly on both sides and give it some time to cure.
Now here’s some real talk: while 3M 90 adhesive can work wonders on certain types of rubber, I’d advise doing some compatibility testing and consulting with adhesive experts before diving headfirst into large-scale projects.
All in all, 3M 90 adhesive is an absolute powerhouse when it comes to bonding rubber surfaces. Its unrivaled adhesion properties, versatility across materials, user-friendly application process, and impressive resistance capabilities make it an indispensable tool in countless industries and applications.