Today, we’re about to embark on a glittering journey into the realm of creativity. Prepare to be amazed as we delve into the captivating world of using Mod Podge for gold leaf. If you’ve ever wondered whether this beloved crafting essential can truly work its magic with luxurious gold leaf, then you’ve come to the right place. So grab your paintbrushes, roll up those sleeves, and join us on an adventure that promises nothing short of pure golden brilliance.
Whether you’re a seasoned pro or just dipping your toes into the crafting waters, we’re here to guide you through the mesmerizing process of incorporating gold leaf with Mod Podge. Together, we’ll unlock the secrets, unveil expert tips, and discover clever tricks to achieve jaw-dropping results. With this dynamic duo at your disposal, there’s no limit to the dazzling creations you can conjure up.
So, get ready to infuse your crafts with a touch of opulence and make them shine like never before. Let’s dive headfirst into this golden escapade and let your imagination run wild.
What is Mod Podge and Gold Leaf?
Contents
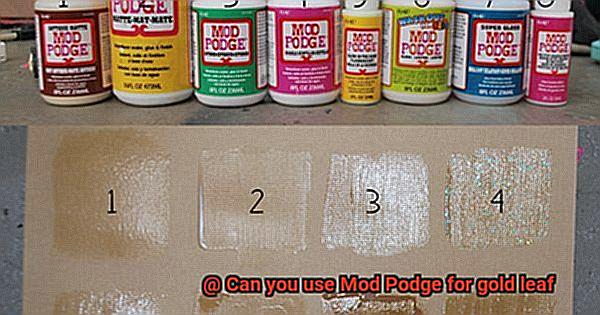
Mod Podge and gold leaf are two materials that have gained popularity in the world of crafting and art. Mod Podge is a versatile adhesive known for its ability to bond various surfaces together, such as paper, fabric, wood, and more. It not only creates a strong bond but also provides a protective seal. With different formulas available, crafters can choose from matte, glossy, or satin finishes to achieve their desired look.
Gold leaf, on the other hand, is a thin sheet of actual gold that is commonly used for decorative purposes. It adds an elegant and luxurious touch to art and craft projects. Gold leaf can be applied to a wide range of surfaces including wood, metal, glass, and even paper. It comes in loose sheets or transfer sheets, providing different options for application.
Using Mod Podge as an adhesive for gold leaf is a topic of debate among crafters. While some find success with this method, others prefer using specialized glues specifically designed for gold leaf application. It’s important to note that Mod Podge is not specifically formulated for gold leaf, so the results may not be as durable or long-lasting as using dedicated adhesives.
If you decide to use Mod Podge for gold leaf application, there are steps you can follow for better results. First, ensure that the surface is clean and free from dust or debris. Apply a thin layer of Mod Podge onto the surface to create a tacky base for the gold leaf to adhere to. Carefully place the gold leaf onto the Mod Podge-covered surface and gently press it down with a soft brush or your fingers. Allow it to dry completely before applying additional layers or finishes.
It’s important to keep in mind that while Mod Podge can be a cost-effective option for small-scale projects or experimentation with gold leaf, it may not provide the same level of durability as specialized adhesives designed specifically for this purpose. If you’re looking for a more professional or long-lasting finish, it’s recommended to invest in a high-quality gold leaf adhesive.
Can You Use Mod Podge for Gold Leaf?
If you’re wondering whether Mod Podge is the right adhesive for gold leaf applications, I’ve got the scoop for you. While Mod Podge is a fantastic all-purpose glue, it may not be the best choice for gold leaf. Let me break it down for you:
- Delicate Gold Leaf: Gold leaf is as delicate as a butterfly’s wing, requiring a specific type of adhesive to ensure proper adhesion. Traditional gold leaf adhesives are designed to bond strongly with this fragile material, creating a finish that is durable and long-lasting.
- Water-Based Mod Podge: Mod Podge, on the other hand, is a water-based adhesive. While it may work wonders for other crafts, its bonding properties may not match up to oil-based or gelatin-based gold leaf adhesives. This can result in the gold leaf not adhering properly or peeling off over time.
- Durability Concerns: Using Mod Podge with gold leaf may compromise the durability of your masterpiece. The weaker bonding properties of Mod Podge compared to specialized gold leaf adhesive can lead to a less durable finished product.
Now, I understand that some of you may still want to give it a shot, so here are a couple of tips to improve your results when using Mod Podge with gold leaf:
- Enhance Bonding: Mix a small amount of traditional gold leaf adhesive with Mod Podge to boost its bonding capabilities.
- Base Coat Technique: Apply a layer of Mod Podge as a base coat and let it dry before applying the gold leaf. This creates a slightly tacky surface that improves adhesion.
However, it’s important to note that these methods may still fall short of using a dedicated gold leaf adhesive in terms of adhesion strength.
Preparing the Surface
Preparing the surface is an essential step in achieving a professional-looking result when working with Mod Podge and gold leaf. There are several reasons why surface preparation is significant:
- Adhesion: Properly preparing the surface ensures that the Mod Podge and gold leaf adhere securely to the surface. A clean and smooth surface allows for better contact and bonding between the adhesive and the surface, preventing peeling or detachment.
- Even finish: Surface imperfections such as dirt, dust, or roughness can affect the appearance of the gold leaf application. Preparing the surface by cleaning and smoothing it helps create a more even and polished finish.
- Durability: A well-prepared surface helps ensure that the gold leaf and Mod Podge adhere strongly to the surface, making the finished project more durable and long-lasting.
Now let’s break down the steps involved in preparing the surface:
- Cleaning: Start by wiping the surface with a damp cloth to remove any dust or debris. For stubborn stains or residue, use a mild detergent and water solution to gently clean the surface. This step is crucial for achieving a clean base for the adhesive.
- Drying: After cleaning, make sure the surface is completely dry before applying Mod Podge and gold leaf. Any moisture on the surface can interfere with adhesion and may cause bubbling or peeling. Use a clean cloth or allow the surface to air dry naturally.
- Priming: Depending on the type of surface, it may be necessary to prime it before applying Mod Podge and gold leaf. Priming creates a smooth and even base for better adhesion. Choose a primer suitable for your surface type and apply it according to the manufacturer’s instructions. Allow the primer to dry completely before proceeding.
- Applying Mod Podge: Once the surface is prepped and primed, apply a thin and even layer of Mod Podge using a brush or foam applicator. Make sure to cover the entire surface evenly, avoiding thick or uneven areas.
Applying the Mod Podge
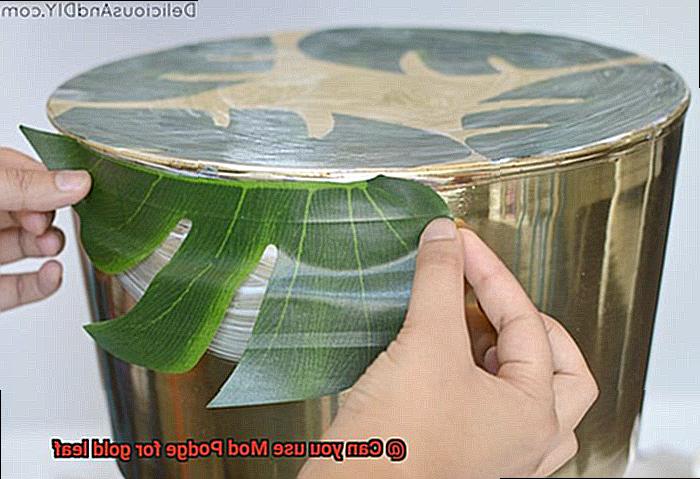
Applying gold leaf with Mod Podge is a delightful and imaginative way to introduce a touch of sophistication to your craft projects. Regardless of whether you are working on a DIY home decor piece or a carefully crafted gift, the process is relatively simple and can produce breathtaking results. Here is a comprehensive step-by-step guide to help you get started:
- Prepare the surface: Before applying the gold leaf, ensure that your surface is clean and smooth. Smooth out any rough edges or imperfections by sanding them down if necessary. If you’re working with a porous material like wood, it’s advisable to apply a layer of primer or paint to seal the surface and provide a flawless base for the gold leaf.
- Apply a thin layer of Mod Podge: Using either a brush or sponge, gently apply a thin and even layer of Mod Podge onto the surface. Work in small sections to guarantee that the Mod Podge doesn’t dry before you have an opportunity to apply the gold leaf.
- Lay the gold leaf: Carefully place the gold leaf onto the wet Mod Podge, ensuring complete coverage of the desired area. You can use your fingertips or a soft brush to gently press down, aiding in the adhesion of the gold leaf to the surface. If there are any gaps or spots that require additional coverage, you can apply more pieces of gold leaf.
- Allow it to dry: Give the gold leaf ample time to dry completely. This may take several hours or even overnight, depending on the humidity and temperature of your surroundings. Avoid touching or disturbing the gold leaf while it dries to prevent any smudging or damage.
- Seal with Mod Podge: Once the gold leaf is dry, protect it by applying another thin and even layer of Mod Podge over the entire surface. Be sure to cover all areas with gold leaf so as not to leave any exposed spots. This will safeguard the gold leaf from tarnishing or flaking off over time.
- Optional: For a glossy finish, you can apply a layer of clear varnish or resin on top of the sealed gold leaf. This will enhance its overall appearance and give it a high shine.
It is important to note that Mod Podge, while suitable for use with gold leaf, may not be the most optimal adhesive option for achieving the best results. If you’re working on a project that requires long-lasting adhesion or if you desire a more professional finish, it is recommended to use specialized adhesives specifically designed for gold leaf.
Placing the Gold Leaf
Placing gold leaf is an art that requires precision and attention to detail. It’s not just about the delicate process of applying the gold leaf itself, but also about choosing the right adhesive for the job. The adhesive you use plays a crucial role in achieving a flawless result that showcases the true beauty of the gold leaf.
One of the main reasons why it’s important to use the right adhesive when applying gold leaf is adhesive compatibility. Gold leaf is a delicate material that requires a specific type of adhesive known as gold leaf adhesive or size. These adhesives are specially formulated to provide the perfect balance of tackiness and drying time. This ensures that the gold leaf adheres securely without damaging its delicate surface.
Preserving the reflective surface of the gold leaf is another key consideration. Gold leaf is prized for its smooth, reflective surface, which adds a touch of luxury to any project. Using the wrong adhesive, such as Mod Podge, can compromise this effect. Mod Podge dries with a shiny finish that can interfere with the desired shine and luster of the gold leaf, diminishing its visual impact.
Moisture resistance is also a critical factor when choosing an adhesive for gold leaf. Gold leaf is sensitive to moisture, and using an adhesive like Mod Podge, which is water-based, can pose a risk. If the surface gets wet after applying Mod Podge on top of gold leaf, the glue may reactivate and become tacky again. This could potentially ruin the gold leaf and result in an unsatisfactory outcome.
To ensure success when working with gold leaf, it’s essential to choose an adhesive specifically designed for this purpose. These specialized adhesives are made with ingredients that won’t interfere with the appearance of the gold leaf and provide a strong bond without compromising its delicate nature.
Drying and Finishing
Drying and finishing are essential steps in the process of working with gold leaf projects. These steps not only ensure proper adhesion but also protect the delicate gold leaf and give it a polished and professional appearance. Let’s dive deeper into why correctly drying and finishing gold leaf projects is so important, and what you need to know.
Firstly, adhesion is crucial for the gold leaf to securely stick to the surface. Rushing this step or using an adhesive not designed for gold leaf can result in poor adhesion or damage during the finishing process.
Secondly, finishing is vital for protecting the gold leaf from damage caused by UV rays, moisture, and general wear and tear. Without a proper protective finish, the gold leaf may tarnish or become scratched over time.

Moreover, the finishing stage gives the gold leaf project a polished and professional look. By using the right sealant or varnish, you can achieve different finishes such as matte, satin, or glossy, enhancing the overall beauty of your project.
Additionally, correctly drying and finishing your gold leaf project can significantly increase its durability and longevity. The protective finish helps preserve the integrity of the gold leaf, allowing it to maintain its brilliance for years to come.
To achieve the best results when drying and finishing your gold leaf project, it is recommended to use specialized adhesives designed for gold leaf and dedicated sealants or varnishes. These products are specifically formulated to provide the necessary adhesion and protection for gold leaf, ensuring a professional and long-lasting outcome.
Advantages and Disadvantages of Using Mod Podge for Gold Leaf
Mod Podge is a versatile crafting glue that is increasingly being used for gold leaf applications. Crafters and artists are drawn to its convenience and ability to experiment with different techniques and materials. It is ready to use straight out of the bottle, eliminating the need for additional mixing or preparation. Applying Mod Podge is as simple as brushing it onto the desired surface, allowing it to dry, and then applying the gold leaf on top.
One of the main advantages of using Mod Podge for gold leaf is its excellent adhesive properties. It ensures that the delicate gold leaf adheres securely to the surface, preventing lifting or peeling over time. Mod Podge also acts as a sealant, protecting the gold leaf from tarnishing or oxidizing. This sealing property makes the gold leaf more resistant to moisture and other environmental factors.
However, there are some disadvantages to using Mod Podge for gold leaf projects. One drawback is its longer drying time compared to specialized gold leaf adhesives. Depending on the thickness of the Mod Podge layer and environmental conditions, it may take several hours or even overnight to fully dry before applying the gold leaf.
Another potential issue is visible brush strokes when applying Mod Podge with a brush. This can be problematic for delicate gold leaf projects, as any imperfections can detract from the overall appearance. However, using a soft, high-quality brush and applying thin, even layers of Mod Podge can help minimize this issue.
Mod Podge also has a glossy finish, which may not be desired for certain gold leaf projects. Achieving a matte or satin finish may require additional steps, such as using a different sealant or applying a matte or satin varnish over the Mod Podge layer.
Lastly, while Mod Podge provides some protection to the gold leaf, it may not offer the same level of durability as specialized gold leaf adhesives. If the finished piece will be exposed to heavy wear and tear or frequent handling, using a stronger adhesive formulated for gold leaf applications may be more suitable.
Tips for Successful Application
Preparing the Surface:
The first step to a successful application of gold leaf with Mod Podge is to properly prepare the surface. This ensures that the gold leaf adheres smoothly and securely. Begin by cleaning the surface thoroughly, removing any dust, dirt, or imperfections that may interfere with adhesion. Use a soft cloth or brush to gently remove any debris, ensuring a clean and smooth surface for the gold leaf.
Applying a Base Coat:
To enhance the adhesion of the gold leaf, it is recommended to apply a base coat of Mod Podge or another suitable adhesive. This creates a smooth and even surface for the gold leaf to adhere to. Apply a thin layer of Mod Podge on the desired area using a brush or sponge, making sure to spread it evenly and smoothly. Allow the base coat to dry completely before proceeding.
Using Thin Layers:
When applying Mod Podge for gold leaf, it is best to use thin layers rather than thick coats. Thin layers ensure better adhesion and reduce the risk of wrinkles or bubbles forming under the gold leaf. Dip your brush or sponge into Mod Podge and apply a thin and even layer on the surface. Wait until it becomes tacky, which means it is sticky to touch but not wet anymore, before placing the gold leaf.
Handling with Care:
Gold leaf is delicate and can easily tear or crumble if not handled carefully. When working with gold leaf, use clean and dry hands or wear gloves to prevent oils from transferring onto the leaf. Hold the gold leaf with tweezers or a soft brush to avoid damaging it. Carefully place it on the tacky Mod Podge surface, making sure to cover the desired area.
Smoothing Out Air Bubbles:
After placing the gold leaf on the Mod Podge, gently press it down using a soft brush or your fingertips. Start from the center and work your way towards the edges to ensure proper adhesion and smooth out any air bubbles or wrinkles. Be gentle to avoid tearing or damaging the delicate gold leaf.
Sealing and Protecting:
Once the gold leaf is applied and properly adhered, it is crucial to seal and protect it to prevent tarnishing or flaking. Apply another thin layer of Mod Podge over the gold leaf using a soft brush, making sure to cover the entire surface evenly. This will create a protective barrier and seal in the gold leaf. Allow the sealant to dry completely before touching or moving the project.
4-d6FovgMc8″ >
Conclusion
Yes, you can absolutely use Mod Podge for gold leaf.
It’s a fantastic adhesive that works wonders when it comes to applying gold leaf to various surfaces. Whether you’re working on a DIY project or adding some glam to a piece of furniture, Mod Podge is your go-to solution.
Its strong hold ensures that the delicate gold leaf stays in place, creating a stunning and luxurious finish.