Are you a DIY enthusiast or a pro builder searching for new ways to stick Styrofoam together? Well, it’s time to grab your trusty toolkit and join us on this exciting journey into the world of using Liquid Nails on Styrofoam. Some folks might raise an eyebrow at this combo, but believe it or not, there’s a growing consensus that it could be a total game-changer.
In this blog post, we’re going to dive deep into the pros and cons of using Liquid Nails as an adhesive for Styrofoam projects. We’ll keep things casual yet informative, shedding light on the mysteries surrounding this unconventional partnership. By the end, you’ll be armed with all the knowledge you need to fearlessly tackle your next Styrofoam-based endeavor.
But before we get started, let’s address the elephant in the room: potential risks. We all know Styrofoam can be a bit of a headache when it comes to bonding. It’s lightweight and versatile, sure, but its porous nature makes finding the right adhesive quite the challenge. However, if applied correctly, Liquid Nails can swoop in and save the day with its strong and secure bond.
Now you’re probably wondering about the benefits. The real beauty of using Liquid Nails on Styrofoam lies in its ability to create a tough-as-nails bond that stands up to whatever you throw at it. Whether you’re crafting props for your next cosplay adventure, sculpting intricate masterpieces, or insulating walls like a pro, this combo has the potential to take your projects to new heights.
Excited yet? Good. Because now it’s time to roll up our sleeves and explore all the nitty-gritty details of using Liquid Nails on Styrofoam projects. We’ll uncover the techniques, tips, and tricks that’ll help you achieve the best results, ensuring your creations stand strong against the test of time. So grab your safety goggles, slip on those work gloves, and let’s get down to business.
The Dangers of Using Liquid Nails on Styrofoam
Contents
- 1 The Dangers of Using Liquid Nails on Styrofoam
- 2 Alternative Adhesives for Bonding Styrofoam
- 3 Foamboard Adhesive: An Ideal Solution for Bonding Styrofoam
- 4 How to Use Foamboard Adhesive Properly
- 5 Low-Temperature Hot Glue: An Effective Alternative for Bonding Styrofoam
- 6 How to Use Low-Temperature Hot Glue Properly
- 7 Tips for Applying Any Adhesive to Styrofoam
- 8 Conclusion
Bonding materials together requires careful consideration of the adhesive used. While Liquid Nails is a versatile construction adhesive, it poses significant dangers when applied to Styrofoam. This lightweight and delicate material can be severely compromised by the solvents in Liquid Nails, leading to structural instability and potential hazards.
In this comprehensive guide, we will explore in detail the dangers of using Liquid Nails on Styrofoam and provide safer alternative adhesive options to protect your projects and health.
Dissolving Foam and Releasing Toxic Fumes:
Styrofoam, also known as expanded polystyrene foam, is highly vulnerable to damage when exposed to Liquid Nails. The chemicals present in this adhesive react with the polystyrene in Styrofoam, causing the foam to dissolve or melt. This not only weakens the material’s structural integrity but also releases toxic fumes that pose significant risks to human health and the environment. Inhaling these fumes can result in respiratory issues, eye irritation, nausea, dizziness, and even long-term health problems.
Fire Hazard:
Using Liquid Nails on Styrofoam also presents a substantial fire hazard. Styrofoam is highly flammable, and the melting caused by the adhesive increases the risk of fire.
The combination of adhesive fumes and the potential for fire makes using Liquid Nails on Styrofoam an unsafe choice that can have catastrophic consequences.
Safe Alternatives for Styrofoam Bonding:
To ensure secure bonding with Styrofoam while maintaining safety, it is crucial to choose adhesives specifically designed for this purpose. Here are two safe alternatives:
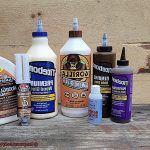
- Foamboard Adhesive: This water-based adhesive is formulated explicitly for bonding Styrofoam and other foam insulation boards. It does not contain solvents that harm Styrofoam, making it a safer option for bonding this delicate material.
- Low-Temperature Hot Glue: Low-temperature hot glue guns are designed to work at lower temperatures, preventing the melting or deformation of Styrofoam during the bonding process. This type of adhesive provides a strong bond and dries quickly, making it suitable for various craft and DIY projects involving Styrofoam.
Alternative Adhesives for Bonding Styrofoam
Selecting the correct adhesive is paramount when bonding Styrofoam to ensure a strong and durable connection without compromising the foam’s integrity. Though liquid nails are a popular construction adhesive, they contain solvents that make them unsuitable for Styrofoam. In this article, we will delve into alternative adhesive options specifically designed for bonding Styrofoam, including foam glue, hot glue, and epoxy adhesive.
Foam Glue:
Formulated to provide a robust and enduring bond on foam materials like Styrofoam, foam glue boasts a low solvent content that minimizes the risk of damage or weakening of the foam. Its ease of use and excellent adhesion properties make it an ideal choice for bonding Styrofoam while maintaining the foam’s structural integrity. Following the manufacturer’s instructions is crucial for optimal results.
Hot Glue:
Hot glue guns offer versatility in various bonding applications, including Styrofoam. It is essential to use low temperature or cool melt glue sticks when working with Styrofoam to prevent melting or damaging the foam. Hot glue guarantees swift and precise application, allowing for a strong bond to form quickly.
Epoxy Adhesive:
Renowned for their strength and durability, epoxy adhesives are suitable for bonding a wide array of materials, including Styrofoam. Caution must be exercised when using epoxy adhesive on Styrofoam, as the curing process emits potent fumes necessitating proper ventilation during application. Strict adherence to the manufacturer’s instructions is imperative.
Foamboard Adhesive: An Ideal Solution for Bonding Styrofoam
Foamboard adhesive is the ultimate dance partner for bonding Styrofoam. It’s like a superhero with its super-strong bond, resistance to moisture and temperature changes, and ease of use. Let’s explore why foamboard adhesive is the ideal solution for all your foam board needs.
Firstly, foamboard adhesive is specifically designed for bonding Styrofoam and other foam boards. Unlike other adhesives that may contain solvents harmful to Styrofoam, foamboard adhesive is formulated with chemicals like toluene or acetone that dissolve the surface of the foam boards. This dissolution creates a powerful bond when the chemicals evaporate.
Secondly, applying foamboard adhesive is a breeze. Before applying the adhesive, it’s important to clean the surfaces of the Styrofoam boards to ensure a proper bond. Once cleaned, simply apply a thin, even layer of foamboard adhesive on both surfaces you want to bond. Follow the manufacturer’s instructions regarding drying times and application methods for best results. The adhesive cures relatively quickly, usually within 30 minutes to an hour, but full strength may take up to 24 hours to develop.
Durability is another key feature of foamboard adhesive. It provides a strong bond that can withstand moisture and temperature changes, ensuring your Styrofoam creations stay intact over time. So whether you’re creating a model airplane or an intricate sculpture, foamboard adhesive has got you covered.
Furthermore, foamboard adhesive is readily available at most hardware stores and online retailers. Whether you need a small tube for a small project or a larger quantity for a professional installation, you can easily find the right amount for your needs. No need to search high and low for this superhero adhesive.
However, it’s important to note that foamboard adhesive is not recommended for use on expanded polystyrene (EPS) foam as it can damage the surface. Always check the product label or consult with the manufacturer to ensure compatibility with your specific type of foam.
How to Use Foamboard Adhesive Properly
Foamboard adhesive is a versatile glue that is perfect for bonding foam materials together. Whether you’re working on crafts, construction projects, or creating signs, using foamboard adhesive correctly is crucial for achieving a strong and durable bond. In this step-by-step guide, we will explore the proper techniques for using foamboard adhesive effectively.
Step 1: Prepare the Surface
To ensure a successful bond, it is essential to start with a clean surface. Before applying the foamboard adhesive, use a soft cloth or sponge and mild detergent to clean the foamboard surface. Remove any dust, dirt, or debris that could interfere with the adhesive’s effectiveness. Once cleaned, make sure the surface is completely dry before proceeding to the next step.
Step 2: Apply the Adhesive
Using a notched trowel or a foam brush, apply the foamboard adhesive evenly onto the surface. Think of it as spreading butter on bread – you want a thin and even layer. Start at one end of the foamboard and work your way across, ensuring all areas are covered. The notches or grooves created by the trowel or brush will help improve the bond between the foam and other materials.
Step 3: Press Firmly
Immediately after applying the adhesive, press the foamboard firmly against the desired surface. Apply even pressure to ensure maximum contact between the two surfaces. This step is crucial for achieving a strong bond. For added security, consider using clamps or weights to hold the foamboard in place while the adhesive cures. This will prevent any movement or separation during the bonding process.
Step 4: Allow Drying Time
Patience is key when using foamboard adhesive. Allow the adhesive enough time to dry and cure properly. Follow the instructions provided by the manufacturer for recommended drying times. Avoid moving or disturbing the foamboard during this period to ensure a secure attachment. It is important to note that curing times may vary depending on the adhesive used, so be sure to read the instructions carefully.
Step 5: Prioritize Safety
When working with foamboard adhesive, it is essential to prioritize safety. Always work in a well-ventilated area to prevent inhaling any fumes from the adhesive. Wear gloves and protective goggles to shield your skin and eyes from potential irritation. Taking these safety precautions will ensure a worry-free and successful bonding experience.
Low-Temperature Hot Glue: An Effective Alternative for Bonding Styrofoam
Look no further. Low-temperature hot glue is the answer to your prayers. Not only is it effective, but it’s also a safer alternative to other adhesives that can cause your cherished Styrofoam to melt or deform.
So, why exactly is low-temperature hot glue the ideal choice for bonding Styrofoam? Let’s delve into the details.
First and foremost, low-temperature hot glue is easily accessible. Whether you’re browsing through craft stores or shopping online, this adhesive is conveniently available for anyone in need of bonding Styrofoam. It comes in the form of glue sticks that snugly fit into a glue gun, ensuring a mess-free application.
Now, let’s talk about the application process. Before applying the low-temperature hot glue, it’s crucial to cleanse the surface of the Styrofoam, eliminating any pesky dust or debris that can hinder a strong bond between the materials. Setting your glue gun to the lowest temperature setting possible is essential in order to prevent any damage to the Styrofoam.
When applying the glue, remember to work swiftly and use small amounts. Unlike other adhesives, low-temperature hot glue cools and hardens rapidly, making it imperative to avoid excess glue seeping out and leaving unsightly marks on your Styrofoam masterpiece.
After applying the glue, securely hold the bonded pieces together for a few minutes until the glue has thoroughly dried and set. This vital step ensures a robust and secure bond between the Styrofoam pieces.
While low-temperature hot glue works wonders for most projects, it’s important to note its limitations. If you’re working on a project that demands an exceptionally strong bond or involves large or heavy pieces of Styrofoam, alternative adhesive options may need to be considered.
How to Use Low-Temperature Hot Glue Properly
When using low-temperature hot glue on Styrofoam, it’s important to follow some guidelines to ensure proper adhesion and prevent damage to the foam. In this guide, we will explore the steps you need to take to use low-temperature hot glue properly on Styrofoam.
Step 1: Prepare the Surface
Before applying the low-temperature hot glue, make sure the Styrofoam surface is clean and free of any dust or debris. Gently wipe it with a damp cloth or use a soft brush to remove any particles. This will ensure a smooth and secure bond between the glue and the Styrofoam.
Step 2: Apply the Glue
Next, apply a thin layer of low-temperature hot glue to the desired area on the Styrofoam. Start with a small amount and add more if needed, as excessive glue can create unwanted bulk and may not adhere properly. It’s best to use small dots or lines of glue rather than large globs, as this will help distribute the adhesive evenly and prevent any excess from seeping through the Styrofoam.
Step 3: Press Firmly but Gently
After applying the glue, press the two surfaces together firmly but gently. Hold them in place for a few seconds to allow the glue to set. Avoid using excessive force that could crush the foam. By pressing the Styrofoam together, you create a strong bond between the foam and any other materials you are attaching it to.
Step 4: Allow Drying Time
It’s important to let the low-temperature hot glue dry completely before handling or moving the glued objects. This usually takes around 15-30 minutes, depending on the specific brand and type of glue used. Avoid touching or disturbing the glued area until it has fully cured.
Step 5: Consider Additional Reinforcement
Low-temperature hot glue may not provide as strong of a bond on Styrofoam compared to other materials. If you require a more secure and long-lasting bond, it’s recommended to consider using an adhesive specifically designed for Styrofoam, such as foam-safe glue or liquid nails. Additionally, you can use pins or tape to reinforce the bond if needed.
Tips for Applying Any Adhesive to Styrofoam
Styrofoam is a versatile material known for its lightweight and insulating properties. However, finding the right adhesive to bond Styrofoam can be a challenge. In this article, we will explore key tips and techniques for applying any adhesive to Styrofoam, ensuring a strong and durable bond that will stand the test of time.
Prepare the Surface: A Clean Canvas
Before applying adhesive, it is crucial to create a clean canvas by wiping away any dust, dirt, or debris from the surface of the Styrofoam. Imagine preparing an artist’s canvas before applying vibrant colors; similarly, a clean surface allows the adhesive to bond effectively and ensures a secure connection.
Roughen the Surface: Creating Texture
To enhance the bond between the adhesive and Styrofoam, gently sand the surface using fine-grit sandpaper. This creates a subtle texture that acts as a foundation for the adhesive to grip onto. Like a sculptor roughening their clay to create intricate details, this step promotes better adhesion without compromising the foam’s integrity.
Test Application: A Trial Run
Before committing to a full application of adhesive, perform a test on a small, inconspicuous area of the Styrofoam. Apply a small amount of adhesive and allow it to dry. This trial run allows you to check for any weakening or detachment before proceeding with the full adhesive application. It’s like test-driving a car before hitting the open road.
Choose the Right Adhesive: A Perfect Match
Not all adhesives are suitable for Styrofoam, as some contain solvents or chemicals that can damage the foam. Look for adhesives specifically formulated for use on Styrofoam or polystyrene. These adhesives are like a tailor-made suit, designed to provide a secure bond without compromising the integrity of the material.
Apply Thin, Even Layers: The Art of Precision
When applying adhesive, aim for thin and even layers instead of thick globs. This ensures better coverage and reduces the risk of excess adhesive seeping through the porous surface of the Styrofoam. Like a skilled artist applying delicate brushstrokes, use a brush, sponge, or specialized applicator for precise and controlled application.
Allow Ample Drying Time: Patience is a Virtue
To achieve a strong bond, it is essential to allow the adhesive enough time to dry or cure fully. Follow the manufacturer’s instructions regarding drying times and any additional measures needed for optimal bonding. Just as a caterpillar needs time in its cocoon to transform into a butterfly, allow the adhesive to work its magic before handling or putting pressure on the bonded area.
Conclusion
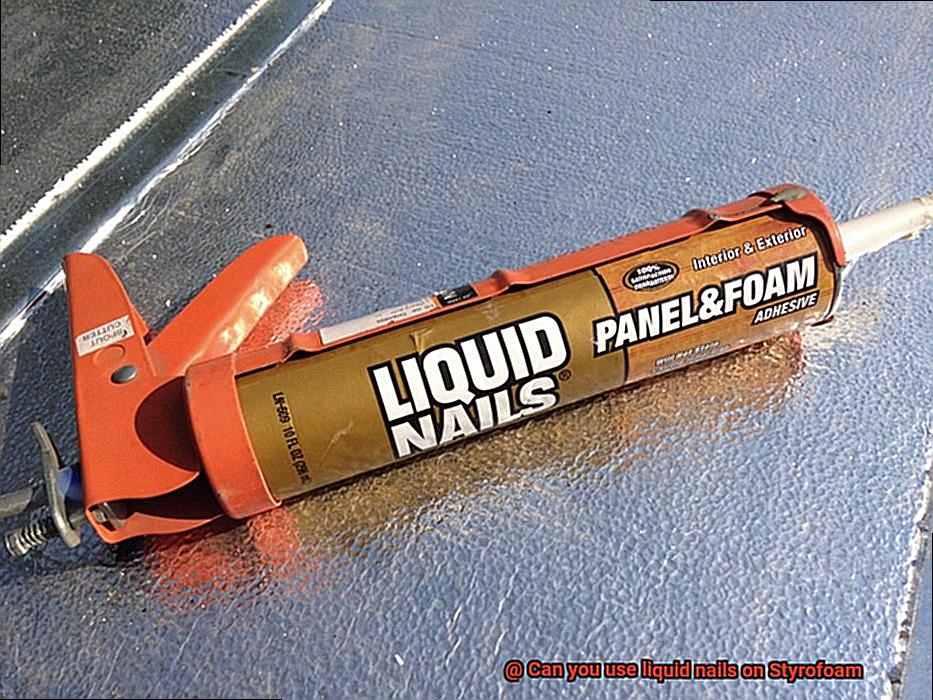
Yes, you can use liquid nails on Styrofoam.
Liquid nails is a strong adhesive that bonds various materials together, including Styrofoam. Its powerful formula creates a durable bond that can withstand the test of time.
It’s important to follow the instructions carefully and apply the adhesive evenly to ensure proper adhesion.