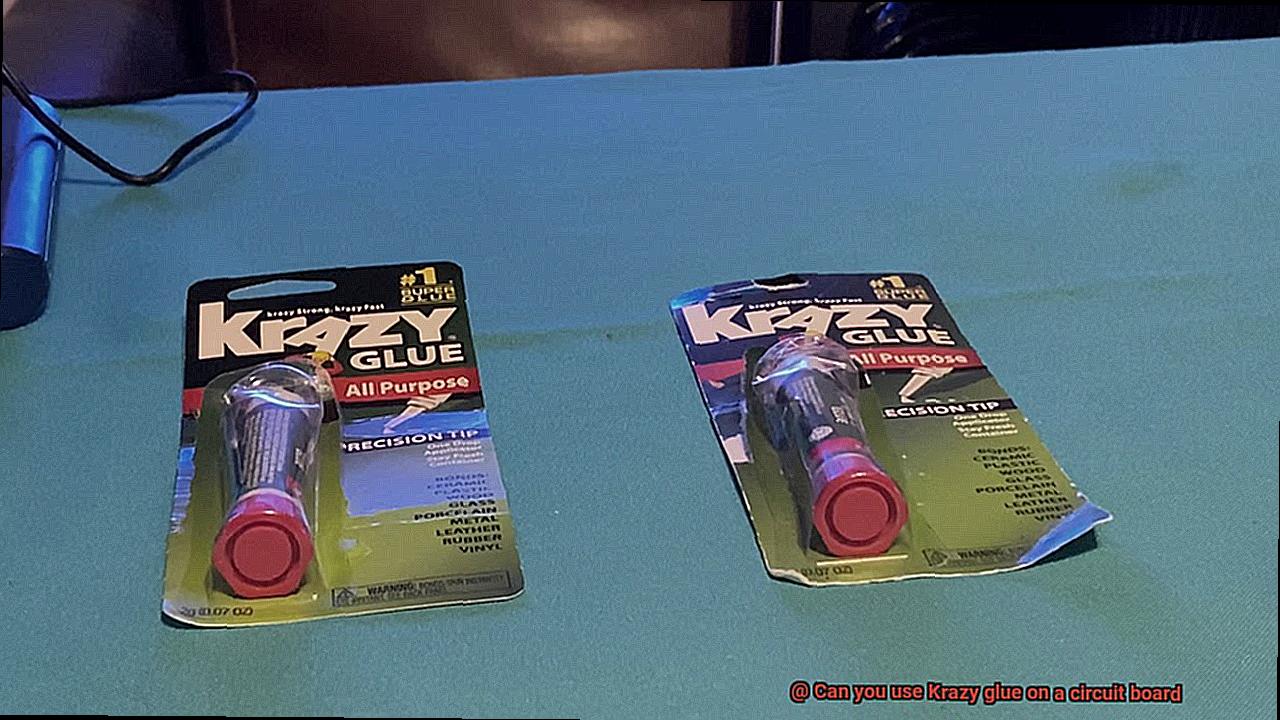
Today, we tackle a common question: Can you use Krazy Glue on a circuit board? Whether you’re a DIY electronics enthusiast or facing a repair dilemma, understanding the ins and outs of using Krazy Glue as an adhesive for circuit boards is crucial.
Soldering may be the go-to technique for traditional circuit board repairs, but Krazy Glue, also known as cyanoacrylate adhesive, has been gaining popularity thanks to its simplicity and speedy bonding abilities. But before you grab that tube of glue, it’s important to weigh up the potential benefits against the risks.
Research suggests that Krazy Glue can indeed be a viable solution for certain circuit board repairs. It has successfully reattached small components, fixed surface-mount devices, and strengthened fragile connections. However, tread carefully because this adhesive also comes with its fair share of risks that could jeopardize your circuit board’s functionality and lifespan.
Experts in the electronics industry generally advise against using Krazy Glue on circuit boards unless absolutely necessary or as a temporary fix. Why? Well, it all boils down to conductivity – or lack thereof. Circuit boards rely on both physical and electrical connections to work their magic. While Krazy Glue might create a temporary bond, it won’t conduct electricity like other alternatives would. This means if you don’t apply it correctly or if too much seeps into sensitive areas, your circuits might suffer.
In the following sections, we’ll delve deeper into the potential benefits and risks associated with using Krazy Glue on circuit boards. We’ll explore specific scenarios where it can be useful while highlighting safer alternatives for repairing your precious circuits. Our goal is to arm you with knowledge so you can make informed decisions when faced with a tricky circuit board repair or modification.
Please note that this blog post is meant to be an informational guide and should not replace professional advice. We highly recommend consulting with an electronics expert or technician before attempting any repairs or modifications on your circuit boards.
Stay tuned for the next section, where we’ll explore the potential benefits of using Krazy Glue on circuit boards for specific repair scenarios.

Why Is Krazy Glue Not Recommended for Circuit Boards?
Contents
- 1 Why Is Krazy Glue Not Recommended for Circuit Boards?
- 2 The Dangers of Using Krazy Glue on Circuit Boards
- 3 Alternatives to Krazy Glue for Circuit Board Repairs
- 4 How to Properly Handle and Use Adhesives with Circuit Boards
- 5 Professional Assistance for Complex Circuit Board Repairs
- 6 Potential Risks of Using Krazy Glue on a Circuit Board
- 7 What to Do if You Need to Repair a Circuit Board
- 8 Tips for Ensuring Proper Handling and Use of Adhesives
- 9 Conclusion
When it comes to repairing electronic devices, choosing the right adhesive is crucial. While Krazy Glue may be a popular choice for quick fixes, it can cause more harm than good when used on circuit boards. In this article, we will explore the reasons why Krazy Glue is not recommended for circuit boards and how it can negatively impact their functionality.
Conductive Chaos:
Circuit boards are meticulously designed with specific pathways for electrical currents. Applying Krazy Glue to these pathways creates unintended conductive paths that disrupt the normal flow of electricity. This can result in malfunctions and compromised functionality.
Corrosion Conundrum:
The chemicals in Krazy Glue can react with certain metals present on circuit boards, leading to corrosion over time. This corrosion weakens connections and can ultimately cause the device to fail. Using Krazy Glue on circuit boards is like adding fuel to the corrosion fire.
Rigid Woes:
Krazy Glue dries into a hard and inflexible substance, which is not compatible with the nature of circuit boards. These boards experience thermal expansion and contraction due to temperature fluctuations. The rigidity of Krazy Glue can cause cracks or breaks on the board, further compromising its integrity.
Repair Roadblocks:
If repairs or modifications are needed on a circuit board glued with Krazy Glue, you may find yourself in a sticky situation indeed. The strong bond created by Krazy Glue makes it incredibly difficult to remove or rework components without causing damage. Troubleshooting and replacing faulty parts become complex and costly endeavors.
The Solution: Specialized Adhesives:
Fortunately, there are adhesives specifically formulated for circuit board applications. These adhesives are non-conductive, resistant to corrosion, and flexible enough to withstand thermal expansion and contraction. They provide a reliable and long-lasting bond without compromising the delicate components of the circuit board.
The Dangers of Using Krazy Glue on Circuit Boards
If you love tinkering with electronics or consider yourself a DIYer, you might be tempted to grab that familiar tube of Krazy Glue to fix your circuit boards. But hold on tight, because today we’re about to uncover the dangers that come with using Krazy Glue on these delicate circuits. Trust me, you’ll want to think twice before reaching for that adhesive.
Conductive Chaos:
One of the biggest risks of using Krazy Glue on circuit boards is its conductive nature. Unlike specialized adhesives designed for electronics, Krazy Glue can actually carry an electric current. Picture this: when it comes into contact with the metal traces on your board, it can create unintended connections or short circuits. And that’s definitely not what you want when it comes to your precious circuitry.
Component Catastrophe:
Not only can Krazy Glue wreak havoc on the traces, but it also has a sneaky way of seeping into nearby components like resistors, capacitors, or integrated circuits. This interference can cause overheating or even complete failure of these vital components. Imagine spending hours meticulously fixing a board only to have it go up in smoke because of a little adhesive mishap.
Stickiness Struggles:
Now let’s say you realize your mistake and want to remove that Krazy Glue from your board. Good luck. Once this adhesive forms its strong bond, it becomes nearly impossible to undo without damaging the board or other components. It’s like being trapped in a sticky web with no escape route.
Toxic Fumes:
As if the above dangers weren’t enough, let’s not forget about the harmful fumes emitted by cyanoacrylate adhesives like Krazy Glue. Inhaling these fumes can irritate your respiratory system and make breathing difficult, especially in poorly ventilated spaces. And here’s another downside: these fumes can also react with certain materials on the board, leading to corrosion or degradation over time. It’s a double whammy of toxic trouble.
Alternatives to Krazy Glue for Circuit Board Repairs
When it comes to delicate circuit board repairs, using the right adhesive is crucial. While Krazy Glue may be a reliable option for other DIY projects, it can cause more harm than good when applied to electronic components. In this article, we will explore some alternatives to Krazy Glue that are better suited for circuit board repairs. We will discuss their advantages, disadvantages, and important factors to consider when choosing the best adhesive for your specific repair job.
Epoxy Resin:
Epoxy resin is a popular choice for circuit board repairs due to its excellent electrical insulation properties and high-temperature resistance. It forms a strong and durable bond, ensuring long-lasting repairs. This adhesive provides reliable protection against moisture, chemicals, and vibration, making it ideal for demanding electronic applications. However, epoxy resin can be challenging to remove if future repairs are needed.
Conductive Silver Adhesive:
If you need to repair broken traces or connections on a circuit board, conductive silver adhesive is an excellent option. Its silver particles allow for electrical conductivity while providing a reliable bond. Conductive silver adhesive is highly conductive and has low resistance, making it ideal for repairing damaged traces or adding new connections. However, it can be expensive compared to other alternatives.
Electrically Conductive Adhesives and Conductive Paint Pens:
For smaller repairs or temporary fixes, electrically conductive adhesives or conductive paint pens are suitable options. These adhesives contain conductive particles that ensure electrical connectivity. They are commonly used for repairing small surface mount devices (SMDs) or making quick fixes on circuit boards. However, they may not provide the same level of durability as epoxy resin or conductive silver adhesive.
Soldering:
In some cases, soldering may be the preferred method for circuit board repairs. Soldering involves melting solder onto the circuit board to create a permanent bond between components. This method requires skill and precision but can be highly effective in repairing damaged circuit boards. Soldering provides a strong and reliable electrical connection, making it suitable for complex repairs or adding new components.
Factors to Consider:
When choosing an adhesive for circuit board repairs, there are several key factors to consider:
- Electrical conductivity: Ensure that the adhesive you choose allows for proper electrical connectivity.
- Temperature resistance: Consider the operating temperatures of the circuit board and choose an adhesive that can withstand those conditions.
- Durability: Evaluate the expected lifespan of the repair and select an adhesive that can provide a long-lasting bond.
- Ease of removal: If future repairs or modifications are anticipated, choose an adhesive that allows for easy removal without damaging the circuit board.
How to Properly Handle and Use Adhesives with Circuit Boards
Circuit boards are the intricate brains of electronic devices, and adhesives play a crucial role in their assembly and repair. Yet, mishandling adhesives can lead to damaging or malfunctioning circuitry. In this comprehensive guide, we will explore the key steps to properly handle and use adhesives with circuit boards, ensuring safe and effective bonding.
Safety Precautions:
Prioritizing safety is paramount when working with adhesives. Some adhesives contain harmful chemicals, so always wear protective gloves and goggles. Additionally, work in a well-ventilated area to minimize exposure to potentially noxious fumes. Remember, safety first.
Cleaning the Surface:
Before applying any adhesive, meticulously clean the surface of the circuit board. Use a lint-free cloth or alcohol wipes to remove dust, dirt, and oils that can compromise the adhesive’s bond strength. A pristine surface guarantees a robust connection between the adhesive and the circuit board.
Choosing the Right Adhesive:
Not all adhesives are created equal for circuit boards. Select adhesives specifically designed for electronics or recommended by the manufacturer. Avoid using fast-acting adhesives like Krazy glue, as they can damage components and disrupt electrical conductivity. Choose wisely for a secure and durable bond.
Applying the Adhesive Correctly:
When it comes to applying adhesive on circuit boards, less is more. Use a small dot or thin line of adhesive to prevent excess spreading onto delicate components. Follow the manufacturer’s instructions regarding the appropriate amount of adhesive to achieve optimal bonding without risking damage.
Curing the Adhesive Correctly:
Properly curing the adhesive ensures maximum bonding strength. Each adhesive has specific curing time and temperature requirements, so adhere strictly to the manufacturer’s recommendations. Rushing or exceeding these parameters can result in weak bonds or even damage to the circuitry. Patience is key.
Removing Adhesives if Necessary:
In case of mistakes or rework, knowing how to remove adhesives without causing damage is crucial. Consult the adhesive manufacturer or seek professional guidance. They can advise on the best removal method, whether it involves specific solvents or mechanical techniques such as scraping or gentle heating. Precision is essential.
Storing Adhesives Properly:
To maintain the adhesive’s effectiveness, store it in a cool, dry place away from direct sunlight and extreme temperatures. Ensure containers are tightly sealed to prevent moisture or air from deteriorating the adhesive’s quality. By properly storing adhesives, you’ll be ready for future projects without compromising performance.
Professional Assistance for Complex Circuit Board Repairs
When it comes to complex circuit board repairs, seeking professional assistance is not just a luxury, but a necessity. These delicate electronic components require specialized knowledge and skills to repair effectively. In this article, we will explore the benefits of professional assistance, including access to specialized knowledge, advanced tools and equipment, availability of replacement parts, warranties and guarantees, safety considerations, and the importance of selecting the right type of glue for repairs.
Access to Specialized Knowledge:
Circuit boards are intricate systems with countless interconnected components and pathways. Professional repair technicians possess a deep understanding of how these components work together and can quickly identify and diagnose issues. With their expertise, they can implement effective solutions, ensuring that your circuit board is repaired correctly the first time.
Advanced Tools and Equipment:
Professional technicians have access to state-of-the-art tools and equipment specifically designed for circuit board repairs. These tools allow for precise repairs without causing any additional damage. By entrusting your complex circuit board repairs to professionals, you can be confident that your device is in capable hands.
Availability of Replacement Parts:
In some cases, a faulty component on a circuit board may need to be replaced. Professional repair technicians often have access to a wide range of replacement parts, making it easier and more efficient to complete the repair process. This saves you the time and effort of sourcing replacement parts independently.
Warranties and Guarantees:
Professional circuit board repair services often provide warranties or guarantees on their work. This means that if any issues arise after the repair has been completed, the technician will address them at no additional cost. This offers peace of mind, knowing that you will receive reliable and long-lasting repairs.
Safety Considerations:
Repairing complex circuit boards can involve working with delicate components and potentially hazardous materials. Professional technicians are trained to adhere to strict safety protocols, minimizing the risk of accidents or injuries. They have the necessary knowledge and experience to handle these repairs safely.
Types of Glue Used:
Various types of glue are used in complex circuit board repairs. One commonly used adhesive is epoxy resin, which provides excellent bonding strength and electrical insulation properties. Another type is conductive glue, which is used to bond components that require electrical conductivity. It is crucial to select the appropriate glue for the specific repair to ensure the circuit board’s optimal performance.
Potential Risks of Using Krazy Glue on a Circuit Board
Circuit boards are the backbone of modern electronics, powering everything from smartphones to cars. When these essential components malfunction, we often try to fix them quickly. However, using the wrong adhesive, such as Krazy Glue, can lead to disastrous consequences. In this article, we will explore the potential risks associated with using Krazy Glue on a circuit board and emphasize the importance of using the right adhesive for the job.
Damage to Delicate Components:
Circuit boards house a multitude of micro-components that work together for proper functionality. Krazy Glue’s seepage into these minuscule gaps can create an insulating layer, disrupting the flow of electricity. This disruption can result in malfunctioning or non-functional circuitry, rendering your device useless.
Conductive Drying:
Krazy Glue has the potential to dry into a conductive state, posing a significant risk when it comes into contact with electrical connections or traces on the circuit board. Unintended short circuits can cause overheating, component failure, or permanent damage to the board itself. This could mean the end of your beloved gadget.
Difficult Removal:
Krazy Glue’s strong adhesive property makes it notoriously challenging to remove once applied. This becomes problematic if any repairs or modifications need to be made in the future. Attempting to remove the glue may lead to further damage or dislodgment of components, exacerbating an already sticky situation.
Harmful Fumes:
During the drying process, Krazy Glue emits fumes containing cyanoacrylate vapors. Prolonged exposure to these fumes in an enclosed space can irritate your eyes, nose, and throat and may even lead to respiratory issues and allergic reactions. To avoid these health risks, it’s best to work in a well-ventilated area and minimize inhalation of the fumes.
Voiding of Warranties:
Using Krazy Glue on a circuit board without adhering to the manufacturer’s guidelines may void any warranties or guarantees. Electronics manufacturers often provide specific recommendations for repairs or modifications to ensure the longevity and performance of their products. Ignoring these guidelines can result in the loss of warranty coverage, leaving you responsible for the repair costs.
What to Do if You Need to Repair a Circuit Board
Circuit boards are the backbone of our electronic devices, but when they malfunction or get damaged, it’s crucial to know how to repair them. In this guide, we’ll walk you through the steps to repair a circuit board, ensuring that you can confidently tackle any issue that arises.
Step 1: Assess the Damage
Start by carefully examining the circuit board for any visible signs of damage, such as burnt or corroded components. Use a multimeter to test for continuity and voltage at various points on the board. By identifying the source of the problem, you can determine the appropriate repair method.
Step 2: Remove Faulty Components
With a steady hand and a trusty soldering iron, delicately remove any faulty components from the circuit board. Remember to apply just enough heat to avoid further damage. Patience is key when it comes to repairing circuit boards, so take your time during this step.
Step 3: Replace with Compatible Components
After removing the faulty components, replace them with new ones that are compatible with the circuit board. Carefully solder them in place and ensure they are securely attached. If you’re unsure about compatibility or proper installation, consult the manufacturer’s documentation or seek professional advice.
Step 4: Repair Damaged Traces or Pads
In some cases, you may encounter damaged traces or pads on the circuit board. To repair them, use conductive epoxy or solder small wires to bridge any gaps in the traces. It’s crucial to make sure these repairs are secure and do not interfere with the functioning of other components.
Step 5: Thoroughly Test the Circuit Board
Once all repairs have been completed, it’s time for a thorough testing phase. Apply power to the board and meticulously check for proper functionality using a multimeter or oscilloscope. Additionally, run any diagnostic tests provided by the manufacturer to ensure everything is in order.
Tips for Ensuring Proper Handling and Use of Adhesives
Adhesives play a crucial role in bonding components on circuit boards, but it is essential to handle and use them properly to ensure effectiveness and prevent damage. In this blog post, we will explore important tips for ensuring the proper handling and use of adhesives on circuit boards.
Choosing the Right Adhesive
Selecting an adhesive specifically designed for electronics is crucial. It should possess properties such as good electrical insulation, high temperature resistance, and low volatility. This ensures that the adhesive won’t compromise the board or its components.
Thoroughly Clean the Surface
Before applying any adhesive, it is necessary to meticulously clean the circuit board’s surface. Dust, dirt, or residue can hinder the bonding process and compromise performance. Use isopropyl alcohol or specialized electronics cleaning solutions for effective cleaning.
Applying the Correct Amount
Applying the adhesive in the correct amount is critical. Excessive adhesive can lead to squeeze-out and potential short circuits, while too little may not provide sufficient bonding strength. Follow the manufacturer’s instructions regarding recommended amounts.
Work in a Well-Ventilated Area
Some adhesives release harmful fumes when applied. Working in a well-ventilated area minimizes exposure to these fumes. If working in an enclosed space, wear a mask or use a fume extractor for personal safety.
Allow Proper Curing Time
Proper curing time is essential for effective bonding. Rushing this process may result in weaker bonds and compromised performance. Follow the manufacturer’s instructions regarding curing time for optimal results.
eP3xJIJ-TbU” >
Conclusion
Using Krazy glue on a circuit board is not recommended.
The adhesive properties of Krazy glue may cause damage to the delicate components on the board. It can potentially create short circuits or interfere with the electrical connections.
Instead, it is best to use specialized adhesives that are designed for electronics and circuit boards. These adhesives are formulated to provide a secure bond without compromising the functionality of the board.
So, when it comes to repairing or assembling a circuit board, it’s crucial to choose the right adhesive for the job.


