Let’s talk about a glue that’s got some serious bonding mojo – contact cement. This adhesive is like the superhero of sticking things together, and it’s especially handy when it comes to rubber. Whether you’re fixing up a rubber gizmo or getting your DIY on, contact cement can be a total game-changer.
In this blog post, we’re diving into the fascinating world of using contact cement to glue rubber. We’ll explore all its advantages, give you some tips and tricks, and make sure you’re set up for success.
Advantages of Using Contact Cement:
Alright, so here’s why contact cement is the bomb dot com for gluing rubber. First off, it’s super strong. Like “hold-on-tight-in-any-weather” kind of strong. It can handle pressure, temperature changes, and even moisture without breaking a sweat. Plus, it dries fast, which means less waiting around and more time for high-fives.
Considerations and Tips:
Now, before we get all sticky with contact cement, there are a few things to keep in mind. Make sure you pick a contact cement that plays nice with rubber surfaces. Some fancy ones are specifically made for bonding rubber, so they’ll give you the best results.
Prepping your surfaces is key to success. Give those rubber and mating surfaces a good cleaning and degreasing session. You want them squeaky clean. For an extra boost in bond strength, roughen up the surfaces with sandpaper too. Oh, and don’t forget to let everything dry completely before moving on.
Applying contact cement is a two-step dance. Step one: apply the adhesive to both surfaces evenly. Step two: wait for it to dry until it gets tacky (sticky but not wet). Once you hit that sweet spot, carefully line up the rubber pieces and press them together with all your might. No room for misalignment here, ’cause once it’s stuck, it’s stuck.
So, there you have it – contact cement is the glue of choice when it comes to rubber bonding. It’s strong, efficient, and built to last. Just remember to choose the right contact cement, prep those surfaces like a boss, and follow the application steps to a T.
Stay tuned for more blog posts where we’ll dive into specific rubber bonding projects and show you how contact cement can be your
Understanding the Nature of Rubber Materials
Contents
- 1 Understanding the Nature of Rubber Materials
- 2 The Benefits of Using Contact Cement for Glueing Rubber
- 3 Choosing the Right Type of Contact Cement for Rubber Bonding
- 4 Preparing the Rubber Surface for Glueing
- 5 Applying Contact Cement to Create a Strong Bond
- 6 Tips and Techniques for Working with Contact Cement
- 7 Special Considerations When Glueing Certain Types of Rubber
- 8 Conclusion
Rubber, a remarkably versatile material, finds its utility across a multitude of industries owing to its exceptional properties. In this enlightening discourse, we embark on a journey to unravel the intricacies of rubber materials, specifically examining their compatibility with contact cement bonding.
We delve into the remarkable characteristics of rubber, the challenges encountered in bonding rubber surfaces, and offer invaluable tips to achieve robust and enduring bonds.
Properties of Rubber Materials:
- Elasticity: At the heart of rubber lies its remarkable elasticity, endowing it with the unique ability to stretch and revert to its original form. This exceptional property allows rubber materials to withstand considerable stress and deformation without incurring lasting damage. When bonded with contact cement, this elasticity ensures that the integrity of the bond remains uncompromised even under demanding conditions.
- Durability: Rubber possesses an innate resistance to abrasion, rendering it exceptionally durable for applications commanding utmost resilience. Consequently, when bonding rubber using contact cement, it is imperative to select an adhesive capable of withstanding the wear and tear that rubber materials may encounter.
- Flexibility: The remarkable flexibility inherent in rubber materials empowers them to bend and twist without succumbing to breakage. This unparalleled flexibility guarantees that bonded joints can withstand movements and vibrations without compromising their strength.
- Adhesive Properties: Rubber boasts inherent adhesive properties owing to its unique surface characteristics. However, these surfaces often present a challenge due to their smooth and non-porous nature, impeding the formation of strong bonds with conventional adhesives. Contact cement, designed explicitly to overcome these obstacles, offers outstanding adhesion to rubber surfaces.
Challenges in Bonding Rubber Surfaces:
- Surface Preparation: Rubber surfaces frequently bear traces of oils, waxes, or other contaminants that hinder effective adhesion. Prudent surface preparation is pivotal for successful bonding. Thoroughly cleansing the rubber surface with a solvent or specialized cleaning agent ensures optimal adhesion.
- Chemical Compatibility: Rubber materials may contain accelerators or additives that can react unfavorably with specific compounds present in contact cement. Such reactions can compromise or weaken the bond over time. Consequently, selecting a contact cement that is compatible with the specific type of rubber being bonded is of paramount importance.
Tips for Effective Bonding with Contact Cement:
- Select the Right Contact Cement: Opt for a contact cement meticulously formulated for bonding rubber materials. These purpose-built adhesives guarantee superior adhesion and steadfast bonds.
- Meticulous Surface Preparation: Assiduously cleanse and dry the rubber surface, eradicating any contaminants that could inhibit bonding. Employ a solvent or cleaning agent specifically formulated for rubber surfaces.
- Follow Manufacturer’s Instructions: Adhere diligently to the recommended application instructions furnished by the contact cement manufacturer. Apply a thin, uniform layer of adhesive to both surfaces and allow it to dry for the stipulated period.
- Apply Firm Pressure: Once the adhesive has dried, bring the two surfaces together and exert firm pressure to forge an unwavering bond. This ensures maximum contact and adhesion between the rubber and contact cement.
The Benefits of Using Contact Cement for Glueing Rubber
The benefits of using contact cement for gluing rubber are numerous and make it the go-to adhesive for many professionals and DIY enthusiasts.
First and foremost, contact cement provides a strong and durable bond. It forms a powerful connection between rubber surfaces, ensuring that they stay firmly together even under stress or strain. This is particularly important for applications where the bonded rubber will be subjected to movement or pressure.
Not only is contact cement strong, but it is also incredibly easy to apply. Unlike other adhesives that require mixing or clamping, contact cement can be applied directly to the rubber surfaces without any additional steps. This convenience makes it a favorite among professionals and DIYers alike.
Another advantage of using contact cement is its versatility. It can be used to bond various types of rubber, including natural rubber, synthetic rubber, and even rubberized fabrics. Whether you’re repairing shoes, sealing rubber gaskets, or attaching rubber trim to surfaces, contact cement has got you covered.
Contact cement also offers excellent resistance to heat, moisture, and chemicals. Once it has cured, it forms a waterproof and heat-resistant bond that can withstand exposure to harsh conditions. This makes it perfect for outdoor applications or areas where the glued rubber may come into contact with water or chemicals.
Flexibility is another key advantage of using contact cement for gluing rubber. Rubber materials often need to retain their flexibility or stretchability even after being bonded together. Contact cement allows for this by maintaining the elasticity of the rubber joints, ensuring that they can still move and flex without compromising the bond.
When compared to other types of adhesives, contact cement also has a longer shelf life. You can store it for extended periods without worrying about it drying out or losing its effectiveness. This means that you can always have a reliable adhesive on hand whenever you need it.
Lastly, contact cement provides a neat and clean finish when used for gluing rubber. It dries clear and does not leave behind any visible residue or marks, giving the glued rubber a professional appearance.
Choosing the Right Type of Contact Cement for Rubber Bonding
Look no further. Contact cement, the superhero of adhesives, is here to save the day. With its incredible strength, durability, and versatility, contact cement forms an unbreakable bond between rubber surfaces, ensuring they stay together under any circumstances. In this comprehensive guide, we will explore the key considerations when selecting the right type of contact cement for rubber bonding.
Types of Contact Cement:
- Solvent-based contact cement: This type is a popular choice for rubber bonding due to its strong bond strength and quick drying time. It contains volatile organic compounds (VOCs) that evaporate during drying, leaving behind a powerful adhesive bond. However, use caution as solvent-based contact cement can be flammable and should be used in well-ventilated areas.
- Water-based contact cement: Offering a safer and more environmentally friendly option, water-based contact cement is VOC-free and has a lower odor compared to its solvent-based counterpart. It provides good bonding strength for rubber materials but may require longer drying times.
Compatibility with Rubber:
Different types of rubber require specific adhesives. Ensure that the contact cement you choose is compatible with your rubber material, whether it’s natural rubber, neoprene, silicone, or synthetic rubber. Check product labels or consult adhesive manufacturers for guidance on compatibility.
Bond Strength Requirements:
Consider the strength requirements of your rubber bonding application. Some contact cements offer high bond strength suitable for heavy-duty applications, while others may be more suitable for lighter or temporary bonds. Understanding your project needs will help you select the right type of contact cement.
Application Method:
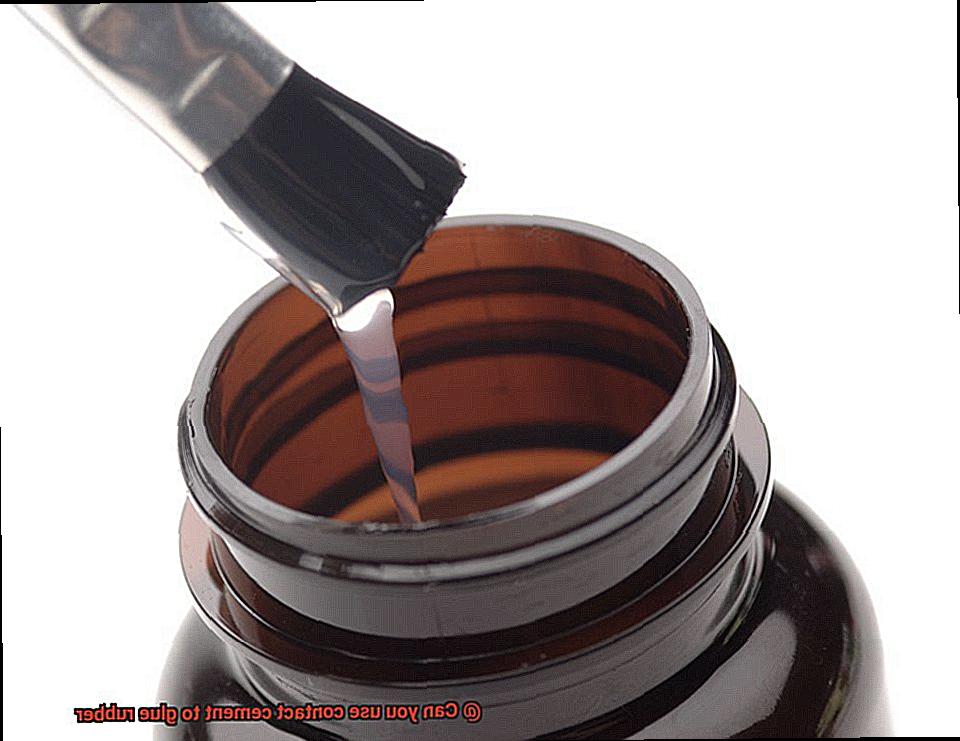
Choose an application method that provides even coverage and ensures good contact between the adhesive and the rubber surface. Options include brush, roller, or spray. Consider the size and shape of your rubber materials to determine the most effective method.
Surface Preparation:
Proper surface preparation is crucial for a strong bond. Make sure the rubber surfaces are clean, dry, and free from contaminants or oils. Enhance bond strength by roughening the surface with sandpaper or applying a primer.
Preparing the Rubber Surface for Glueing
When it comes to glueing rubber surfaces, preparation is the key to success. Just like a warrior dons their armor before battle, your rubber surface needs some tender loving care before it can withstand the toughest challenges. So let’s break down the steps necessary to prepare your rubber surface for a bond that even the most formidable adversary would envy.
- Step 1: Cleanliness is next to stickiness. Start by giving the rubber surface a thorough cleaning. Dirt, dust, or grease can interfere with the bonding process, so grab a mild detergent or soap and water solution and scrub away. Rinse it well and ensure it’s bone dry before moving on.
- Step 2: Smooth it out. If your rubber has any rough spots or imperfections, gently sand them away with fine-grit sandpaper. This creates a smoother surface for the adhesive to grip onto, ensuring a stronger bond in the end.
- Step 3: Dull the shine. Some rubber surfaces have a glossy finish that hinders adhesion. To solve this problem, use a deglossing agent like acetone or rubbing alcohol. Apply a small amount onto a clean cloth and rub it over the rubber until the shine disappears. But tread lightly, as too much moisture can affect the adhesive’s performance.
- Step 4: Rough it up (just a little). To maximize bond strength, lightly roughen the rubber surface with a sanding block or abrasive pad. This creates microscopic grooves that give the adhesive more surface area to grip onto – think of it as giving your adhesive some extra fingers to hold tight. Remember, gentle is the name of the game; don’t go Hulk on your rubber and risk damaging it.
- Step 5: Prime time. For an extra boost in adhesion, consider applying a rubber primer. These magical concoctions improve chemical compatibility between the rubber and adhesive, guaranteeing a stronger bond. Follow the manufacturer’s instructions for application and allow it to dry before moving on to the glueing process.
Applying Contact Cement to Create a Strong Bond
This comprehensive guide will walk you through the process of applying contact cement to create a strong and durable bond between rubber and any other material. So, grab your tools and let’s get started.
Step 1: Choose the Right Contact Cement:
To ensure a successful bond, it is crucial to select the appropriate contact cement for rubber bonding. Look for specialized adhesives designed explicitly for this purpose. These adhesives are formulated with maximum adhesion and flexibility in mind, which are essential properties when working with rubber materials.
Step 2: Prepare the Surfaces:
Before applying contact cement, meticulously clean and dry both surfaces that need to be bonded. Ensure they are free from dust, dirt, and contaminants, as any debris can weaken the final bond.
Step 3: Apply Contact Cement:
Using a brush or roller, apply a thin and even layer of contact cement to both surfaces. Follow the manufacturer’s instructions regarding the application method and coverage area for optimal results. Remember, less is more when it comes to applying contact cement – a thin coat will suffice.
Step 4: Let it Dry:
Allow the contact cement to dry for the specified time mentioned by the manufacturer. This drying period allows the solvent in the adhesive to evaporate, leaving behind a tacky surface ready for bonding. Patience is key here – rushing this step can compromise the strength of the bond.
Step 5: Joining Surfaces:
Once both surfaces are dry, carefully align the rubber material with the other surface you want to bond it to. Apply firm pressure to ensure proper adhesion. Consider using clamps or weights to hold the materials together while the bond sets. This step ensures a strong and long-lasting bond.
Important Considerations:
- Contact cement forms an instant bond when the adhesive-coated surfaces come into contact, so make sure to align the materials correctly on the first try.
- Remember that contact cement is not suitable for all types of rubber, such as silicone rubber or highly porous rubber materials. In such cases, opt for specialized adhesives recommended for those specific rubber types.
Tips and Techniques for Working with Contact Cement
When it comes to bonding rubber materials, contact cement is an adhesive powerhouse. Whether you’re working on a household project or tackling an industrial task, contact cement is your go-to choice for a strong and reliable bond. In this comprehensive guide, we will explore five essential tips and techniques for working with contact cement when bonding rubber.
Prepare the Surfaces:
Before diving into the adhesive application process, take a moment to prepare the surfaces. Ensure that both the rubber surface and the bonding surface are squeaky clean, free from any dirt, dust, or grease. Grab a clean cloth and give them a thorough wipe-down using mild detergent or rubbing alcohol. This crucial step sets the foundation for maximum adhesion.
Roughen the Rubber Surface:
To supercharge adhesion, roughen up the rubber surface. Grab some fine-grit sandpaper or a trusty wire brush and gently sand the surface. You’re not looking to obliterate it – just create a textured landscape that helps the contact cement grip on tight. This extra grip translates into a stronger bond that can tackle any challenge.
Apply a Thin and Even Layer of Contact Cement:
Now it’s time to bring out the contact cement and apply it with finesse. Whether you opt for a brush, roller, or spatula, remember that less is more. Go for a thin and even layer on both the rubber and bonding surfaces. Avoid dousing them in adhesive – too much can lead to weak bonds or unnecessarily long drying times. Precision is key here.
Allow Partial Drying:
Patience is a virtue when it comes to working with contact cement. After applying the adhesive, let it dry partially before joining the two surfaces together. This magical “tack time” allows the contact cement to become delightfully sticky, ready for bonding action. Keep an eye on the manufacturer’s instructions for specific tack times – each brand has its own secret recipe.
Align and Apply Pressure:
Once the tack time is up, it’s time for the grand finale – bringing the rubber and bonding surfaces together. But hold your horses. Ensure proper alignment before making contact because once they touch, there’s no going back. Once aligned, apply pressure like a champion. Clamps, weights, your hands – anything goes, as long as it distributes the pressure evenly across the bonded area. Follow the manufacturer’s recommended pressure and curing time to achieve a bond that can withstand the test of time.

Special Considerations When Glueing Certain Types of Rubber
Gluing rubber is not a one-size-fits-all process. Different types of rubber require special considerations to achieve a strong and durable bond. In this guide, we will delve into the unique challenges of gluing silicone rubber, EPDM rubber, and neoprene rubber. Whether you’re tackling a DIY project or seeking professional advice, understanding these considerations will help you select the right adhesive and achieve exceptional results.
Silicone Rubber: Conquering the Slippery Challenge
Silicone rubber’s low surface energy poses a formidable hurdle for adhesives trying to form a robust bond. Overcoming this challenge requires the use of a primer or adhesive specifically formulated for silicone. These products contain surface activators that increase the surface energy of the silicone, ensuring better adhesion. Moreover, thorough surface cleaning and preparation are vital to optimize bonding.
EPDM Rubber: Where Resistance Meets Resilience
EPDM rubber’s remarkable resistance to chemicals and solvents can complicate the gluing process. To successfully bond EPDM rubber, it is essential to choose an adhesive specifically designed for this material. These adhesives incorporate ingredients that soften the surface, enhancing bonding capabilities. Prior to application, meticulous surface cleaning is crucial for a reliable bond.
Neoprene Rubber: Tough and Tenacious
Neoprene rubber’s reputation for resisting oils, chemicals, and weathering makes it a popular choice across industries. However, achieving effective bonding with neoprene rubber requires a neoprene adhesive tailored to this particular material. These adhesives contain ingredients that soften the neoprene surface and maximize bonding strength. For even greater adhesion, roughening the surface with sandpaper or a wire brush can be beneficial.
Surface Preparation: Cleanliness is Key
Before applying any adhesive, ensure the rubber surfaces are meticulously clean and free from dirt, dust, or oils that could hamper bonding. Utilize solvents or cleaners specially formulated for rubber surfaces to eliminate contaminants that may interfere with the bonding process. By taking the time to properly prepare the surfaces, you will achieve a stronger and longer-lasting bond.
Temperature and Humidity: The Perfect Marriage
Consider the temperature and humidity requirements specified by the adhesive manufacturer. Both the adhesive and rubber should be within the recommended range to optimize bonding. Extreme temperatures or high humidity can negatively impact the adhesive’s curing process and bonding strength. Following the instructions diligently will ensure ideal conditions for successful bonding.
Ht2nxWXIHnk” >
Also Read: How to Glue Neoprene to Rubber?
Conclusion
Yes, you can definitely use contact cement to glue rubber.
Contact cement is a strong adhesive that bonds well with rubber materials. It provides a reliable and durable bond, making it ideal for various applications involving rubber.
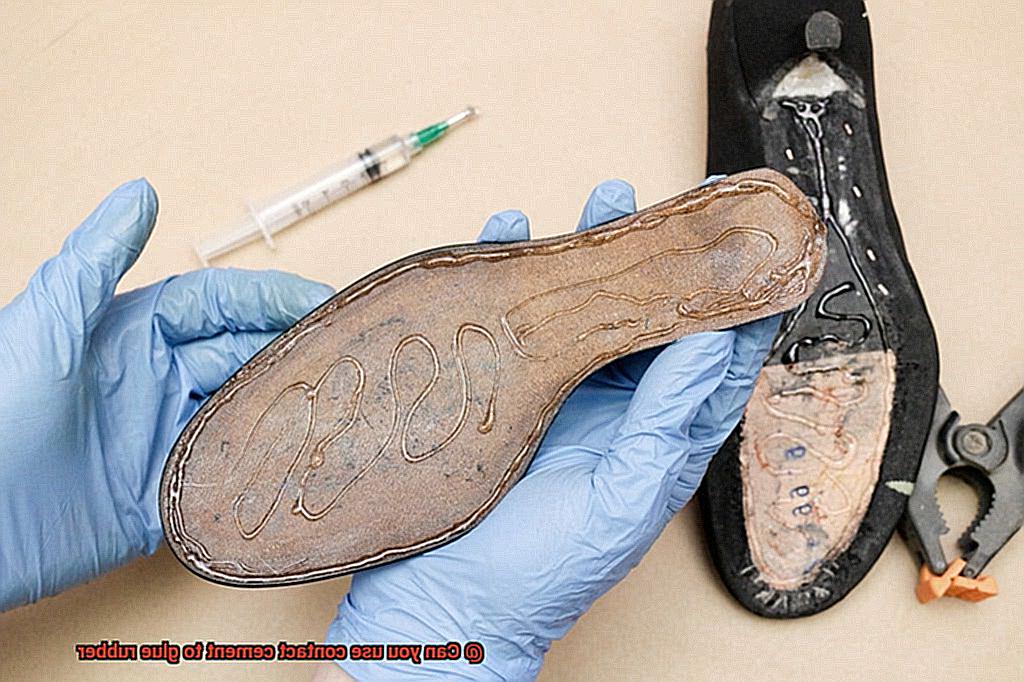
Whether you’re repairing shoes, fixing inflatable toys, or working on a DIY project with rubber components, contact cement is a reliable choice. Its strong grip ensures that the rubber stays in place, even under pressure or constant movement.
Just make sure to follow the instructions carefully when using contact cement to ensure proper application and maximum adhesion.