Picture this: you’re staring at a torn rubber object, desperately seeking a solution. Your mind races as you wonder, can you super glue rubber? Fear not, my friend, for you are not alone in this sticky situation. Countless souls have pondered the same question. And guess what? The answer is a resounding YES. In this blog post, we’ll embark on an exhilarating journey through the realm of super glue and rubber.
Get ready to uncover surprising uses, unleash your creativity with unexpected applications, and arm yourself with pro tips to achieve an unbreakable bond. So whether you’re fixing a sneaker sole or crafting something extraordinary, buckle up and prepare to witness the magical fusion of super glue and rubber.
What is Super Glue?
Contents
- 1 What is Super Glue?
- 2 Why is Super Glue Tricky to Use on Rubber?
- 3 Tips for Successful Bonding:
- 4 How to Prepare the Rubber Surface for Super Glue
- 5 Choosing the Right Type of Super Glue for Rubber
- 6 Applying the Super Glue Correctly
- 7 Curing the Bonded Materials
- 8 Durability of Super Glue on Rubber
- 9 Alternative Adhesive Options for Bonding Rubber
Super glue, also known as cyanoacrylate adhesive, is a powerful adhesive that has transformed the way we bond materials together. In this article, we will delve into the world of super glue and explore its unique properties and applications, with a specific focus on bonding rubber surfaces. If you’ve ever wondered how to effectively glue rubber or struggled to find the right adhesive for your rubber projects, read on for a deep dive into the science of super glue.
Understanding Super Glue:
Super glue is an instant adhesive that sets rapidly when exposed to moisture in the air. Its main component, cyanoacrylate, undergoes a chemical reaction called polymerization, transforming from a liquid to a solid state. This rapid transformation occurs within seconds, creating a strong and durable bond between surfaces.
The Challenge of Bonding Rubber:
Bonding rubber surfaces can be tricky due to the unique properties of rubber. It is flexible, has low surface energy, and is resistant to many adhesives. However, fear not. Specialized super glues formulated for bonding rubber have been developed to overcome these challenges.
Tips and Techniques for Successful Rubber Bonding:
- Surface Preparation: Thoroughly clean the rubber surface using rubbing alcohol or acetone to remove dirt, oils, or debris that may hinder bonding. Ensure the surface is completely dry before proceeding.
- Choose the Right Super Glue: Look for super glue products specifically designed for bonding rubber. These formulations have enhanced adhesion properties tailored for rubber surfaces.
- Application: Apply a small amount of super glue evenly onto one surface. Remember, less is more. Excessive glue can result in messy residue. Press the two surfaces firmly together and hold in place for a few minutes to allow for proper bonding.
- Curing Time: Depending on the type of super glue used, curing times can vary from minutes to hours. Follow the manufacturer’s instructions for optimal results.
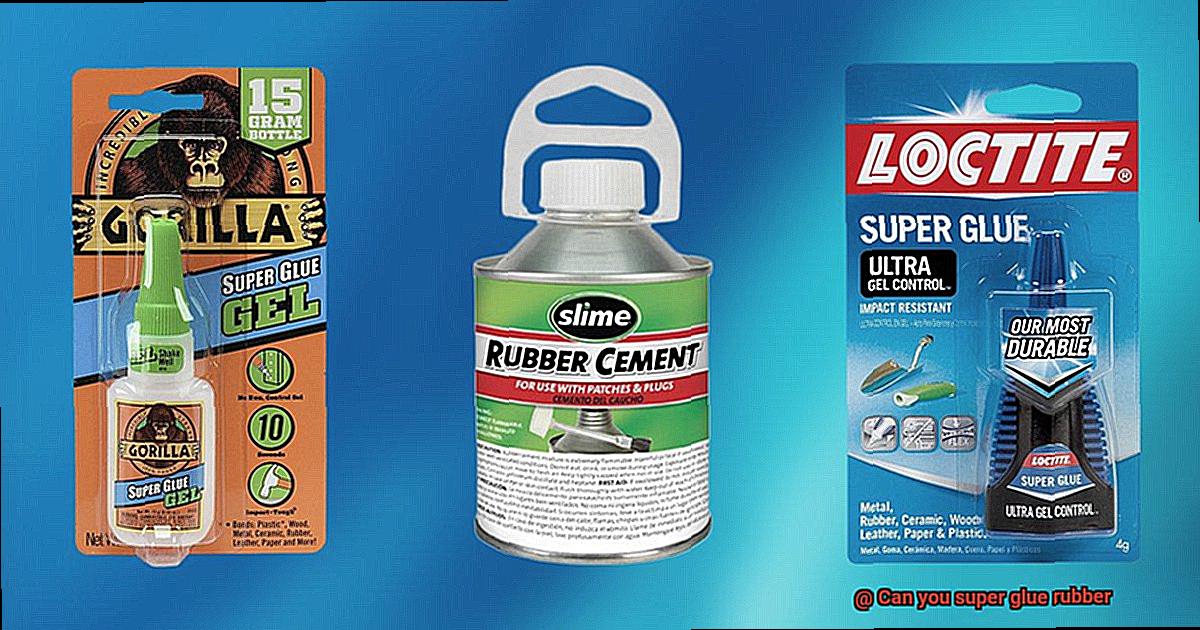
- Testing and Alternatives: If uncertain about using super glue on a specific rubber item, perform a small test in an inconspicuous area. In cases where super glue does not provide the desired bond strength, consider alternative adhesives such as rubber cement or epoxy adhesives.
Why is Super Glue Tricky to Use on Rubber?
Super glue, known for its rapid drying and strong adhesive properties, has become a popular choice for various applications. However, when it comes to rubber, achieving a reliable bond can be quite challenging. In this article, we will explore the scientific reasons behind the difficulties of using super glue on rubber surfaces and provide tips to improve the success rate.
Elasticity:
Rubber’s exceptional flexibility and ability to stretch without breaking make it a sought-after material in numerous industries. However, this elasticity poses a problem for super glue because the constant movement of rubber places stress on the adhesive, leading to eventual failure.
Additives:
To enhance rubber’s flexibility and durability, additives such as plasticizers and oils are commonly used. While these additives benefit rubber’s performance, they create a barrier that hinders the adhesive from effectively bonding with the surface.
Smooth Surface:
Unlike rougher materials like wood or metal that provide more contact points for adhesion, rubber surfaces are often smooth and non-porous. This lack of texture limits the surface area available for the glue to grip onto, weakening the bond.
Moisture Sensitivity:
Rubber contains natural moisture, which interferes with the curing process of super glue. Moisture hampers proper drying of the glue and compromises its ability to form a strong bond. Additionally, moisture can prolong drying time or prevent complete curing.
Tips for Successful Bonding:
Surface Preparation:
Thoroughly clean the rubber surface to remove any dirt, dust, or oils that may hinder adhesion. Slightly roughening the surface with sandpaper can create more surface area for the glue to cling to.
Primers:
Using a primer specifically designed for bonding rubber surfaces significantly improves adhesion. Primers contain chemicals that enhance surface wetting and compatibility, allowing the glue to form a stronger bond.
Consider Alternative Adhesives:
While super glue can work on rubber with proper preparation, alternative adhesives formulated specifically for rubber, like rubber cement or specialized rubber adhesives, may provide better results in terms of strength and durability.
How to Prepare the Rubber Surface for Super Glue
Rubber surfaces can be tricky to bond with super glue due to their smooth and non-porous nature. However, by following a few simple steps, you can prepare the rubber surface effectively and achieve a strong and durable bond. In this blog post, we will guide you through the process of preparing rubber for super glue using easy-to-follow instructions.
Clean the Rubber Surface:
Start by cleaning the rubber surface thoroughly to remove any dirt, dust, or grease that could hinder the bonding process. Use a mild detergent or rubbing alcohol with a clean cloth to wipe the surface clean. This will ensure that the super glue adheres properly.
To truly prepare the rubber surface for a flawless bonding experience, imagine yourself wiping away all the grime and imperfections. Watch as the dirt dissolves under the gentle pressure of your cloth, leaving behind a pristine rubber surface ready to embrace the strength of the super glue.
Roughen the Surface:
Next, gently roughen the rubber surface using sandpaper or a file. This step creates small scratches or grooves on the surface, providing more points of contact for the adhesive. Be careful not to apply too much pressure or damage the rubber.
As you delicately glide the sandpaper over the rubber, feel the resistance under your fingertips. The smooth surface slowly transforms into a textured landscape, ready to embrace the super glue with open arms. The gentle friction creates a dance between the sandpaper and rubber, ensuring a strong and enduring bond.
Ensure the Surface is Dry:
Before applying super glue, ensure that the rubber surface is completely dry. Moisture can interfere with the bonding process, so allow the surface to air dry or use a hairdryer on a low setting to speed up drying.
As you watch droplets of moisture evaporate from the rubber’s surface, imagine them dissipating into thin air, leaving behind a perfectly dry canvas. The anticipation builds as the rubber eagerly awaits the arrival of the super glue, ready to embrace its strength and create an unbreakable connection.
Apply Super Glue Accurately:
Using a small amount of super glue, apply it evenly across the area you wish to bond. Avoid applying too much glue as it can lead to excess squeeze-out and messy results. Press the rubber surfaces together firmly and hold them in place for a few minutes to allow the glue to set.
As you delicately squeeze a small drop of super glue onto the rubber, witness its transformation from a liquid to a powerful adhesive. Feel the thrill as you press the rubber surfaces together, watching the super glue seep into every nook and cranny, creating an unbreakable bond. Hold your creation in place, knowing that patience will be rewarded with strength and durability.
Allow Sufficient Curing Time:
The curing time for super glue can vary depending on factors such as temperature and humidity. Follow the manufacturer’s instructions for the recommended curing time. It’s important to be patient and allow sufficient time for the super glue to fully cure before subjecting it to stress or strain.
As you wait for the super glue to cure, envision the chemical reaction taking place within its molecules. Time becomes an ally, allowing the adhesive to transform from a sticky substance into a solid foundation of strength. Embrace patience as you anticipate the moment when your bonded rubber surface will be ready to withstand any challenge.
Conclusion:
By following these steps to prepare the rubber surface for super glue, you can increase the chances of achieving a successful bond. Remember to clean the surface thoroughly, roughen it slightly, ensure it is dry, apply the glue accurately, and allow sufficient curing time. With these precautions in place, you can enjoy a strong and durable bond between rubber surfaces using super glue.
Choosing the Right Type of Super Glue for Rubber
When it comes to bonding rubber materials, selecting the appropriate super glue is vital. Not all super glues are equal, and using the wrong one can lead to a feeble bond that easily breaks apart. To ensure a robust and enduring connection, it’s crucial to comprehend the various types of super glue available and their benefits when used on rubber.
First and foremost, seek out a super glue specifically labeled for use on rubber or one that lists rubber as a compatible material. These specialized formulas are designed to forge a potent bond with rubber surfaces. They contain ingredients that enhance adhesion to rubber, guaranteeing a long-lasting connection.
Flexibility is another critical factor to consider. Rubber materials often necessitate some elasticity to endure stretching and bending without compromising their adhesive properties. Opt for a super glue that offers flexibility, enabling bonded rubber surfaces to maintain their integrity even under stress.
Setting time is also an important consideration. Some super glues boast quick-drying formulas, facilitating faster bonding. Others may require more time to cure properly. Depending on your project requirements, select a super glue with a setting time that suits your needs.
To make an informed decision, carefully read product labels and instructions. Look for any specific recommendations or precautions regarding the use of the super glue on rubber surfaces. Additionally, perusing customer reviews and ratings can provide valuable insights into others’ experiences with a particular brand or type of super glue for rubber.
Applying the Super Glue Correctly
Imagine this: you’re knee-deep in a DIY project involving rubber materials, and you need a bond that can withstand the test of time. Enter super glue, the unsung hero of adhesive solutions. But before you dive into squeezing that tube, let’s explore the art of applying super glue correctly to rubber surfaces. Trust me, it’s not rocket science, but it does require finesse. So strap on your safety goggles and get ready to dive into the world of super gluing rubber.
Step 1: Cleanliness is Next to Stickiness
Before you embark on bonding those rubber surfaces, cleanliness is key. Leave no room for dirt, dust, or grease. Take a moment to wipe them down with mild detergent or rubbing alcohol. Don’t forget to meticulously dry them before moving on to the next step.
Step 2: Roughen Up the Surface
Rubber can be a stubborn material when it comes to bonding. Give it a gentle nudge by roughening the surface with sandpaper or a file. Picture it as creating tiny scratches that act as footholds for the glue. Remember, gentle circular motions are your best friend here – we don’t want any casualties in the rubber ranks.
Step 3: Protect and Serve
Now that your rubber surface is primed for action, protect any surrounding areas you don’t want accidentally glued together (it happens to the best of us.). Grab some masking tape or set up a protective barrier to shield yourself from sticky situations.
Step 4: Glue It Like You Mean It
Take hold of that super glue bottle and squeeze out a modest amount onto one of the rubber surfaces you want to bond. Remember, less is more in this case. You can always add more if needed. And please, resist the temptation to unleash your entire bottle in one go – we’re aiming for a bond, not a glue monster.
Step 5: Press and Hold, My Friend
Swiftly and firmly press the two rubber surfaces together. Hold them in place for a few minutes to allow the magic to unfold. Don’t be tempted to wiggle or fuss with them during this time – it’s all about that unyielding bond.
Step 6: Patience is a Virtue
Now comes the hard part – waiting. Let the bond cure for at least 24 hours before subjecting it to any stress or pressure. Treat it like a fine wine; let it age gracefully and grow stronger with time (just don’t drink it, no matter how tempting.).
Step 7: Extra Credit – Apply Some Pressure
For those particularly stubborn rubber surfaces, consider using a clamp or applying gentle pressure with heavy objects. But remember, moderation is key. We want a robust bond, not crushed rubber despair.
Step 8: Oops. I Glued Myself Again
If you accidentally find yourself in a sticky situation and get super glue on your skin (it happens to the best of us), fear not. Acetone or acetone-based nail polish remover is your secret weapon. Gently rub the affected area with a cloth or cotton ball soaked in acetone until the glue starts to dissolve. Wash the area with soap and water afterward to remove any residue.
Curing the Bonded Materials
Today, we venture into the captivating realm of curing bonded materials when working with super glue and rubber surfaces. Get ready to discover the secrets that will take your adhesive game to new heights.
Chapter 1: The Science Behind Curing
In this chapter, we unravel the mysteries behind curing. Explore how different types of super glue have varying curing times – from lightning-fast seconds to more patient minutes. Discover why following the manufacturer’s instructions is paramount for success. Dive into the impact of temperature on curing, understanding why working within the recommended range is crucial for optimal results.
Chapter 2: Patience is a Virtue
In this chapter, patience takes center stage as the key ingredient for success. Hear tales of brave souls who rushed this step and ended up with weak bonds that crumbled under pressure. Learn from their mistakes and embrace patience as your greatest ally in achieving a bond that withstands the test of time.
Chapter 3: The Power of Pressure
Ah, pressure – it can make or break a bond. Brace yourself for a journey into the world of bonding perfection. Discover how applying pressure during the curing process enhances the strength and durability of your bond. Explore clamping techniques and using weights to ensure maximum contact between the adhesive and rubber surfaces. Witness how pressure becomes your secret weapon in achieving unyielding bonds.
Chapter 4: The Moisture Mystery
Did you know that some super glues require moisture for proper curing? In this chapter, shed light on this intriguing phenomenon. Unveil why moisture is crucial for certain adhesives and how to create the ideal conditions for their extraordinary curing powers. Marvel at the intricate dance between moisture and adhesive, unlocking its potential in your bonding endeavors.
Chapter 5: Time is Your Ally
As we near the end of our adventure, recognize the importance of giving your bond ample time to reach its maximum strength. Explore the risks of subjecting it to stress or load immediately, and discover the expert-recommended waiting period before putting your bond to the ultimate test. Embrace time as your ally, ensuring your bond stands tall and unyielding.
Durability of Super Glue on Rubber
Prepare for an exhilarating journey into the world of super glue and its bond with rubber. In this exploration, we will unveil the factors that determine the durability of this adhesive on rubber surfaces. Get ready to revolutionize your understanding of glue.
The Challenge:
Rubber, with its flexibility and low surface energy, presents a unique challenge for adhesives. But fear not, for even the most finicky of rubbers can succumb to the irresistible grip of super glue.
Preparation is Key:
Before applying super glue on rubber, meticulous surface preparation is vital. Cleanliness is not just a virtue; it’s essential for strong bonding. Ensure the rubber surface is free from dirt, oil, and contaminants. A gentle wipe with a suitable solvent or cleaning agent will do the trick. Additionally, roughening the surface slightly with sandpaper or a file increases bonding area and enhances overall strength.
Application Technique:
In super glue application, less is more. Excess glue inhibits proper bonding and weakens the end result. Apply a thin, even layer of adhesive to one surface and firmly press the surfaces together. This delicate dance between pressure and precision will yield an unyielding bond.
Curing Time:
Allowing sufficient curing time is crucial for unlocking the true potential of super glue. The magic of this process varies, taking minutes to hours depending on the brand and formulation. Patience truly is a virtue here.
Environmental Factors:
Beware of external elements that can sabotage your rubber bond’s durability. Extreme temperatures and prolonged exposure to moisture can weaken the adhesive grip. Additionally, certain chemicals may degrade or soften the bond over time.
Flexibility Matters:
While super glue bonds on rubber can be impressively strong, they may lack the same flexibility as the rubber itself. Excessive stretching or flexing could lead to bond weakening or breakage. Specific bonding requirements may call for specialized rubber adhesives with enhanced flexibility and resistance to environmental factors.
Also Read: How to Glue Neoprene to Rubber?
Alternative Adhesive Options for Bonding Rubber
In this blog post, we will explore the wonderful world of alternative adhesive options for bonding rubber.
- Epoxy Adhesives: Known for their high strength and durability, epoxy adhesives are perfect for various applications. They can handle heat, moisture, and chemicals with ease. However, be mindful of their longer curing time.
- Neoprene-Based Adhesives: Offering excellent bonding capabilities, neoprene adhesives provide a strong and flexible bond. They can withstand extreme temperatures and harsh environments, though they may not be as resistant to chemicals compared to other options.
- Silicone Adhesives: Popular for bonding rubber, silicone adhesives provide flexibility and resistance to moisture. Ideal for applications where flexibility and watertightness are essential. However, they may not offer the same level of strength as other alternatives.
- Polyurethane Adhesives: With good resistance to chemicals and temperature fluctuations, polyurethane adhesives deliver a strong bond. Often used in applications requiring flexibility and durability, they may be pricier than other options.
When choosing an adhesive, consider the specific type of rubber being bonded. Different rubbers have unique properties that affect adhesive performance. Consult manufacturer’s instructions or seek professional advice for compatibility assurance.
Proper surface preparation is crucial for success. Ensure surfaces are clean, dry, and free from contaminants or oils. Roughening the rubber surface can enhance bond strength.
Follow manufacturer’s instructions for application techniques and curing times. Some adhesives require application to both surfaces, while others need just one. Curing times vary, so patience is key.
While alternative adhesive options are effective for bonding rubber, it’s vital to consider the application and environment. Evaluate factors like temperature, exposure to chemicals or moisture, and stress/load endurance when selecting an adhesive.
5ecE-EiZruY” >