Tired of watching paint dry? Well, we’ve got some game-changing tricks up our sleeves to help you put the pedal to the metal and speed up the drying time of your trusty Mod Podge.
Mod Podge, that magical glue-sealant-finish combo beloved by DIY enthusiasts worldwide, can sometimes leave us tapping our fingers impatiently. But fear not. We’ve scoured every nook and cranny of the crafting universe to bring you the most effective techniques for zapping away those drying hours without sacrificing quality.
So buckle up, because we’re about to rev up your crafting experience. Get ready to unlock the hidden potential in your Mod Podge bottle as we spill the beans on how to achieve lightning-fast drying times. It’s time to craft like a speed demon.
What is Mod Podge?
Contents
- 1 What is Mod Podge?
- 2 Factors that Affect the Drying Time of Mod Podge
- 3 Using a Hairdryer or Heat Gun to Speed Up Drying
- 4 Increasing Air Circulation to Speed Up Drying
- 5 Utilizing Dehumidifiers to Reduce Humidity Levels
- 6 Oven Method for Speeding Up Drying
- 7 Potential Risks of Rushing the Drying Process
- 8 Safety Guidelines for Expediting the Drying Process
- 9 Conclusion
Look no further than Mod Podge. This versatile and reliable crafting adhesive is a staple in the crafting community, offering endless possibilities for your projects. In this blog post, we will explore the wonders of Mod Podge, its common uses, and some handy tips to enhance your crafting experience.
What is Mod Podge?
Mod Podge is not just an ordinary glue; it’s a magical adhesive that brings beauty and durability to your crafts. Made up of a unique blend of polymers, resins, and solvents, this water-based adhesive dries clear and creates a strong bond between various materials. Whether you’re working with paper, fabric, wood, or even ceramics, Mod Podge has got you covered. And the best part? It’s non-toxic and safe for both adults and children, making it suitable for all your crafting endeavors.
Common Uses:
Mod Podge is a versatile adhesive that can be used for a wide range of projects. Here are some common uses:
- Decoupage Magic: Mod Podge is the secret ingredient behind the stunning art of decoupage. By layering pieces of paper or fabric onto a surface using Mod Podge, you can create beautiful collages that add depth and personality to your projects. From furniture revamps to customizing gift boxes or even creating wall art, decoupage with Mod Podge opens up a world of possibilities.
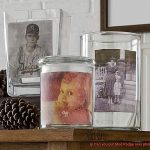
- Sealing Finishes: Mod Podge not only adheres materials together but also acts as a protective sealant. Whether you want to preserve delicate photographs or artwork or seal finishes on various surfaces, Mod Podge provides a durable and long-lasting solution. It keeps your creations looking pristine while protecting them from moisture and other damaging elements.

Different Finishes:
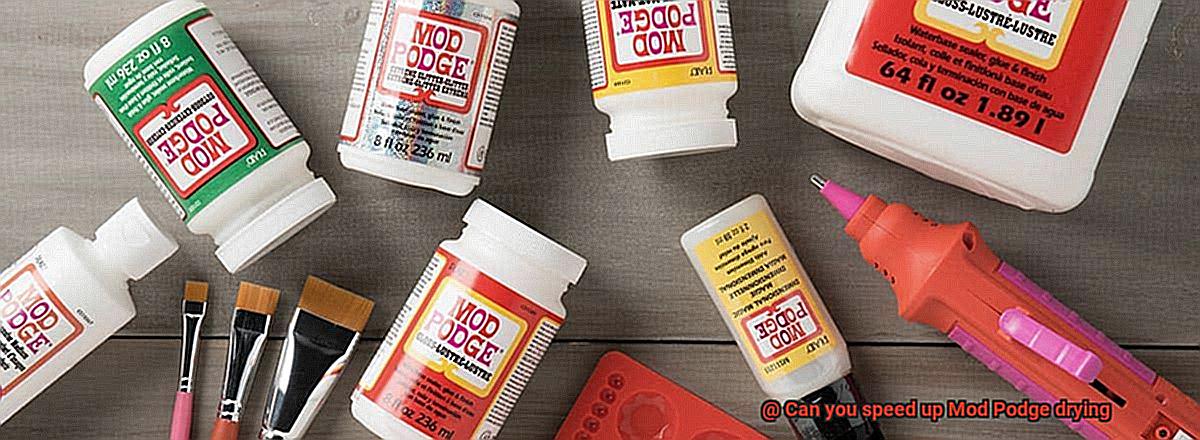
Mod Podge comes in various finishes to suit your desired look and feel. Here are the most common options:
- Matte Finish: If you prefer a non-reflective, flat look, the matte finish is perfect for you. It provides a clean and understated appearance, allowing the focus to be on the craftsmanship of your project.
- Gloss Finish: For those who love a shiny, reflective surface, the gloss finish adds a touch of elegance and sophistication to your crafts. It enhances colors and brings out the vibrancy in your artwork.
- Satin Finish: If you’re looking for something in between matte and gloss, the satin finish offers a subtle sheen that strikes the perfect balance. It adds a touch of luster without being too overpowering.
Tips for Speeding Up Drying Time:
While Mod Podge offers durability and effectiveness, waiting for it to dry can sometimes test your patience. Here are some tips to speed up the drying process:
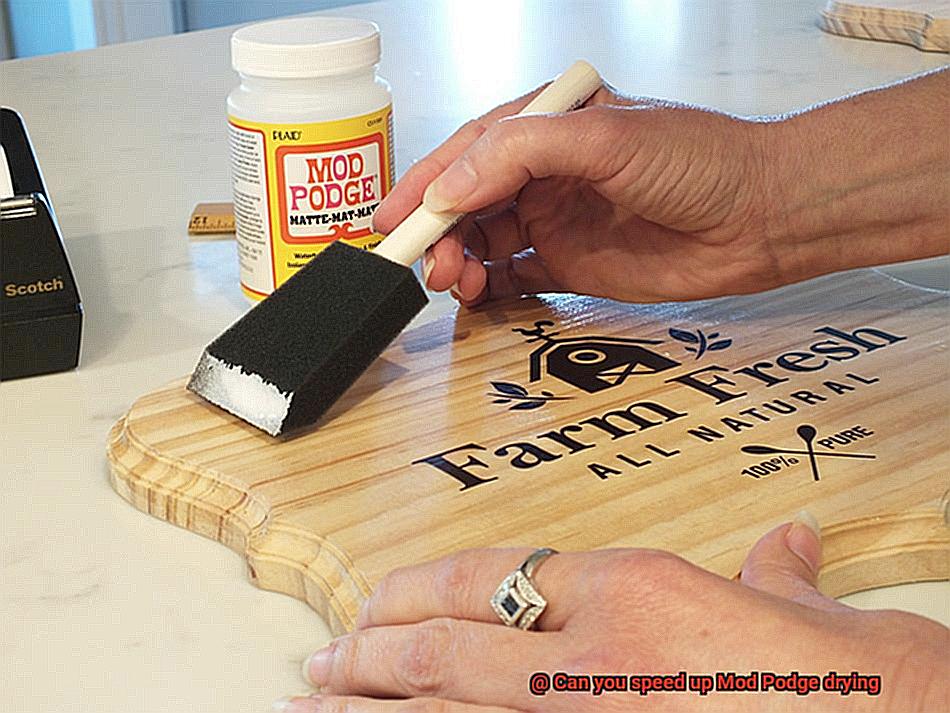
- Use Heat: You can use a hairdryer or heat gun on low or medium settings to gently blow warm air onto your project. This helps evaporate the moisture in the Mod Podge, resulting in faster drying.
- Increase Airflow: Placing your project near a fan or source of airflow can help speed up drying time by promoting evaporation. Ensure that there’s enough space around your project for air to circulate freely.
- Reduce Humidity: Running a dehumidifier in the room can help reduce humidity levels, allowing Mod Podge to dry more quickly. This is especially useful in humid climates where drying time may be prolonged.
Factors that Affect the Drying Time of Mod Podge
Crafting with Mod Podge is a joy, but waiting for it to dry can be a test of patience. As an expert on all things Mod Podge, I’m here to reveal the secrets behind its drying time.
First and foremost, let’s talk about the thickness of your Mod Podge application. If you slather it on in thick globs, you’re in for a long wait. Thin and even coats are the key to a speedy dry. Remember, less is more.
Now, let’s address the notorious humidity factor. High humidity levels can put a damper on your drying time. Literally. The excess moisture in the air slows down evaporation and extends the drying process. To combat this, consider using a dehumidifier or working in a well-ventilated area. If you find yourself in a low-humidity environment, rejoice. Your Mod Podge will dry much faster.
But that’s not all – temperature also plays a significant role. Warm temperatures are your best friend when it comes to speeding up the drying process. They encourage faster evaporation and get your project ready for display in no time. Aim for a room temperature of 70-75 degrees Fahrenheit (21-24 degrees Celsius) for optimal drying conditions.
The type of surface you’re working on can also affect drying time. Porous surfaces like wood or fabric love to suck up moisture from Mod Podge, resulting in longer drying times. Non-porous surfaces like glass or metal, on the other hand, allow for quicker evaporation and faster drying. If you’re working with a porous surface, apply a thin layer of Mod Podge and let it dry completely before adding more coats.
And finally, beware of the number of coats you apply. Each layer adds moisture that needs to evaporate, so piling on multiple thick coats without sufficient drying time in between will only prolong the process. Be patient and apply thin layers, allowing each coat to dry completely before adding more.
Using a Hairdryer or Heat Gun to Speed Up Drying
Crafting with Mod Podge is a delightful experience, but waiting for it to dry can feel like an eternity. Fortunately, there is a secret weapon in our crafting arsenal: the trusty hairdryer or heat gun. These tools can be a game-changer when it comes to speeding up the drying time of Mod Podge. However, it’s important to understand the advantages and disadvantages before embarking on this speedy journey.
Advantages:
- Time-saving: The primary advantage of using a hairdryer or heat gun is that it significantly reduces drying time. This means you can move on to the next step of your craft project much faster.
- Even drying: The continuous airflow from a hairdryer or heat gun helps to evenly distribute heat, ensuring that all areas of your project dry at the same rate.
- Versatility: Hairdryers and heat guns can be used on various crafting materials, making them versatile tools in your creative endeavors.
Disadvantages:
- Risk of damage: Excessive heat can cause Mod Podge to bubble or crack, potentially damaging your masterpiece. It’s crucial to use caution and select low or medium heat settings.
- Incomplete drying: While using a hairdryer or heat gun can speed up the drying process, it may not eliminate it entirely. It’s still necessary to allow your project to air dry for an additional period after applying heat to ensure thorough drying.
- Fumes: When heated, Mod Podge can release fumes that may be harmful to inhale. It is essential to work in a well-ventilated area or open space to avoid any potential health risks.
Increasing Air Circulation to Speed Up Drying
Thankfully, there’s a secret weapon in our crafting arsenal – increasing air circulation. In this comprehensive guide, we will explore the advantages of improving air circulation to speed up drying time. Say goodbye to long waits and hello to faster crafting.
Advantage #1: Fan-tastic Results
- Place a fan near your project to create a gentle breeze that aids in moisture evaporation.
- Set the fan on a low or medium setting to avoid uneven drying or a rough finish.
Advantage #2: Embrace the Great Outdoors
- Open windows or doors in your crafting space to allow fresh air to circulate.
- Fresh air promotes faster evaporation but consider outdoor humidity levels for optimal results.
Advantage #3: Dehumidifiers – Your Drying Ally
- Use dehumidifiers in humid climates or during rainy seasons to remove excess moisture from the air.
- A drier environment accelerates drying time and prevents sticky surfaces.
Advantage #4: Heat It Up
- Apply low heat near your project using a hairdryer or heat gun.
- Heat speeds up evaporation, but be cautious to avoid bubbling or cracking by maintaining a safe distance and constantly moving the heat source.
Utilizing Dehumidifiers to Reduce Humidity Levels
I have discovered the ultimate solution to speed up the drying process – the magical combination of dehumidifiers and proper ventilation.
Let’s delve into how dehumidifiers work their magic. These nifty devices are specifically designed to remove excess moisture from the air, making them an absolute game-changer for us glue enthusiasts. By using a dehumidifier, you can create an environment with lower humidity levels, which will significantly aid in drying your Mod Podge creations more quickly.
So how exactly do these dehumidifiers work? It’s quite simple. They draw in the surrounding air and pass it over cooling coils. As the air cools down, the moisture condenses and collects in a water tank or is drained away. The dehumidified air is then released back into the room, creating a drier environment that is perfect for speedy drying.
To make the most of your dehumidifier, it’s important to place it in close proximity to the drying area. This ensures that the moisture being emitted by the Mod Podge is effectively pulled out of the air. Remember, efficiency is key.
Proper ventilation plays a crucial role in accelerating drying times. Opening windows or using fans can work wonders in circulating air and helping moisture evaporate more quickly. By allowing fresh air to flow through your crafting space, you create a dynamic environment that gives your Mod Podge project a breath of fresh air.
However, it’s essential to find the right balance. You don’t want to create a windstorm that sends your paper crafts flying across the room. Be mindful of the airflow and adjust accordingly.
It’s important to note that while dehumidifiers can significantly reduce humidity levels, they may not completely eliminate all moisture from the air. Factors like climate, room size, and existing moisture sources can impact their efficiency. So, it’s crucial to monitor the drying process and make adjustments as needed.
To maximize your success with this dynamic duo, make sure to follow the manufacturer’s instructions for both the Mod Podge and the dehumidifier. Some Mod Podge varieties may have specific guidelines for drying, and different dehumidifiers may have unique settings or features that enhance drying effectiveness. Following instructions is always a good idea.
Oven Method for Speeding Up Drying
I have the ultimate solution for you – the oven method. With this technique, you can speed up the drying process and have your creations ready in no time. Let’s delve into the specifics, shall we?
To begin, preheat your oven to a low temperature, ideally around 200°F (93°C). Just remember not to exceed 250°F (121°C) to avoid any mishaps. To ensure that the oven temperature is accurate, it’s worth getting an oven thermometer. Precision is key here.
Now that your oven is heated up, it’s time to protect your precious project. Place it on a baking sheet or parchment paper to shield it from direct contact with the oven rack. We don’t want any accidents ruining our hard work, right? Keep in mind that the drying time can vary depending on the thickness of the Mod Podge layer and the size of your project, so keep a close eye on it.
Periodically check the progress by gently touching the surface. If it feels dry and no longer tacky, then congratulations – your project is ready. But hold on, we’re not done yet. Leave it in the oven for a few more minutes to cool down before removing it. Patience is a virtue.
It’s important to note that while this method works wonders for most projects, it may not be suitable for all types of materials. Always refer to the instructions provided by the manufacturer of Mod Podge for guidance. Safety first, folks. Ensure proper ventilation and keep flammable materials away from the heat source.
Potential Risks of Rushing the Drying Process
Rushing the drying process when using Mod Podge can lead to a series of potential risks that may wreak havoc on your masterpiece. This article will explore the dangers of impatience and delve into the world of glue, uncovering the pitfalls that await those who rush the drying process.
Uneven Drying: The Sticky Situation
Imagine carefully applying a thick layer of Mod Podge onto your project, only to realize time is running short and you need it to dry faster. In your haste, you may be tempted to use a hairdryer or crank up the heat.
By rushing the drying process, you run the risk of uneven drying. While the surface may appear dry, the inner layers may remain wet, resulting in an unpleasantly tacky finish that is prone to smudging and damage.
Bubbling and Cracking: The Nightmare Before Finish
Nothing is more disheartening than witnessing air bubbles and cracks mar your meticulously crafted creation. When Mod Podge dries too quickly, moisture evaporates rapidly, causing these unsightly imperfections to form on the surface. Not only do they compromise the aesthetic appeal, but they also weaken the adhesive properties of Mod Podge.
Dust and Debris: The Uninvited Guests
Imagine painstakingly applying Mod Podge to your project, only to discover dust particles and debris trapped on its sticky surface. Rushing the drying process increases the chances of this happening as the glue solidifies before airborne particles have a chance to settle. This leaves you with an uneven and rough finish that is challenging to rectify.
Shrinking and Warping: The Not-So-Magical Transformation
As Mod Podge dries, it undergoes chemical changes that cause it to contract and solidify. Rushing this process disrupts the natural drying cycle, leading to uneven drying and potential warping of your glued item. Say goodbye to that perfectly flat surface you envisioned.
Durability and Longevity: The Price of Impatience
Mod Podge is known for its ability to form a strong bond and provide a protective seal on various surfaces when given ample time to dry. Rushing the drying process compromises its adhesive properties, resulting in a weaker bond and reduced durability over time. Don’t let impatience cost you the longevity of your creations.
Safety Guidelines for Expediting the Drying Process
While this versatile crafting glue may sometimes take longer to dry than desired, there are safety guidelines that can help expedite the drying process without compromising the quality of the finished project.
First and foremost, prioritize proper ventilation. Mod Podge can emit strong fumes, so working in a well-ventilated area is crucial. Open windows, turn on a fan, or work outside if weather permits. This not only aids in drying but also prevents inhalation of potentially harmful fumes.
When using heat to speed up drying, exercise caution. Excessive heat can cause bubbling or warping of projects. Use a low setting on a hairdryer or heat gun, keeping it at a safe distance and constantly moving it to ensure even distribution of heat.
Follow the manufacturer’s instructions when applying Mod Podge. Thin layers and sufficient drying time between coats expedite the overall drying process. Avoid rushing through multiple thick layers without proper drying time to avoid issues like bubbling or wrinkling.
Patience is key. Refrain from touching or handling the project before it’s fully dry to prevent fingerprints or smudges. Allowing each layer to completely dry before applying the next ensures a flawless finish.
Proper storage is essential for maintaining Mod Podge’s effectiveness. Store it in a cool, dry place away from direct sunlight or extreme temperatures. Heat and moisture can affect its consistency and drying properties.
Cwoi5CEQ9IU” >
Conclusion
Yes, you can definitely speed up the drying process of Mod Podge. There are a few tricks and techniques that can help you get your project dried and ready to use in no time.
One way to speed up the drying time is by applying thin layers of Mod Podge instead of thick ones. Thicker layers take longer to dry, so by using thinner coats, you can expedite the process. Additionally, make sure to spread the Mod Podge evenly across your surface to avoid any uneven drying.
Another tip is to increase air circulation around your project. You can do this by using a fan or opening windows to let fresh air in. The movement of air helps evaporate the moisture in the Mod Podge, speeding up the drying time.
If you’re working on a small project, you can also try using a hairdryer on low heat setting. Hold it at least 6 inches away from your project and move it around continuously to prevent overheating or causing any damage.
Lastly, consider using Mod Podge formulas specifically designed for faster drying times. Some variations like Mod Podge Super Gloss or Mod Podge Mega Glitter Dry faster than traditional formulas, making them ideal for projects with tight deadlines.
By implementing these tips and techniques, you’ll be able to accelerate the drying process of Mod Podge and complete your projects more efficiently.