Ever wished you could freeze time and keep your precious memories intact? Well, say hello to Mod Podge – the superhero of crafting supplies. This magical potion not only adds a glossy sheen to your projects but also acts as an impenetrable fortress for your cherished photos. Picture-perfect preservation has never been easier.
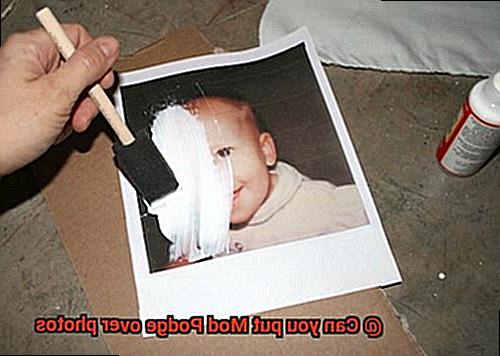
So how does it work? Applying Mod Podge over photos is a crafter’s secret weapon. With just a flick of a foam brush, you can seal and secure your snapshots in no time. It’s like giving them a protective hug that says, “I’ve got you covered.” And the best part? It’s a breeze to use. Simply brush on a thin layer of Mod Podge, let it dry, and watch as your memories transform into indestructible treasures.

But wait, there’s more. Mod Podge offers an entire arsenal of options to suit your style. Want that glossy finish that makes colors pop? They’ve got it. Craving a more subdued matte look? No problemo. With Mod Podge, you can customize your photo preservation game and make it uniquely yours.
Gone are the days of worrying about wear and tear ruining those precious moments captured in photographs. Thanks to Mod Podge, you can now shield them from the elements while adding an artistic touch to boot.
So join us on this journey into the mesmerizing world of Mod Podge. Discover its wonders, unleash your creativity, and embark on a mission to preserve memories like never before. Your photos deserve nothing less than the best – they deserve the magic touch of Mod Podge.
What is Mod Podge?
Contents
Are you a crafting enthusiast on the hunt for a versatile adhesive that can bring your projects to life? Look no further than Mod Podge. This beloved crafting glue has captured the hearts of DIY enthusiasts and crafters worldwide, offering endless possibilities for creativity. In this blog post, we delve into the world of Mod Podge, exploring its uses, formulations, and tips for getting the best results. Get ready to unleash your creativity with this ultimate crafting glue.
Versatility at its Finest:
Mod Podge is a water-based adhesive that dries clear, making it perfect for a wide range of crafting projects. Its thick, paste-like consistency allows for easy application and smooth spreading on various materials such as paper, fabric, wood, metal, and plastic. Whether you’re working on decoupage, collage, or paper crafts, Mod Podge has got you covered.
A Bond That Lasts:
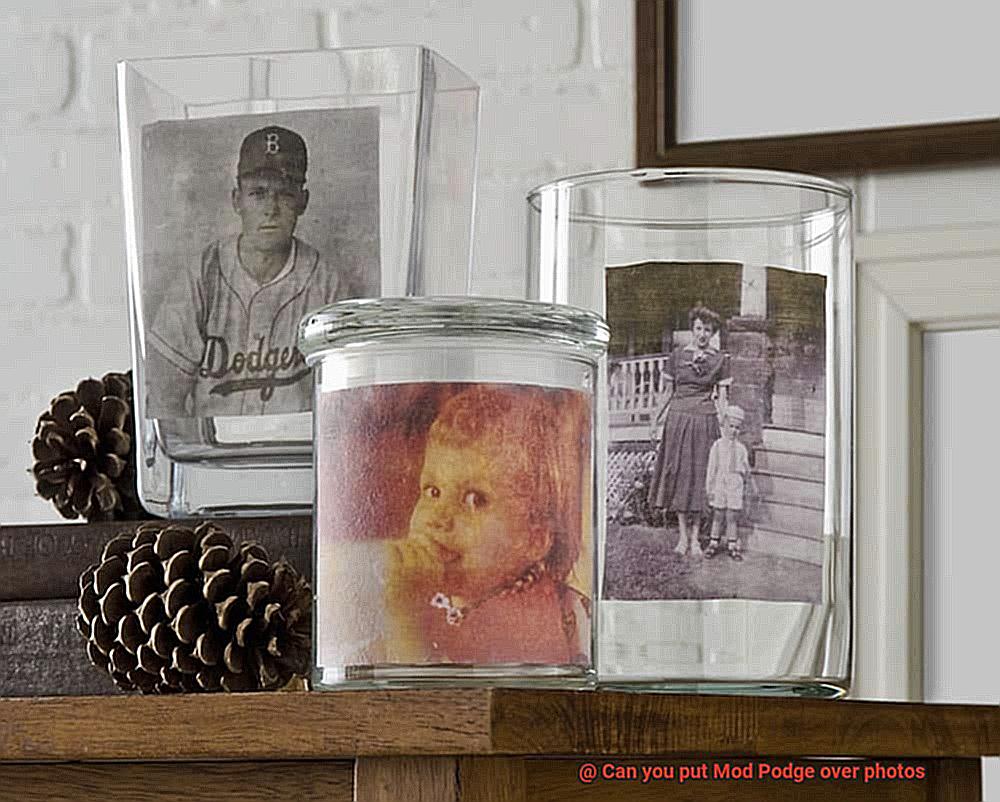
One of the key features that sets Mod Podge apart is its ability to act as both an adhesive and a sealer. When applied to surfaces, it forms a strong bond that securely holds materials together. This makes it ideal for projects that need durability and resistance to wear and tear. Preserve precious memories by using Mod Podge to create stunning photo crafts or protect your artwork.
Formulations for Every Project:
Mod Podge comes in various formulations to suit different project needs. The Original Mod Podge offers a matte finish and is perfect for projects where you want the texture of the underlying materials to shine through. If you’re looking for added shine, Gloss Mod Podge will do the trick with its shiny finish. For a more subtle sheen, Satin Mod Podge is your go-to option. And if you want to add some sparkle and pizzazz, Sparkle Mod Podge will make your creations shine bright.
Beyond Gluing and Sealing:
Mod Podge is not limited to its adhesive and sealing properties. It also acts as a versatile medium for creating unique effects. Mix it with acrylic paints to create custom colors or add glitter for a touch of sparkle. Mod Podge can even be used for image transfer projects, allowing you to personalize your crafts further.
Tips for Success:
To achieve the best results with Mod Podge, it’s essential to properly prepare your surfaces and follow some simple tips. Make sure your surfaces are clean and dry before applying Mod Podge. Apply thin, even layers, allowing each layer to dry completely before adding more. And remember, less is more. Excessive brushing can cause smudging or streaking. If you’re unsure about using Mod Podge on valuable photos, test it on a small, inconspicuous area first.
Is Mod Podge Safe for Photos?
Mod Podge, the beloved adhesive of crafters worldwide, is a versatile tool that can be used to create stunning photo crafts. But before you embark on your Mod Podge photo adventure, it’s essential to understand the safety considerations. While Mod Podge is generally safe for photos, there are a few precautions to keep in mind to ensure optimal results.
First and foremost, it is crucial to clean your photos thoroughly, removing any dirt or oils before applying Mod Podge. This step is vital for a smooth and even bond between the adhesive and the photo. Additionally, conducting a test patch on a small corner of the photo is highly recommended. This allows you to observe how the Mod Podge interacts with the specific paper or ink used in your photo, preventing any potential surprises that could mar your precious memories.
Furthermore, some types of photo paper may be more susceptible to wrinkling or warping when exposed to moisture. To safeguard against this, apply Mod Podge sparingly and allow each layer to dry completely before adding another. This approach will prevent smudging or running of the ink, ensuring your photos retain their pristine beauty.
If long-term preservation is a concern, rest assured that there are photo-safe alternative adhesives available. These specialized adhesives are specifically formulated to preserve photographs without causing damage or degradation over time.
Preparing Photos for Mod Podge Application
Before diving headfirst into the gluey wonderland, let’s make sure your photos are properly prepared for the Mod Podge application. Trust me, it’s worth the extra effort to ensure picture-perfect results.
First things first: cleanliness is key. Grab a soft, lint-free cloth or trusty microfiber cloth to gently wipe away any dust or dirt particles from the surface of your photos. We don’t want any pesky imperfections ruining our masterpiece, do we?
Now, let’s tackle those sneaky fingerprints. They’re like little gremlins trying to sabotage your project. Fear not, my friend. Take a clean, dry cloth and give those fingerprints a gentle rubbing motion. Avoid applying too much pressure to prevent smudging or damaging the photos.
If you’ve got some stubborn creases or wrinkles on your photos, don’t fret. Place the photo between two sheets of clean, white paper and put them under a heavy book for a few hours. The weight of the book will work its magic and flatten out those annoying wrinkles.
Ah, paper type matters too. Glossy or semi-glossy photos are your best buddies when it comes to Mod Podge applications. They provide a smoother surface for that glorious glue to work its magic. Matte photos may absorb more Mod Podge and result in a slightly different finish. Keep that in mind.
Digital prints need some extra love too. Let them dry for at least 24 hours before even thinking about applying Mod Podge. This gives the ink time to set properly and prevents any smudging or running when that glorious glue comes into play.
Size and shape matter, my friend. Cut or trim your photos to the desired size before applying Mod Podge. This will give your project a clean and seamless finish. Nobody likes wonky edges, right?
Last but not least, my golden rule: always, always, ALWAYS do a test patch before going all in. Apply a small amount of Mod Podge to a discreet area of the photo and make sure it plays nicely with the ink and paper. Better safe than sorry.
Applying Mod Podge Over Photos
Get ready to embark on a journey into the world of Mod Podge and discover how to beautifully preserve your cherished memories. In this guide, we’ll explore the art of applying Mod Podge over photos, sharing invaluable tips and tricks to ensure your creations are protected and stand the test of time. Let’s dive in.
Make a Copy:
Before immersing yourself in the magical world of Mod Podge, safeguard your original photo by making a copy. This way, you can experiment and perfect your technique while preserving the precious memories captured in the original.
Thin is In:
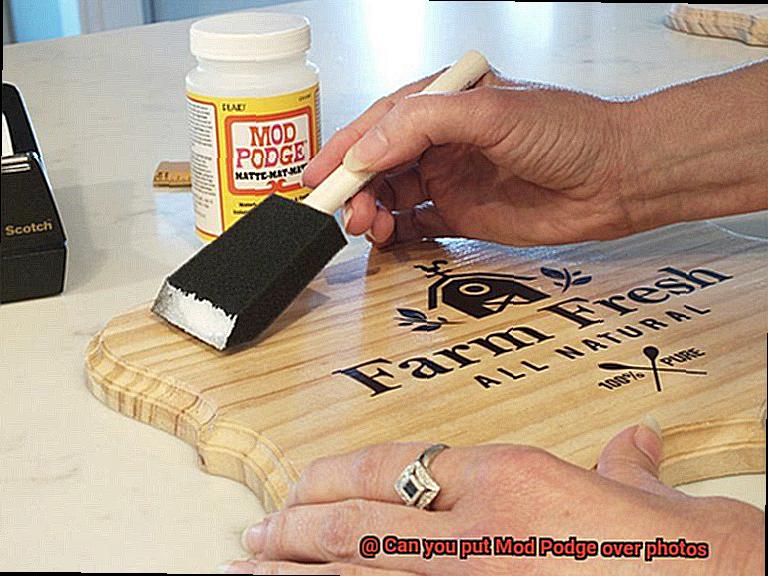
When it comes to applying Mod Podge over photos, remember that less is more. Opt for a thin layer to prevent moisture damage. Equip yourself with a trusty foam brush or soft bristle brush to achieve an even application without unsightly streaks or brush marks.
Choose the Right Formulation:
Mod Podge offers an array of formulations, each with its own unique characteristics. From matte to gloss, satin to specialty finishes like sparkle or outdoor, choose wisely to achieve your desired final appearance and enhance the durability of your photo creation.
Cleanliness is Key:
Before applying Mod Podge on your photo, give it a little TLC by ensuring it’s clean and free from dirt or oils. Gently wipe the surface with a soft cloth or use a mild cleaning solution specially designed for photos.
Patience is a Virtue:
Once the Mod Podge has been applied, resist the urge to touch it until it’s completely dry. The drying time varies depending on the layer thickness and environmental conditions but can take anywhere from 15 minutes to a few hours. Patience will reward you with a flawless finish.
Additional Protection:
While Mod Podge provides some defense against fading and yellowing, it’s not invincible. To fortify your creation, consider using a glass or acrylic front when framing your Mod Podge-covered photo. This will shield it from damaging UV rays and physical harm.
Test, Test, Test:
Before diving headfirst into your photo project, don’t forget to conduct a small test patch. Applying Mod Podge on an inconspicuous area of your photo will help you identify any potential risks or issues, allowing you to make necessary adjustments before proceeding confidently.
Potential Effects of Mod Podge on Photos
Today, we embark on an exploration of the potential effects of Mod Podge on your cherished photos. Get ready to dive into the enchanting realm of Mod Podge and discover its magical and not-so-magical qualities.
Let’s start by addressing some concerns, shall we? One of the primary issues with using Mod Podge on photos is its tendency to cause cloudiness or haziness. Imagine a beautiful memory turned into a foggy mess. This occurs when the moisture in the adhesive interacts with the photo’s chemicals, resulting in a loss of clarity. No one wants their precious moments hidden behind a misty veil.
But wait, there’s more. Mod Podge has the power to alter the colors of your beloved images, especially if they are black and white. Picture this: a yellowish tint creeping onto your treasured memories, distorting their original beauty. Quite the disappointment, isn’t it?
And let us not forget about bubbles and warping. If you don’t exercise caution during application or use an excessive amount of glue, you might find yourself facing a crafting nightmare – bubbly or warped photos. The horror.
Now, here’s a crucial nugget of information: Mod Podge is not archival quality. What does that mean exactly? Well, over time, the glue may deteriorate and cause damage to your photos. Imagine your cherished memories cracking or peeling away; it sends shivers down your spine.
There are ways to minimize these potential effects. By applying Mod Podge in thin, even layers and ensuring each layer dries completely before adding another, you can avoid issues like cloudiness or bubbling. A sigh of relief.
However, if long-term preservation is a top priority (and it should be.), there are alternative products available specifically designed for protecting and adhering photos without causing damage. These magical potions are often acid-free and archival quality, guaranteeing that your precious memories remain in pristine condition for years to come.
Before embarking on your Mod Podge adventure, consider using a test print or duplicate copy instead of risking damage to an original or valuable photograph. After all, your memories deserve the utmost care and respect.
Testing Mod Podge Before Use
Get ready to embark on a journey through the enchanting world of Mod Podge and discover how to preserve your cherished memories. Today, we’ll unveil the secrets to a successful Mod Podge experience by conducting a simple test that ensures your photos remain intact and unspoiled. So, let’s dive in and unlock the wonders of this magical adhesive.
Step 1: Handpick the Perfect Test Surface
Begin your adventure by selecting a scrap piece of paper or a similar material that closely resembles the photo you intend to use. This carefully chosen surface will serve as your guide, revealing how Mod Podge interacts with the materials you’re working with.
Step 2: Unleash the Power of Mod Podge
Equip yourself with a brush or sponge applicator and gently apply a thin, even layer of Mod Podge to the test surface. Allow your creativity to flow as you cover every inch, mimicking the precise application process you’ll use for your actual project.
Step 3: Patience is a Virtue
In this magical realm, patience is key. Allow the Mod Podge to dry completely. This tranquil waiting period enables you to observe how the adhesive transforms, ensuring it won’t alter the appearance of your photo or create any undesirable effects.
Step 4: A Meticulous Inspection
Once tranquility has settled and drying is complete, embark on an inspection adventure. Carefully scrutinize the test surface for any changes in color, texture, or clarity. Watch for signs of yellowing, wrinkling, or bubbling – these are clues that may reveal an adverse reaction.
Step 5: Deciphering the Test Results
Behold. If your test surface remains unblemished, congratulations are in order. It’s a sign that you can confidently proceed with using Mod Podge on your desired project. However, if unwanted effects or alterations tarnish the photo’s appearance, it’s time to explore alternative methods of adhering photos to surfaces.
Step 6: Embrace Diversity in Mod Podge
Remember, within this enchanted realm, different types of Mod Podge hold unique powers. Unleash the full potential of your craft by testing each variation individually. This allows you to uncover the perfect fit for your project – a match made in crafting heaven.
Step 7: Conjuring with the Elements
In this mystical realm, environmental factors can influence the behavior and drying process of Mod Podge. As you conduct your test, be mindful of the temperature and humidity swirling around you, for they may impact the final outcome of your enchanting creation.
Additional Tips and Techniques for Using Mod Podge on Photos
Mod Podge is an incredibly versatile adhesive and sealer that can be used to preserve and protect your precious photos. Whether you’re creating a photo collage, scrapbook page, or personalized gift, Mod Podge can help bring your memories to life. In this guide, we will explore some additional tips and techniques to help you achieve the best results when using Mod Podge on photos.
Prepare the Surface
Before applying Mod Podge, it’s crucial to ensure that the surface of your photo is clean and free from dust and dirt. Use a soft cloth or a microfiber cloth to gently wipe the surface, ensuring that no particles remain. This step is essential for achieving a smooth and flawless finish.
Experiment with Different Finishes
Mod Podge comes in various finishes, including glossy and matte. Don’t be afraid to experiment with different finishes to achieve different effects on your photos. A glossy finish will give your photo a shiny and polished look, perfect for vibrant and colorful images. On the other hand, a matte finish will provide a more subtle and muted appearance, ideal for vintage or artistic projects.
Apply Thin, Even Layers
When applying Mod Podge to your photos, it’s important to use thin, even layers to avoid streaks or clumps. Use a foam brush or a soft bristle brush for smooth application, ensuring that the Mod Podge is evenly distributed across the surface. If air bubbles appear during application, gently tap them with your brush or use a pin to pop them.
Allow Each Layer to Dry Completely
After applying each layer of Mod Podge, allow it to dry completely before applying the next one. Patience is key in this step, as rushing the process can lead to bubbling or peeling. To ensure proper bonding between layers, it’s recommended to wait at least 15-20 minutes before applying the next layer.
Add Embellishments After Drying
If you’re looking to add extra flair and personality to your photos, consider incorporating embellishments or decorations. However, it’s important to apply these after the Mod Podge has dried completely. Use a small amount of Mod Podge as an adhesive for these decorations, whether it’s glitter, sequins, or other craft materials. Apply the Mod Podge directly onto the photo or onto the back of the embellishment, ensuring secure attachment.
Conclusion
Yes, you can absolutely put Mod Podge over photos.
It’s a fantastic way to preserve and protect your cherished memories. Mod Podge is a versatile crafting medium that acts as both an adhesive and a sealant.
By applying a thin layer of Mod Podge over your photos, you create a protective barrier that helps prevent fading, yellowing, and damage from moisture or dust. Plus, it adds a glossy finish that enhances the colors and gives your photos a professional look.
Whether you’re creating personalized gifts, scrapbooking, or decorating various surfaces with your favorite snapshots, Mod Podge is the perfect solution.