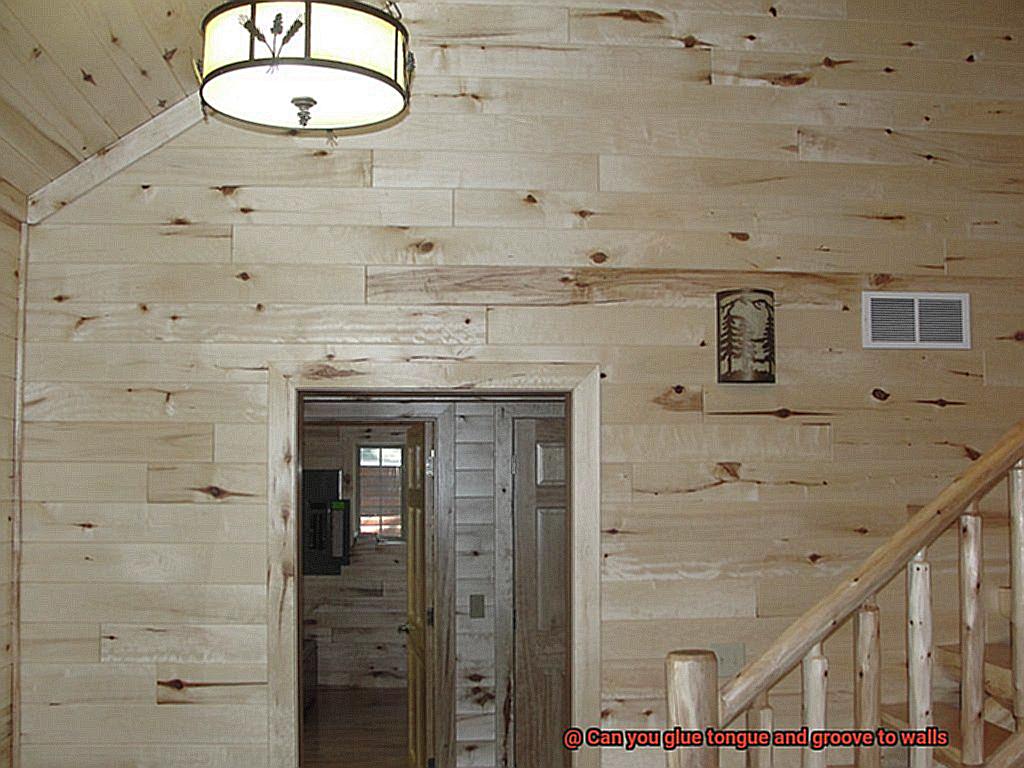
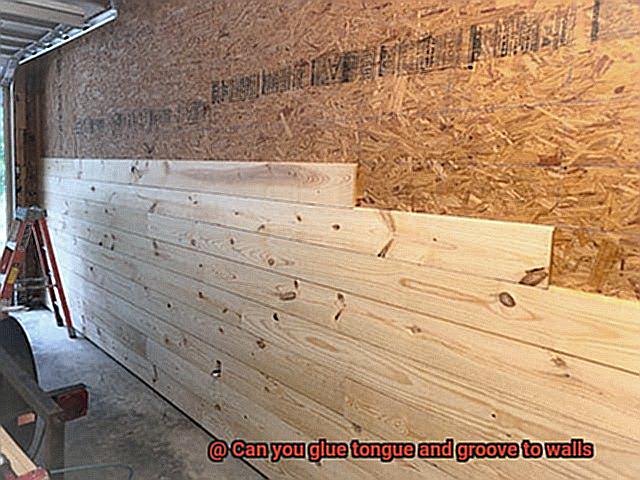
Looking to transform your walls into a stunning work of art? Tongue and groove paneling might just be the answer you’ve been searching for. Whether you’re dreaming of a cozy cottage vibe or a modern rustic retreat, this DIY project has got you covered. But here’s the million-dollar question: can you glue tongue and groove to walls instead of going all Thor with nails or staples? Well, my friend, grab your tool belt and get ready for an adventure because we’re about to explore the ins and outs of gluing tongue and groove paneling. Get ready to unlock the secrets behind this jaw-dropping wall treatment that will have your friends begging for design advice. Let’s dive in and discover why glue might just be the unsung hero of your next home makeover.
Advantages of Gluing Tongue and Groove to Walls
Contents
- 1 Advantages of Gluing Tongue and Groove to Walls
- 2 Factors to Consider Before Gluing Tongue and Groove to Walls
- 3 Types of Wood Suitable for Gluing Tongue and Groove to Walls
- 4 Preparing the Wall Surface for Glued Installation
- 5 Choosing the Right Adhesive for Gluing Tongue and Groove to Walls
- 6 Applying the Adhesive Evenly on Both Surfaces
- 7 Fitting the Boards Together and Pressing Firmly
- 8 Allowing Sufficient Drying Time After Gluing
- 9 Conclusion
Tongue and groove installation is a popular choice for wood paneling or flooring, providing a secure fit and a timeless aesthetic. While traditional methods involve the use of nails or screws, gluing tongue and groove to walls offers several advantages that can enhance both the appearance and functionality of your installation. In this blog post, we will explore the benefits of gluing tongue and groove boards to walls, including seamless aesthetics, noise reduction, increased stability, enhanced moisture resistance, convenience in installation, and ease of repair or replacement.
Seamless Aesthetics:
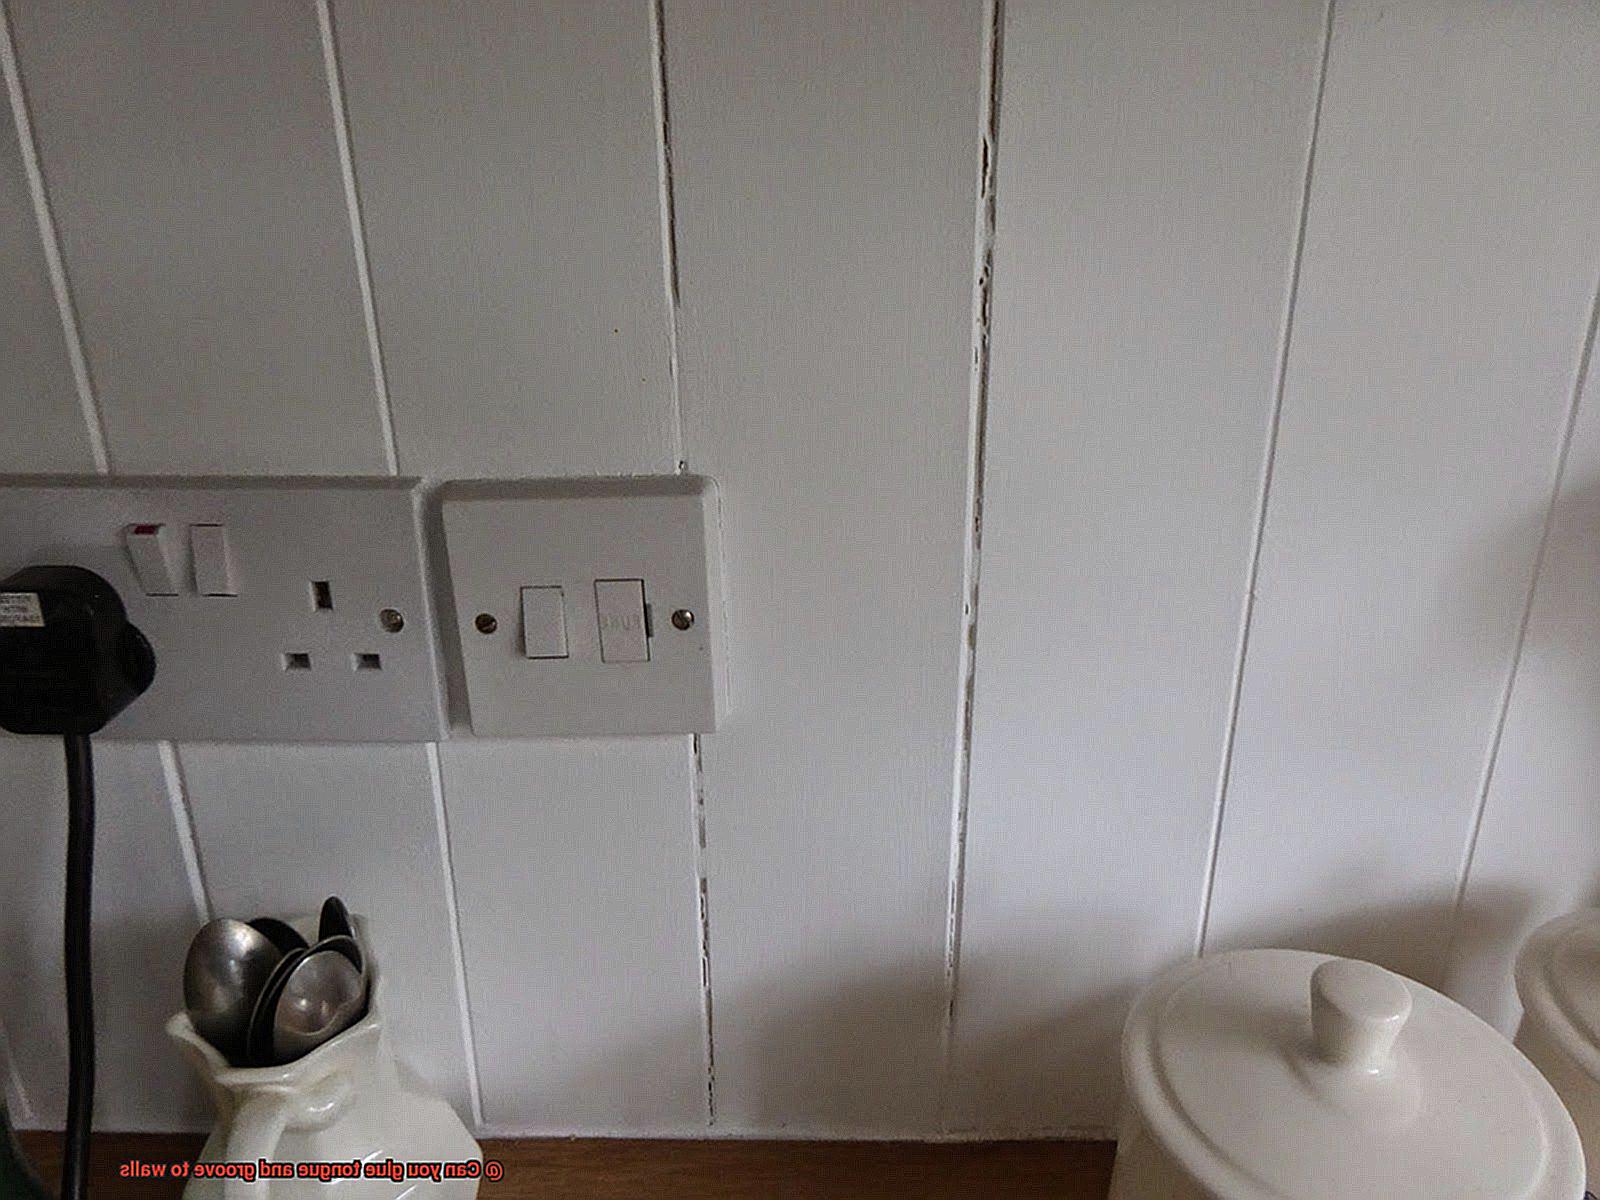
- Gluing tongue and groove boards eliminates visible fasteners for a sleek and seamless appearance.
- Enhances the overall aesthetic appeal of your installation.
Noise Reduction:
- The adhesive acts as a barrier between the boards and the wall, reducing noise transmission and minimizing vibrations.
- Particularly advantageous in bedrooms, home offices, or recording studios where noise reduction is desired.
Increased Stability:
- Gluing tongue and groove boards creates a stronger bond that minimizes movement over time.
- Prevents gaps between the boards and reduces the risk of warping or damage caused by changes in temperature and humidity.
Enhanced Moisture Resistance:
- Eliminates penetrations from nails or screws, providing an additional layer of protection against moisture infiltration.
- Ideal for areas prone to high humidity or potential water exposure, such as bathrooms or kitchens.
Convenience in Installation:
- Simplifies the installation process, saving time and effort.
- Faster and more efficient installation, especially for larger areas.
Ease of Repair or Replacement:
- Allows for easy removal and replacement of individual boards if needed.
- Repairs or replacements are quicker and less time-consuming compared to traditional methods.
Factors to Consider Before Gluing Tongue and Groove to Walls
Transforming your walls into a work of art with tongue and groove boards is an exciting DIY project. However, before you dive in, there are several crucial factors to consider to ensure a successful installation that stands the test of time.
First and foremost, consider the type of tongue and groove you have. Whether it’s wood, PVC, or laminate, each material has its own unique properties. Selecting the right adhesive for a strong and durable bond is essential. For example, wood tongue and groove may require a construction adhesive specifically designed for wood bonding.
Don’t overlook the importance of surface preparation. Clean, dry walls free from dust or contaminants are essential. Lightly sanding the walls creates a rough surface that promotes better adhesion. Repair any imperfections or unevenness before applying the adhesive.
Choosing the right adhesive is vital. Read the manufacturer’s recommendations and select an adhesive compatible with both the tongue and groove material and the wall surface. This ensures a long-lasting bond that can withstand any climate conditions.
Speaking of climate conditions, they can affect adhesive performance. Extreme temperatures or high humidity levels require an adhesive suitable for your specific climate to prevent future issues.
Expansion and contraction are important factors. Tongue and groove installations experience movement due to temperature and humidity changes. To accommodate this, allow for expansion gaps during installation. Additionally, use an adhesive with flexibility to prevent buckling or separation over time.
Proper application technique is crucial. Follow manufacturer’s instructions on applying the adhesive for a strong bond. Apply it evenly on both the tongue and groove and the wall surface using a notched trowel or suitable applicator.
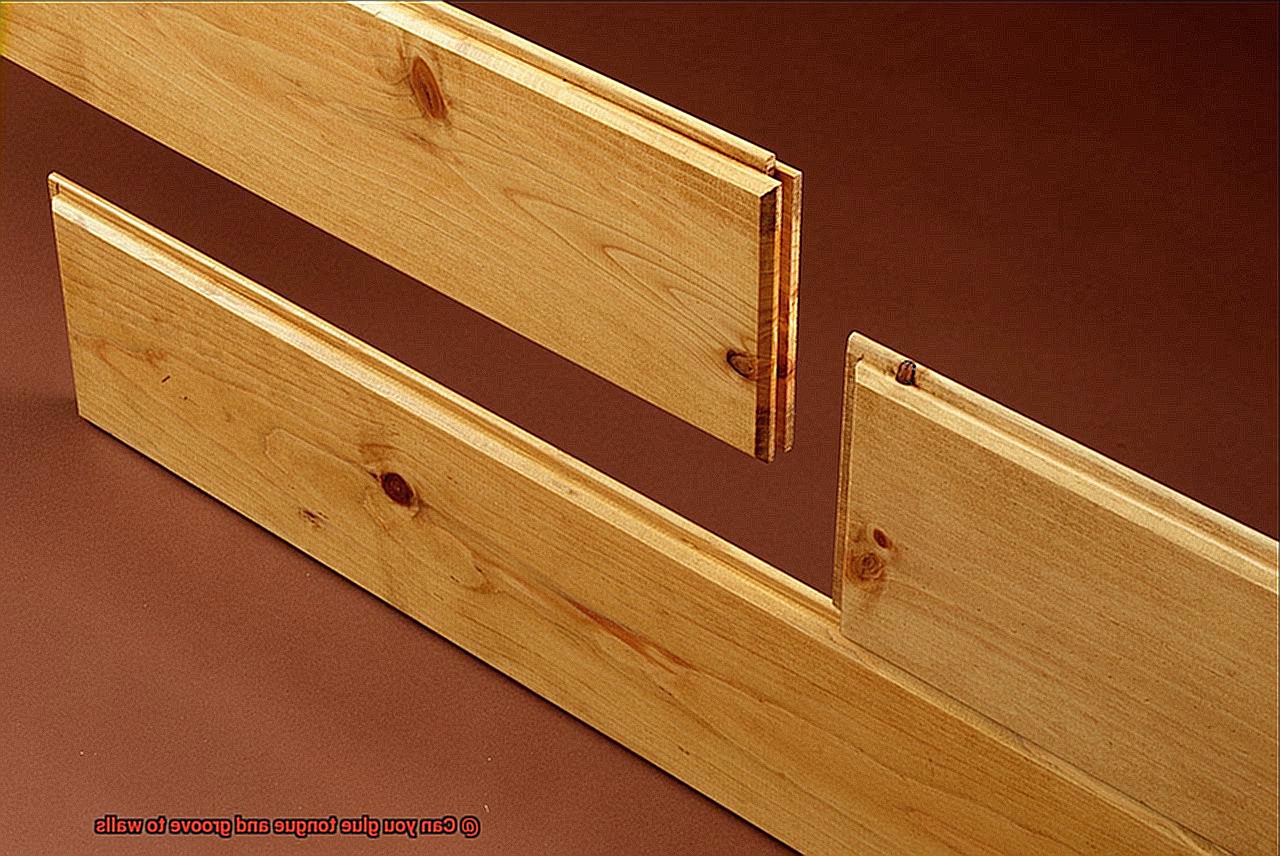
Types of Wood Suitable for Gluing Tongue and Groove to Walls
Selecting the right type of wood is crucial for a strong and durable bond when gluing tongue and groove to walls. In this article, we will explore five types of wood suitable for this purpose. Each wood type offers unique characteristics, durability, and aesthetic appeal. Let’s dive in.
Pine – Affordable and Easy to Work With:
Pine is a popular choice due to its affordability and availability. Its softness makes it easy to work with and glue. With good adhesive properties, pine allows the glue to penetrate the wood fibers, creating a robust bond. However, be aware that pine is susceptible to dents and scratches, making it less suitable for high-traffic areas.
Cedar – Resistant to Decay and Insect Damage:
Cedar is an excellent option for gluing tongue and groove to walls. Its natural oils act as preservatives, making it resistant to decay and insect damage. Cedar’s stability ensures a tight bond between the joints, even with humidity changes. The beautiful grain patterns of cedar add elegance to any space.
Oak – Strength and Durability:
Oak is a hardwood known for its strength and durability. It has excellent adhesive properties, ideal for gluing tongue and groove to walls. Resisting warping and twisting, oak ensures a tight fit between the joints. Its wear resistance makes it suitable for both high-traffic areas and spaces prone to moisture.
Maple – Dense Hardwood with a Smooth Finish:
Maple is a dense hardwood that offers stability and strength. Its close-grained texture allows for a smooth surface finish when gluing tongue and groove boards to walls. With good adhesive properties, maple ensures a strong bond between the joints. Keep in mind that maple can be relatively expensive compared to other woods.
Mahogany – Beauty and Durability:
Mahogany is a luxurious wood known for its beauty and durability. Its rich color and straight grain pattern make it visually appealing for tongue and groove applications. Mahogany is resistant to rot and decay, suitable for high moisture areas. However, it can be pricey and may require special care during installation.
Preparing the Wall Surface for Glued Installation
To ensure a flawless and long-lasting installation, it is crucial to properly prepare the wall surface. In this comprehensive guide, we will take you through each step of the process, from surface preparation to adhesive selection, application techniques, and safety measures. Let’s dive in.
Surface Preparation:
- Strip away any old wallpaper, paint, or coverings using a scraper or sandpaper.
- Inspect the surface for cracks, holes, or unevenness and fill them with a suitable filler.
- Smooth out imperfections with finesse using a putty knife.
- Gently sand the entire wall surface to create a subtly rough texture for optimal adhesive bonding.
- Bid farewell to dust and debris by wiping down the wall after sanding.
Adhesive Selection:
- Choose an adhesive designed specifically for wood-to-wall applications.
- Consider important factors such as drying time, bond strength, and compatibility with tongue and groove panels.
Application Techniques:
- Follow the manufacturer’s instructions diligently for mixing and applying the adhesive.
- Apply the adhesive evenly on the back of each panel using either a notched trowel or a roller.
- Exert firm pressure when pressing the panel against the wall, ensuring precise alignment with the marked layout.
Safety Measures:
- Work in a well-ventilated area to evade inhaling fumes from the adhesive.
- Protect your hands and eyes by wearing gloves and goggles to prevent any contact with the adhesive.
- Adhere to proper storage and disposal guidelines for the adhesive.
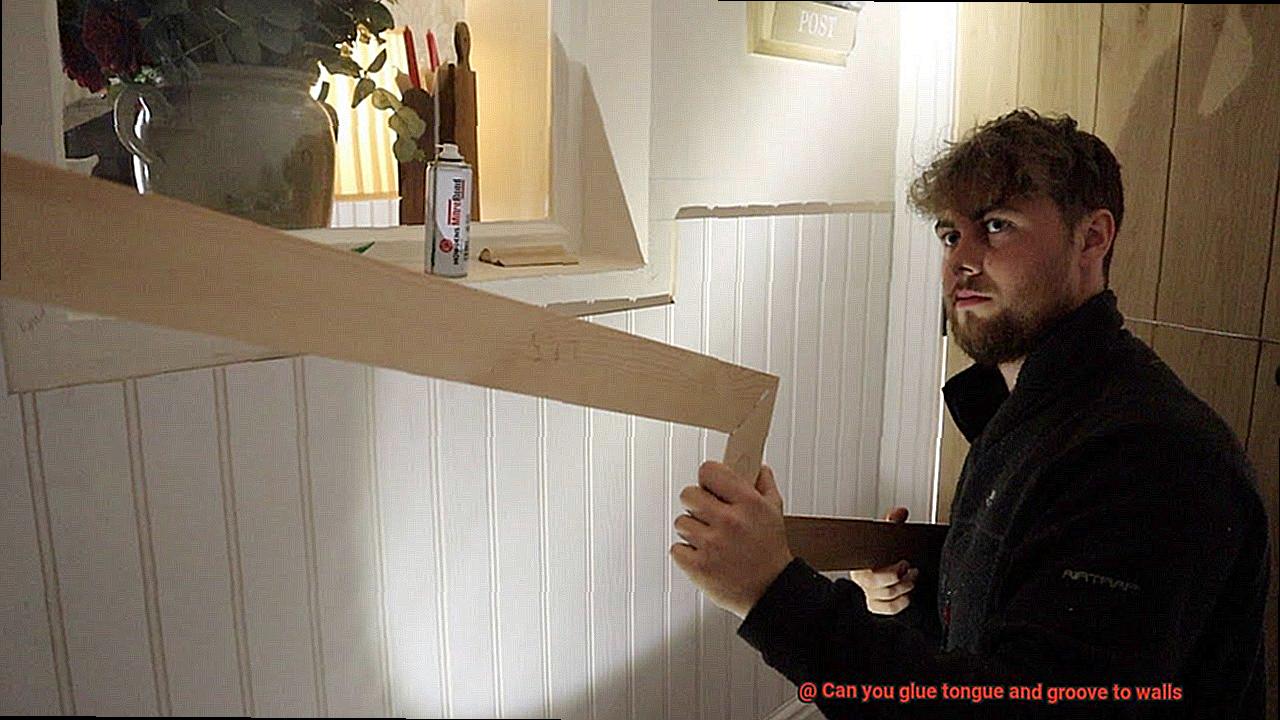
Choosing the Right Adhesive for Gluing Tongue and Groove to Walls
Choosing the perfect adhesive for gluing tongue and groove to walls is like finding the missing puzzle piece to complete a beautiful picture. It’s a crucial decision that can make or break your installation. But fret not, my friend. With our expert advice, you’ll be able to choose the right adhesive with confidence.
First and foremost, consider the material compatibility. Different tongue and groove materials require different adhesives. For wood panels, opt for wood glue or polyurethane-based adhesives formulated specifically for bonding wood. If you’re dealing with multiple materials like wood, drywall, and concrete, go for the versatile construction adhesives that can bond them all.
Next, prepare the wall surface like a warrior preparing for battle. Clean it thoroughly to remove any dust, grease, or debris. A pristine surface ensures a strong bond that will withstand the test of time.
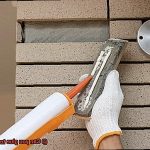
Now, it’s time to apply the adhesive with finesse. Follow the manufacturer’s instructions diligently. Spread an even layer of adhesive on the wall surface using a notched trowel or apply it directly onto the back of each tongue and groove panel. This step requires precision and attention to detail.
Patience is a virtue when it comes to curing time. Some adhesives need time to dry and set before you can install the tongue and groove panels. Don’t rush this step; give it the time it needs to ensure a bond that will hold strong for years.
When in doubt, seek expert advice. Consult professionals or seasoned carpenters who can provide valuable insights based on their experience and knowledge. They’ll guide you towards the perfect adhesive for your specific project.
Remember, while adhesives provide a solid bond, additional mechanical fasteners like nails or screws might be necessary for added stability and strength. They’re like backup dancers supporting the star performance of your tongue and groove panels.
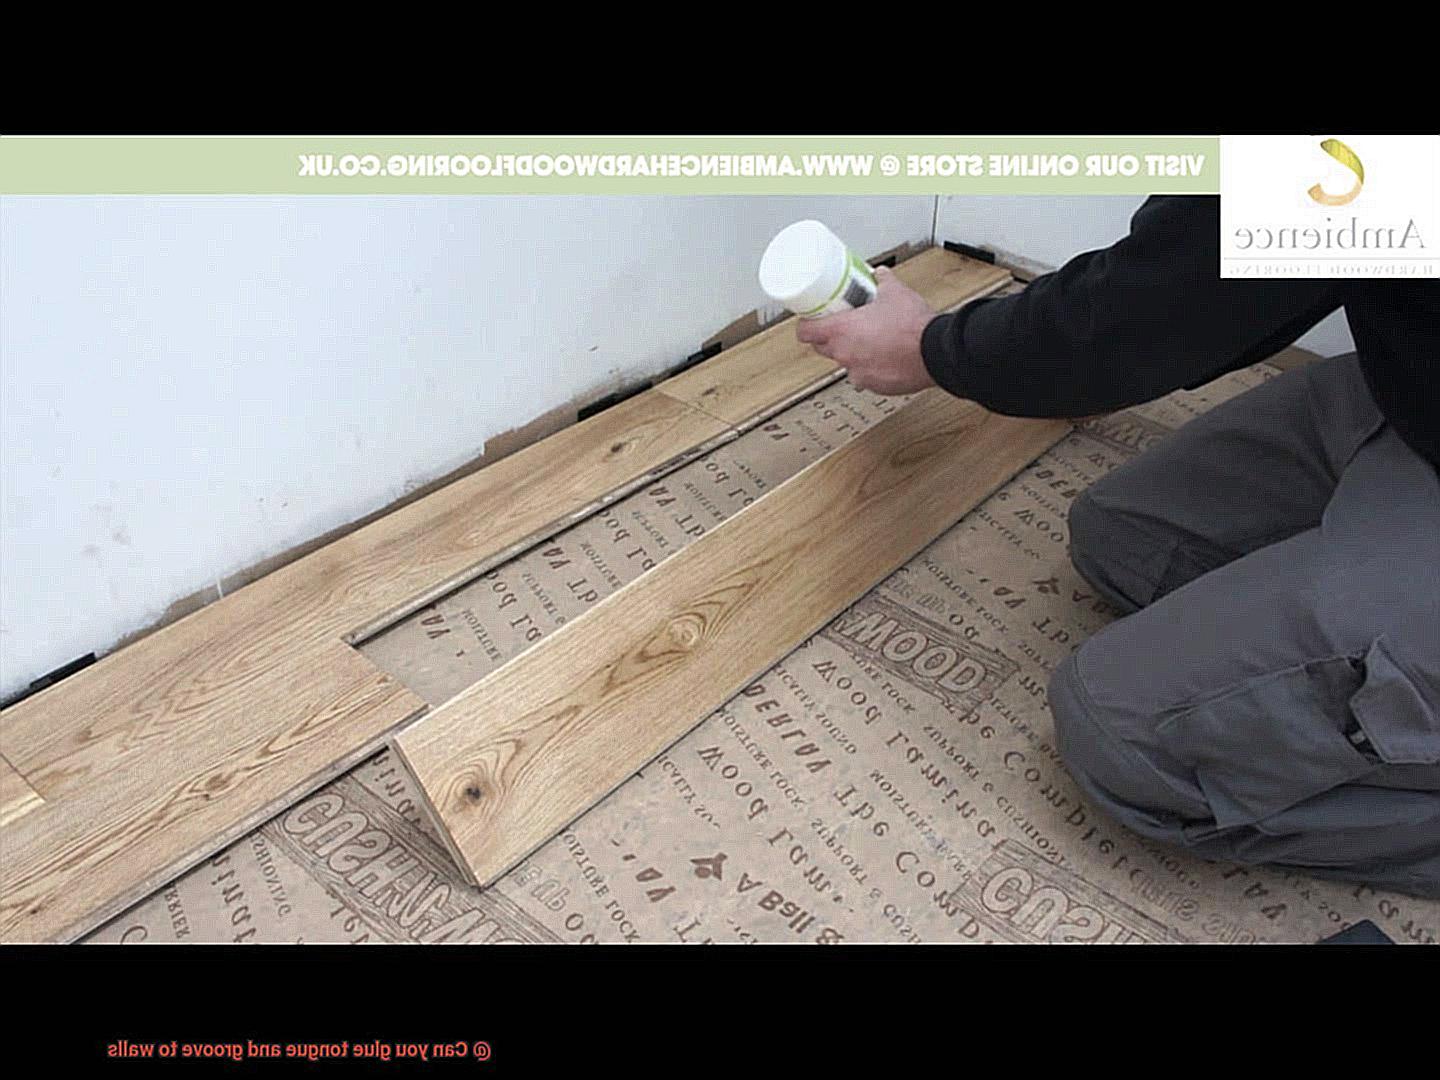
Applying the Adhesive Evenly on Both Surfaces
Applying the Adhesive Evenly on Both Surfaces: Achieving Perfection in Gluing Tongue and Groove Boards to Walls
Welcome, fellow DIY enthusiasts. Prepare yourself for a journey into the mesmerizing world of adhesives, where we will uncover the secrets to applying them flawlessly on both surfaces. Today, our focus will be on gluing tongue and groove boards to walls. So, grab your tools and let’s dive right in.
Step 1: Cleanliness is Paramount
Before embarking on the adhesive adventure, take a moment to ensure that the tongue and groove edges of your boards are pristine. Banish every speck of dust, dirt, or lingering adhesive residue from their surfaces. Arm yourself with a clean cloth or an indomitable brush, and give those edges a thorough cleansing. No room for debris here.
Step 2: Choose Your Adhesive Intelligently
Now that your boards are gleaming with cleanliness, it’s time to select the adhesive that will be your trusty companion in this bonding endeavor. An array of options awaits you – construction adhesive, wood glue, and more. But choose wisely. Pick an adhesive specifically designed for wood-to-wall bonding, one that promises strength and durability. Don’t settle for anything less.
Step 3: Test the Waters
Before diving headfirst into gluing your entire wall, heed this sage advice: test, test, test. Choose a small section to conduct a trial run. This preliminary step will unveil any compatibility issues or adjustments that need to be made before committing to the full installation. Trust us, this little extra effort can save you from potential headaches down the road.
Step 4: Evenness is the Key
Now comes the grand moment – the application of the adhesive evenly on both surfaces. Equip yourself with a trusty putty knife or a versatile trowel (depending on the scale of your project), and commence the masterpiece. Begin by spreading a thin, even layer of adhesive onto the tongue edge of your board. Make sure to caress every inch, leaving no spot untouched.
Proceed to the corresponding wall surface with grace and poise. Apply another delicately thin layer of adhesive, ensuring an even distribution across the entire area. But wait, there’s more. For those seeking perfection, venture into the realm of notched trowels. With this ingenious tool, create mesmerizing ridges in the adhesive. These ridges will forge a stronger bond between the board and the wall. Prepare to be amazed.
Step 5: Fit and Press, Like a Maestro
With both surfaces adorned with an even coat of adhesive, it’s time for the pièce de résistance – fitting and pressing. Gently align the tongue and groove edges of your boards, as if they were long-lost lovers yearning for reunion. Take a moment to ensure that they fit snugly and are aligned correctly before applying any pressure. Precision is key.
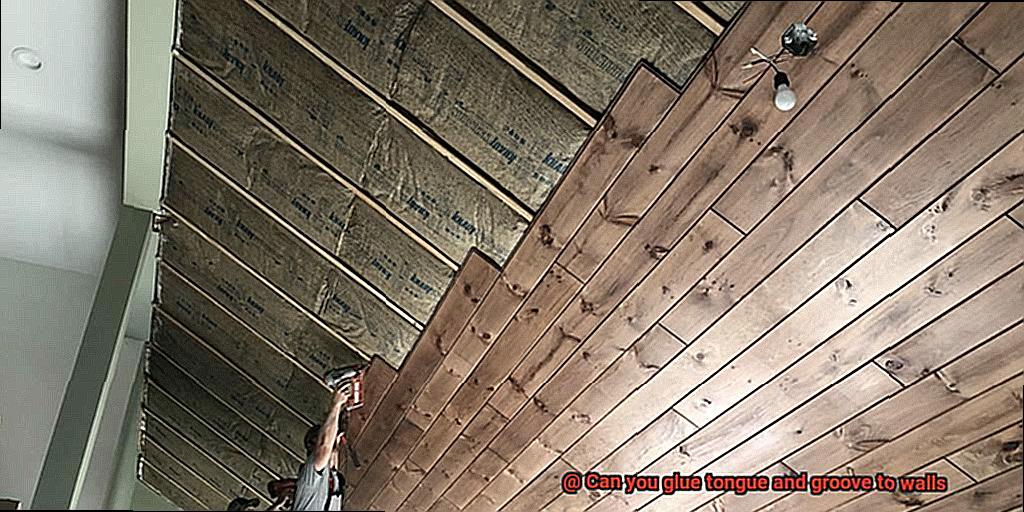
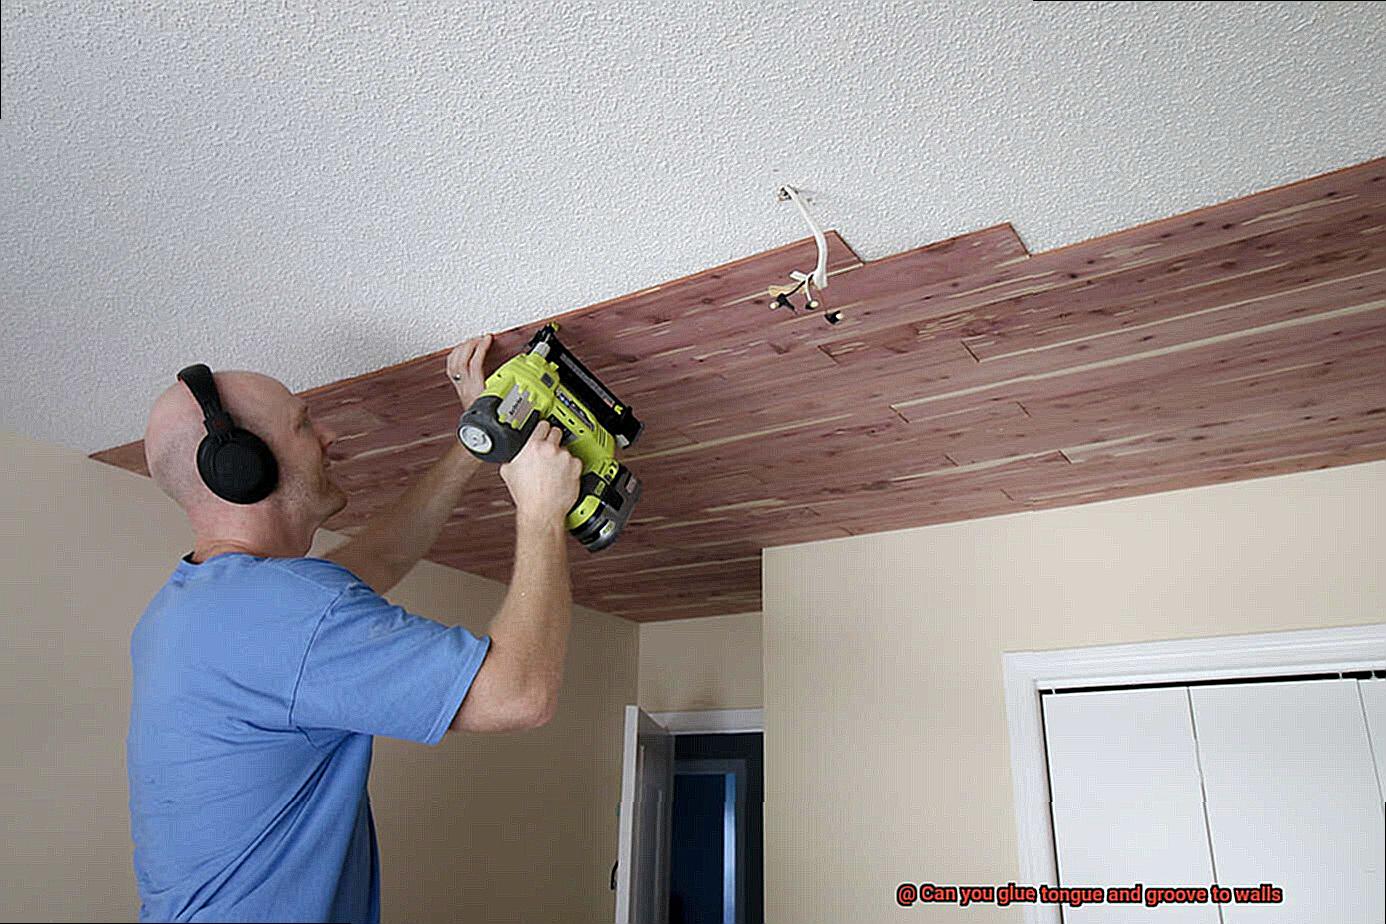
Fitting the Boards Together and Pressing Firmly
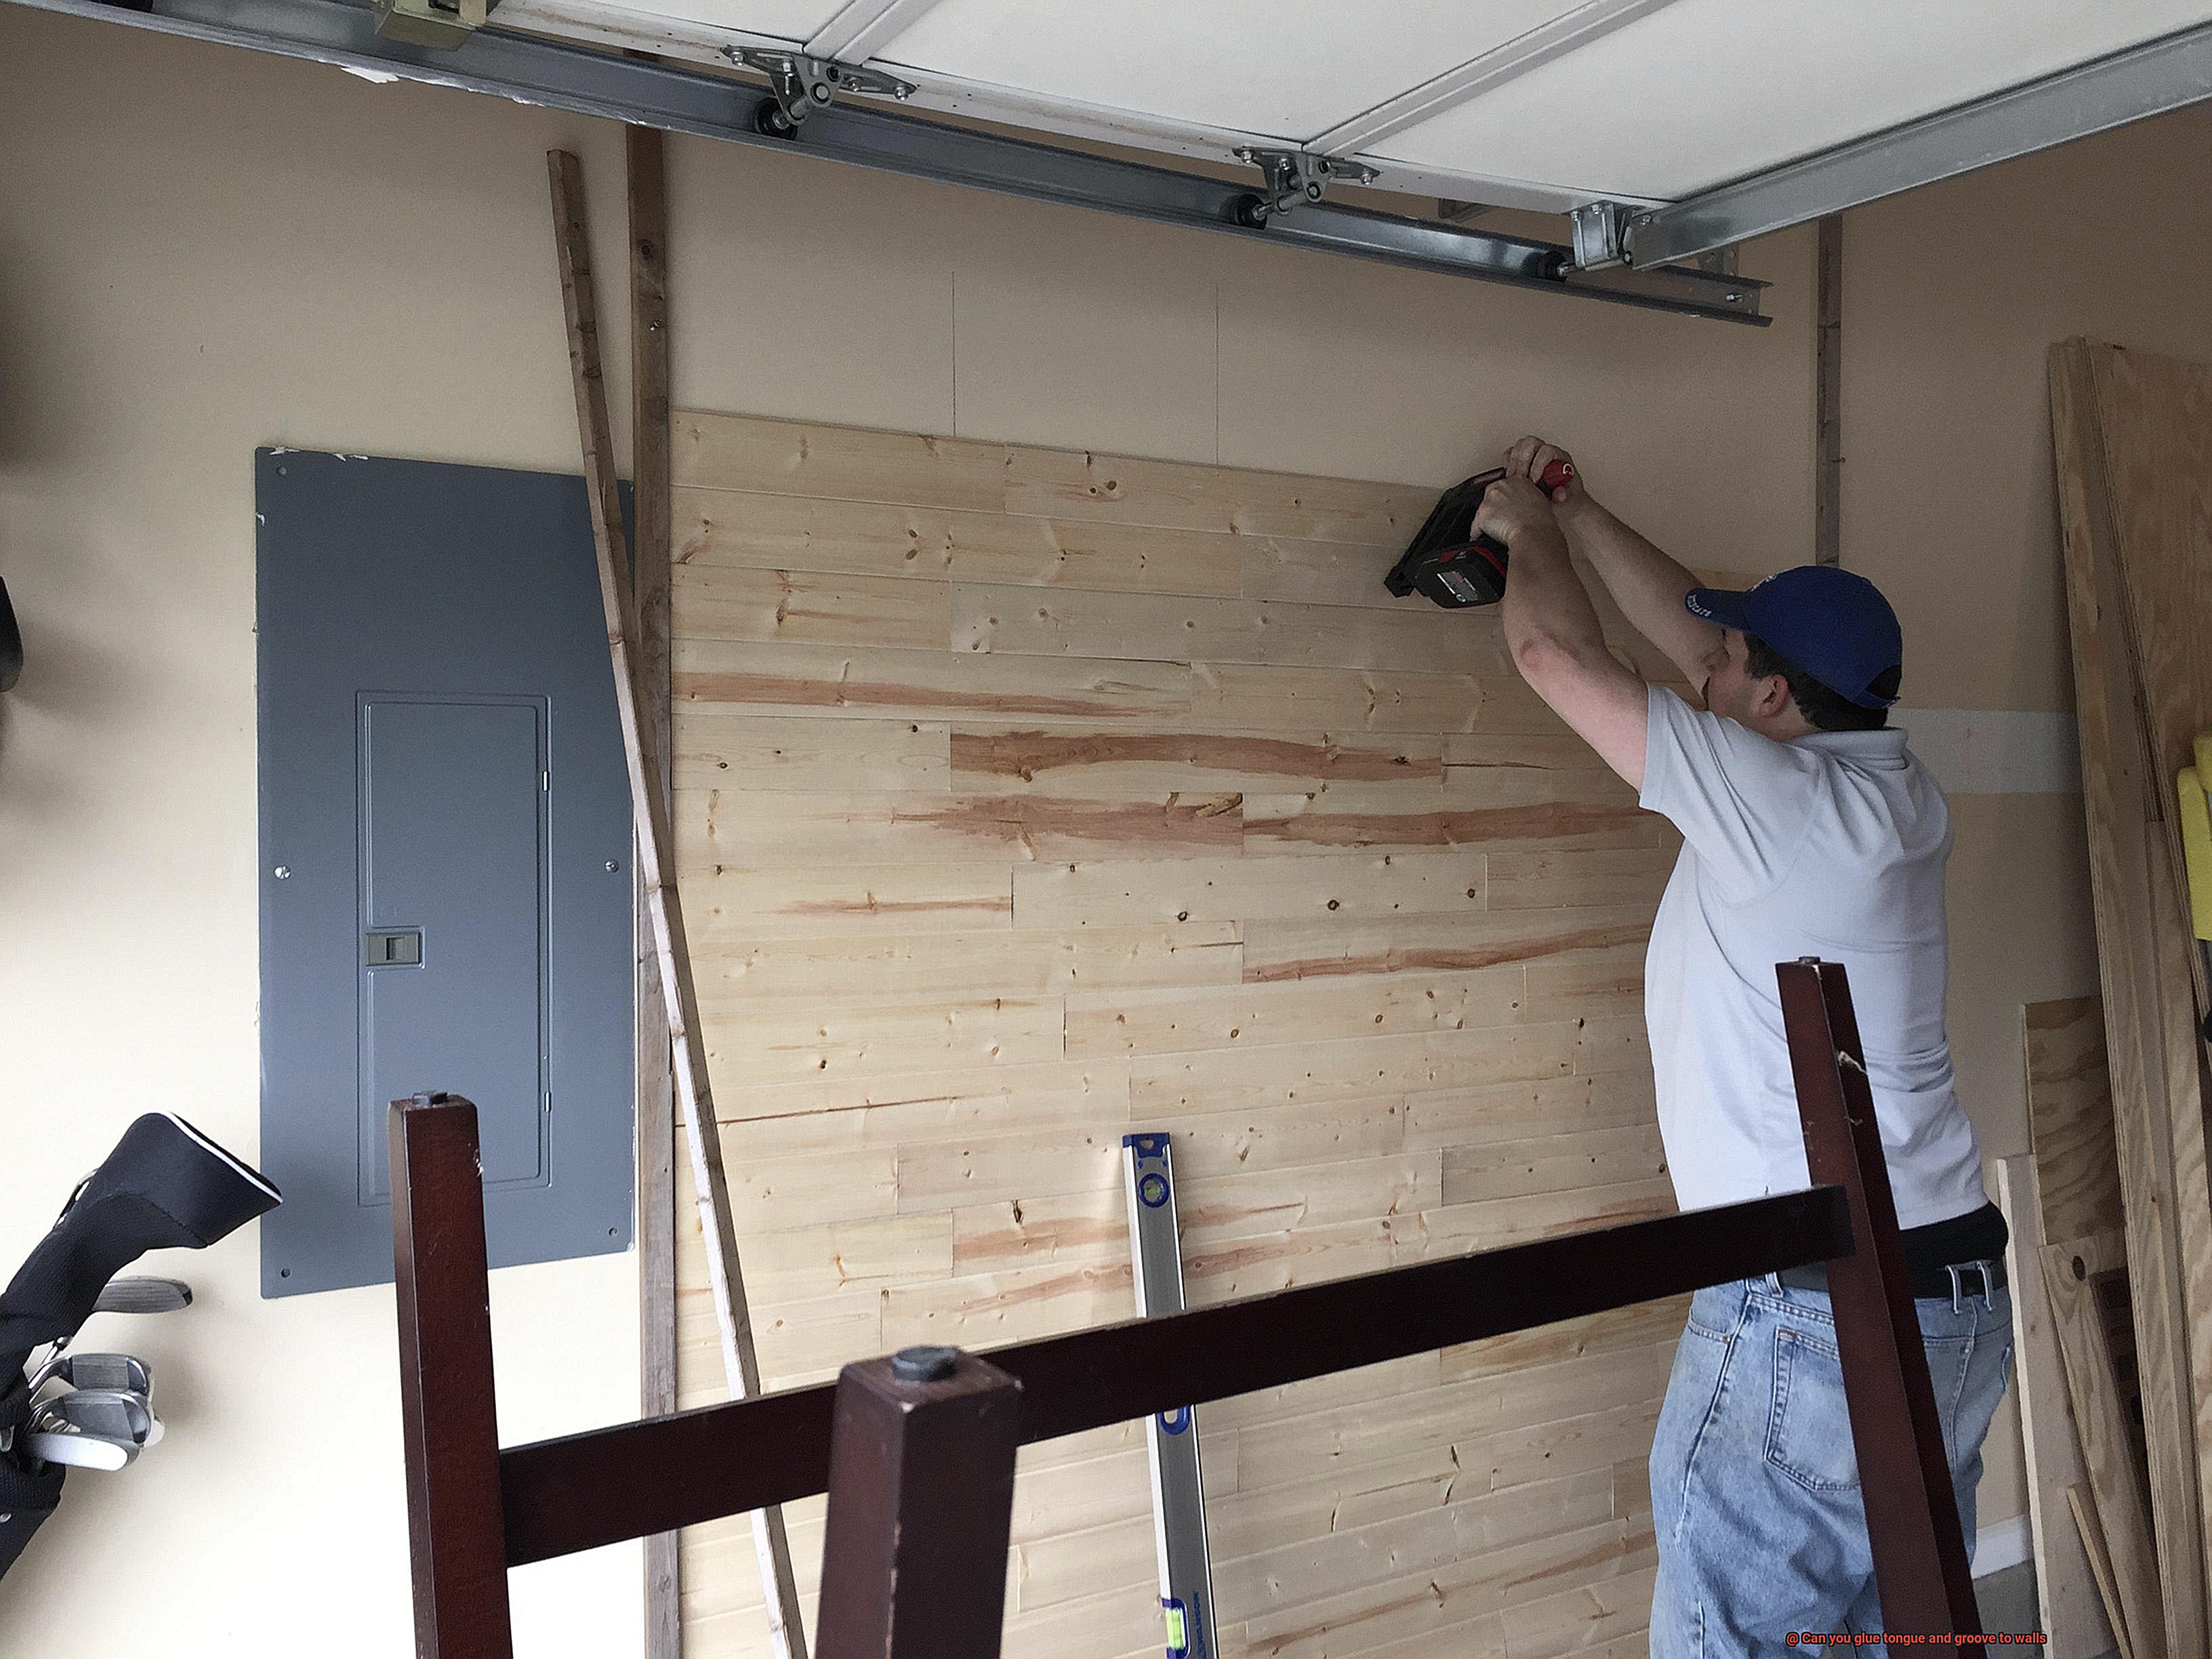
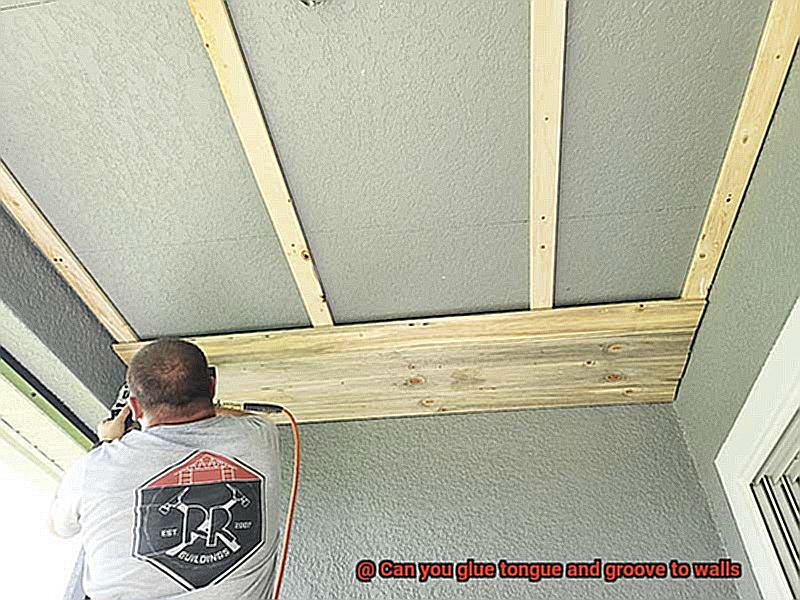
Fitting tongue and groove boards together and pressing them firmly is a crucial step in achieving a professional and secure wall installation. Here’s how to do it right:
- Choose the right adhesive: Select a high-quality wood glue specifically designed for tongue and groove applications. This type of glue ensures a strong and durable bond that will stand the test of time.
- Measure and cut with precision: Carefully measure and cut your boards to the desired length, leaving a little extra room for adjustments. Use a saw or miter saw for clean and precise cuts, as a tight fit is essential.
- Fit the boards together: Insert the tongue of one board into the groove of another, making sure they align perfectly without any gaps. Gently tap the boards with a rubber mallet or block of wood to help them slide into place. This ensures a snug fit that prevents unsightly gaps.
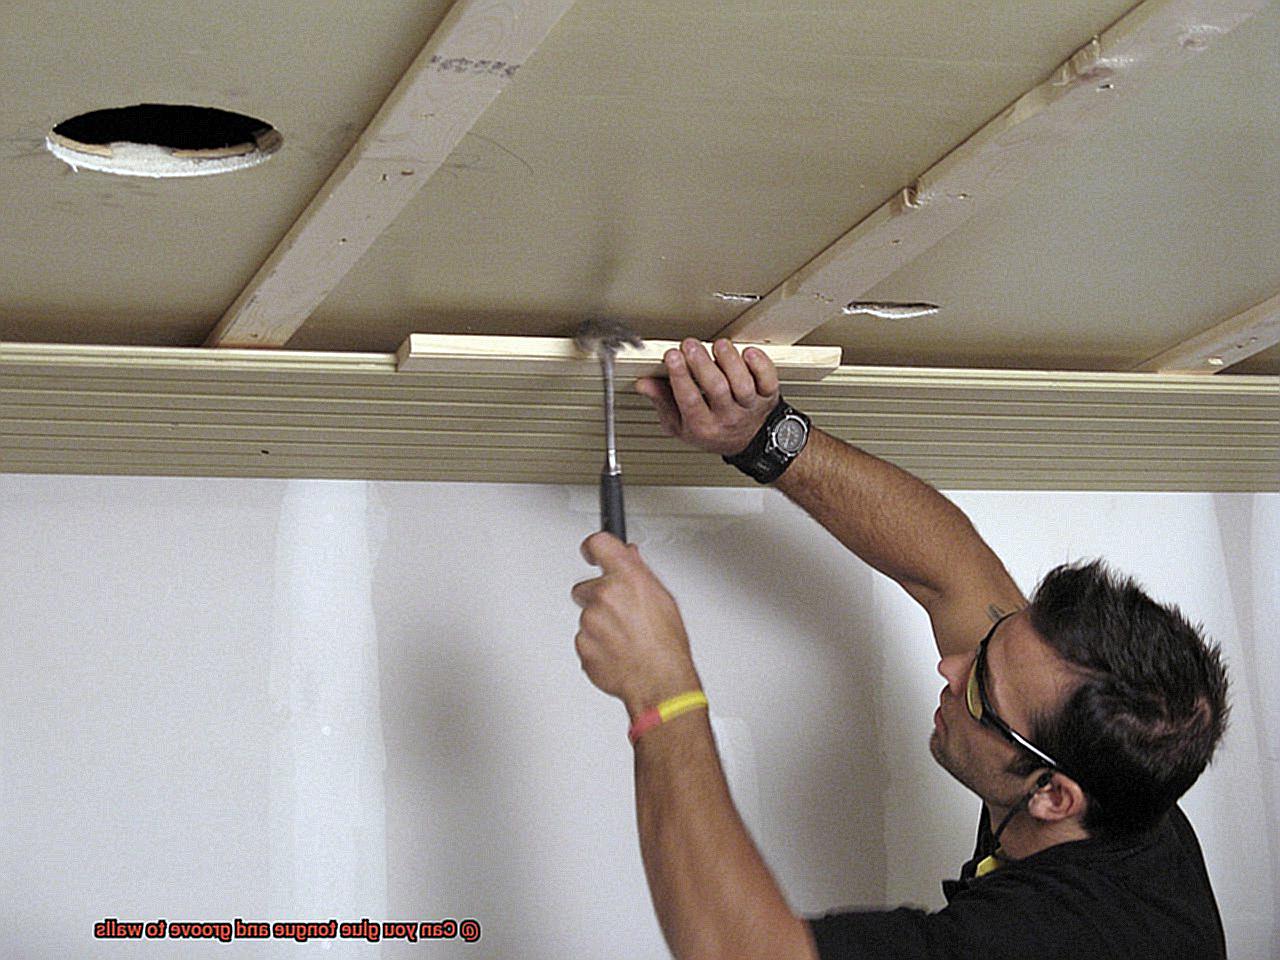
- Press firmly against the wall: Apply even pressure to hold the boards in place while the glue dries. There are three methods you can use:
- Clamps: If you have clamps, attach them to the outer edges of the boards. The clamps provide even pressure and hold the boards securely.
- Weights: If clamps aren’t available, use heavy objects like books or bricks placed evenly on top of the boards. This distributes weight and exerts pressure.
- Manual pressure: Apply pressure manually by pushing against the boards with your hands or using a large flat surface like plywood to press them against the wall. Ensure even pressure across the entire surface.
- Allow proper drying time: Resist the temptation to peek. Leave the pressed boards undisturbed for the recommended drying time specified by the glue manufacturer. This ensures a strong and secure bond.
Allowing Sufficient Drying Time After Gluing
Today, we embark on a journey into the adhesive realm, exploring the crucial step of allowing sufficient drying time after gluing tongue and groove to walls. If you crave a flawless and long-lasting installation, join us as we unveil the secrets to a successful project.
The Importance of Drying Time:
Forming a Mighty Bond: Allowing ample drying time ensures the formation of a robust and enduring bond between the wood and wall surface. This bond is the backbone of your walls, withstanding the daily wear and tear they’ll encounter.
Factors Influencing Drying Time:
- The Glue’s Personality: Different glues have distinct drying times, making it crucial to follow the manufacturer’s instructions for your specific adhesive. Think of these instructions as your trusty GPS, guiding you through this adhesive expedition.
- Nature’s Influence: Mother Nature also plays a role. Higher humidity levels and colder temperatures can slow down the drying process, while drier conditions expedite it. Keep an eye on the weather forecast as you embark on your glue-drying adventure.
Tips for Optimal Drying:
- Embrace the Breeze: Proper ventilation is key, expediting drying by allowing moisture to escape. Crack open those windows, unleash the power of fans, and let the air dance around your glued masterpiece.
- Gentle Care Required: Treat your glued area like a delicate flower in need of nurturing. Avoid placing heavy objects or applying force during drying. Remember, patience is your ally here.
- Shield from Moisture: Water is not your glue’s best friend during drying time. Protect the glued surface from moisture exposure using plastic sheets or waterproofing agents if necessary.
Determining Dryness:
The Knock Test: Give your glued area a gentle tap or knock with your knuckles. A hollow sound signals proper drying, a testament to your adhesive prowess. If you hear a dull thud or feel movement, a little more patience is required.
l7coiF9lK_o” >
Conclusion
To sum up, gluing tongue and groove to walls is a game-changer when it comes to installation. The perks are endless: a seamless look that will leave you in awe, noise reduction that will make your space serene, stability that will stand the test of time, moisture resistance that puts worries at bay, installation made easy for your convenience, and repairs or replacements that won’t give you a headache.
But before you start gluing those boards to your walls, there are some crucial factors to consider. The type of tongue and groove material matters. Pine, cedar, oak, maple, or mahogany? Each brings its own unique charm in terms of affordability, durability, beauty, and resistance against decay or moisture.
Prepping your wall surface is key to achieving perfection. Say goodbye to old wallpaper or paint. Smooth out imperfections and unevenness. Give those walls a gentle sanding for optimal adhesion. And don’t forget – cleanliness is next to godliness. Make sure the surface is free from dust and other pesky contaminants.
Choosing the right adhesive is like finding your soulmate – it’s crucial for a strong bond. Take into account factors like material compatibility, drying time (because patience is a virtue), bond strength (we’re talking rock-solid here), and compatibility with both the tongue and groove material as well as the wall surface.
When applying the adhesive, attention to detail is everything. Clean those edges until they sparkle before spreading an even coat of glue. A notched trowel or putty knife can be your trusty sidekick in achieving that perfect distribution on both surfaces.
Fit those boards together tightly and press them firmly against the wall like there’s no tomorrow – because security matters. Need some extra muscle? Clamps or weights will do the trick while the glue works its magic. And remember – patience pays off. Follow the manufacturer’s instructions for drying time so you can enjoy a bond that’s as strong as Hercules.
In conclusion, gluing tongue and groove to walls is a surefire way to elevate your space both visually and functionally.