Crafted from the perfect blend of copper and zinc, you possess an unparalleled beauty and strength that has made you a beloved material for artists, craftsmen, and metal enthusiasts alike. But here’s the burning question that has left many scratching their heads: can you actually glue brass to brass?
Just imagine the possibilities if we could effortlessly fuse two brass surfaces together without resorting to complex soldering or welding techniques. Picture the seamless connection, preserving both the visual appeal and structural integrity of our brass creations. Today, my fellow inquisitive souls, we embark on a thrilling journey into the world of brass bonding to uncover the answers you crave.
In this captivating expedition, we will delve into renowned techniques, cutting-edge adhesive solutions, and dive headfirst into the science behind brass-to-brass adhesion. We’ll debunk myths, shed light on potential challenges, and offer expert guidance to ensure your endeavors in bonding brass are nothing short of triumphant.
Get ready for an adventure where we explore:
- The Feasibility Conundrum: Is bonding brass a fool’s errand or a stroke of genius? We’ll unravel the mysteries of brass composition and determine whether its chemical makeup poses a formidable challenge for traditional adhesives.
- Sticky Solutions Unveiled: Brace yourself as we uncover the leading adhesive options specifically formulated to bond brass to brass. Discover their unique strengths, limitations, and find your perfect match among these remarkable glues.
- The Power of Preparation: Prepare to be amazed as we unveil crucial steps that maximize the bonding potential of brass surfaces. These preparatory measures will ensure an unyielding adhesive bond that stands the test of time.
Fasten your seatbelts and join us on this thrilling quest to uncover the secrets of brass bonding. Together, we’ll embrace the challenge of uniting brass to brass, defying conventional methods and forging connections that last a lifetime. Let’s unlock the knowledge you need to elevate your brass creations to new heights of permanence and design excellence.
What is Brass?
Contents
- 1 What is Brass?
- 2 Types of Adhesives Suitable for Bonding Metals
- 3 Advantages of Using Epoxy Resin for Metal Bonding
- 4 Preparing the Surfaces Before Applying Epoxy Resin
- 5 How to Apply Epoxy Resin for Bonding Brass to Brass
- 6 Advantages of Using Cyanoacrylate Adhesive for Metal Bonding
- 7 Preparing the Surfaces Before Applying Cyanoacrylate Adhesive
- 8 How to Apply Cyanoacrylate Adhesive for Bonding Brass to Brass
- 9 Conclusion
Brass, an enchanting alloy that gleams with a radiant golden hue, has captivated civilizations since ancient times. From its origins in the annals of history to its widespread use in various industries today, brass remains an emblem of elegance and versatility. This enthralling guide will delve into the essence of brass – its composition, remarkable properties, and the art of bonding it together. Whether you’re a connoisseur of musical instruments, a lover of ornate decorations, or simply curious about this captivating alloy, let us embark on a journey to uncover the secrets of brass.
Composition and Resplendent Appearance:
- The Dance of Copper and Zinc: Embracing a harmonious blend, brass is primarily composed of copper and zinc. The proportions of these two elements determine the mesmerizing shades of gold that grace each brass creation.
- An Array of Possibilities: The ratio of copper to zinc can range from 60-90% copper and 10-40% zinc. To enhance specific properties like strength or machinability, additional elements such as lead, tin, aluminum, or nickel may be incorporated into the alloy.
Malleability and Endless Creativity:
- The Artistic Enigma: Brass possesses an inherent malleability that allows it to be shaped and formed into intricate designs with ease. Whether through casting, forging, or machining processes, artisans can mold this alloy into objects that embody their creative visions.
- Adornments That Inspire: With its ability to effortlessly take on various forms, brass enchants the world with its presence in musical instruments, jewelry, coins, weapons, plumbing fixtures, electrical connectors, and an array of decorative items.
The Shield Against Time’s Grasp:
- A Guardian Against Corrosion: One of brass’s most remarkable properties is its inherent corrosion resistance. The zinc content within the alloy forms an impenetrable shield against rust and other forms of corrosion, ensuring the longevity of brass creations in both indoor and outdoor environments.
- The Artistry of Aging: As time embraces brass, it undergoes a natural transformation, developing a gentle patina or tarnish. This aging process adds a touch of antiquity and character to brass objects, elevating their aesthetic appeal.
Types of Adhesives Suitable for Bonding Metals
In the realm of metal bonding, choosing the right adhesive is as crucial as wielding a mighty sword. Whether you are embarking on a grand project or seeking to repair a cherished possession, understanding the diverse types of adhesives suitable for bonding metals, particularly brass, will empower you to conquer any challenge. Prepare to be enlightened as we delve into the realm of metal bonding and uncover the secrets of six powerful adhesives.
Epoxy Adhesives: Forging Unbreakable Bonds
Behold the epitome of strength and resilience – epoxy adhesives. Comprised of a dynamic duo, a resin and a hardener, these adhesives exhibit unrivaled bonding properties. Once these components are expertly mixed, an unbreakable bond emerges, capable of withstanding scorching temperatures and repelling even the harshest chemicals. Seek not further if you desire to unite brass with brass in an unyielding embrace.
Cyanoacrylate Adhesives: Lightning-Fast Fixes
When time is of the essence and swift repairs are required, cyanoacrylate adhesives, also known as super glue, emerge as saviors. Their lightning-fast setting properties fuse metal surfaces together in an instant. However, be mindful that while super glue excels in providing immediate relief, it may not possess the endurance necessary for heavy loads or high-stress endeavors.
Polyurethane Adhesives: Flexibility Embodied
Prepare to witness the epitome of flexibility and durability – polyurethane adhesives. These versatile champions effortlessly unite various metals, including brass, while remaining resilient against incessant movement and vibrations. Be it indoor or outdoor applications, their formidable strength withstands impact and resists moisture with unwavering resolve.
Structural Adhesives: The Powerhouse Champions
When colossal metal bonding challenges arise, structural adhesives emerge as the heroic powerhouses. Brimming with strength and tenacity, acrylic or methacrylate adhesives, among others, conquer extreme conditions with ease. These indomitable warriors possess unparalleled shear and peel strength, triumphantly enduring heavy loads and relentless environments.
Silicone Adhesives: The All-Encompassing Guardians
In the face of fluctuating temperatures and unrelenting moisture, silicone adhesives stand as unwavering guardians. Their exceptional resistance to temperature variations, chemicals, and moisture renders them indispensable for sealing and bonding applications. Bid farewell to concerns about metal substrates expanding or contracting, for silicone adhesives remain steadfast in their grip.
Advantages of Using Epoxy Resin for Metal Bonding
Today, we are going to explore the incredible advantages of using epoxy resin for this purpose, particularly when it comes to bonding brass to brass. Prepare to be amazed by the power and versatility of this adhesive.
First and foremost, let’s talk about strength and durability. Epoxy resin is a force to be reckoned with when it comes to creating bonds that can withstand heavy loads and stress. Whether you’re working in an industrial setting or tackling structural repairs, epoxy resin will provide a secure and long-lasting bond that can handle anything you throw at it.
But that’s not all. Epoxy resin is also incredibly versatile. It has the ability to bond different types of metals together, including brass to brass, as well as plastics and ceramics. This makes it a go-to adhesive for a wide range of applications, giving you the flexibility to tackle any project that comes your way.
Now, let’s talk about resistance. Epoxy resin is like a superhero when it comes to withstanding chemicals, moisture, and temperature variations. It fearlessly protects your bonded joint from harsh environments and substances, ensuring that it remains intact and strong. So whether you’re dealing with chemical exposure or extreme temperature changes, epoxy resin has got you covered.
But what about those pesky gaps and irregularities between metal surfaces? Fear not. Epoxy resin has the unique ability to fill in those small gaps, creating a seamless and uniform bond. Say goodbye to visible gaps or weak spots – epoxy resin will give you a smooth joint that looks flawless.
And let’s not forget about rigidity and durability. Once cured, epoxy resin becomes rigid and durable, providing extra stability and stiffness to your bonded metal parts. This is particularly beneficial in applications where the joint needs to withstand vibrations or movements without compromising its integrity.
Last but certainly not least, epoxy resin plays well with various surface finishes and coatings commonly found on metals. Whether your brass surfaces are polished, painted, or coated with protective layers, epoxy resin will effortlessly bond them together without compromising their surface finish. It’s like the adhesive equivalent of a match made in heaven.
Preparing the Surfaces Before Applying Epoxy Resin
Embarking on a project with epoxy resin requires more than just skill and creativity. The secret lies in the preparation of the surfaces before the magic of bonding takes place. In this captivating guide, we will delve into the key steps that will ensure a bond between brass pieces that is unbreakable and durable. So, gather your supplies and get ready to unlock the power of surface preparation.
Step 1: Cleanliness – The First Line of Defense:
In the battle for a strong bond, cleanliness is your first weapon. Start by arming yourself with a mild detergent or soap and warm water, as you thoroughly clean the surfaces of both brass pieces. Leaving no room for contaminants such as dirt, dust, grease, or any other unwanted substances, rinse the surfaces meticulously and allow them to dry completely.
Step 2: Sanding – Creating a Path for Success:
The path to success is often paved with tiny grooves. Arm yourself with fine-grit sandpaper (around 120 to 220 grit) and gently sand the brass surfaces. This act of gentle roughening creates microscopic grooves, allowing the epoxy resin to grip onto the surface more effectively, ensuring a bond that can withstand any challenge.
Step 3: Degreasing – Dissolving Protective Barriers:
The brass pieces are warriors protected by a layer of oil or wax. However, before the epoxy resin can join them in their battle, this protective barrier must be dissolved. Take hold of acetone or rubbing alcohol and cleanse the surfaces using a clean cloth or cotton pad. Wipe away any remnants of protection and ensure that both brass pieces are left dry and ready for action.
Step 4: Etching – Enhancing Adhesion:
Smooth surfaces may seem invincible, but with the power of etching, even they can be conquered. If your brass surfaces are highly polished or smooth, etching becomes a crucial step. With an etching solution formulated specifically for brass, follow the provided instructions to create a slightly rougher surface. This enhancement ensures an adhesive bond that will leave your project victorious.
How to Apply Epoxy Resin for Bonding Brass to Brass
Seeking a robust and long-lasting union between brass pieces? Look no further than epoxy resin. With its exceptional bonding capabilities and resistance to heat and chemicals, epoxy resin is the ideal adhesive for joining brass surfaces. In this comprehensive guide, we will take you through the steps of applying epoxy resin for bonding brass to brass. Let’s embark on this journey.
Step 1: Prepare the Surfaces
Before diving into the application process, it is crucial to prepare the brass surfaces meticulously. Begin by thoroughly cleansing the surfaces with a gentle detergent or rubbing alcohol. This thorough cleaning eliminates any dirt, oil, or grease that might impede the bonding process. Patience is key here – ensure that the surfaces are completely dry before proceeding.
Step 2: Roughen the Surfaces
To maximize the epoxy resin’s gripping power, gently roughen the brass surfaces using sandpaper or a fine-grit abrasive pad. This process creates an optimal environment for creating a mechanical bond with the epoxy resin, guaranteeing an unyielding connection.
Step 3: Choose High-Quality Epoxy Resin
Selecting the right epoxy resin is paramount to achieving a successful bond. Opt for an epoxy specifically formulated for metal bonding, as these variants typically offer unparalleled strength and durability. Pay close attention to the manufacturer’s instructions, ensuring correct mixing ratios and thorough blending of the components.
Step 4: Apply Epoxy Resin
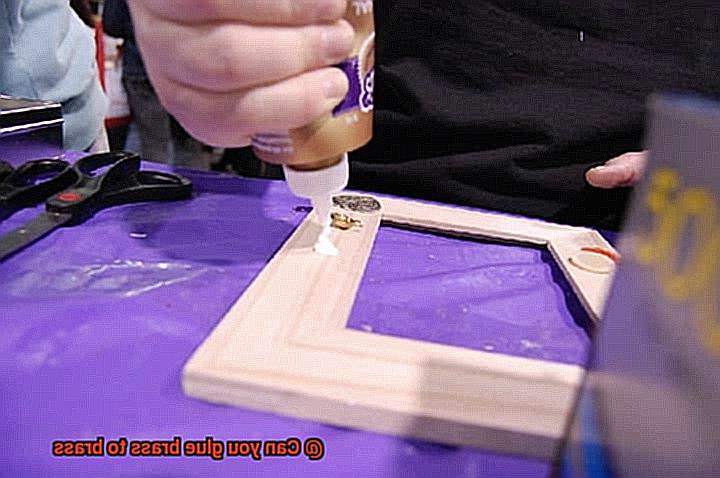
With a brush or applicator in hand, carefully apply a thin, even layer of epoxy resin onto one of the brass surfaces. Allow the resin to gracefully envelop the surface, ensuring uniform coverage without any unsightly gaps or pesky air bubbles. The roughened texture of the brass will facilitate an effortless spread.
Step 5: Press and Hold
Now comes the moment of truth. Gently align the first brass surface with the second, ensuring a perfect fit, and firmly press them together. Apply steady pressure for a few fleeting moments, allowing the adhesive to work its magic and establish an unbreakable bond. If you desire an added measure of strength and stability, consider employing clamps to hold the brass pieces together while the epoxy cures. However, exercise caution – do not overtighten the clamps, as this can result in excess resin seepage, weakening the bond.
Advantages of Using Cyanoacrylate Adhesive for Metal Bonding
This incredible adhesive offers a multitude of advantages that set it apart from the competition, making it the go-to choice for professionals and DIY enthusiasts alike.
First and foremost, cyanoacrylate adhesive boasts an extraordinary ability to cure in the blink of an eye. While other adhesives may leave you waiting around for hours or even days, cyanoacrylate adhesive sets and hardens within seconds. This means you can swiftly bond metal parts together with precision and efficiency, saving valuable time and effort. Whether you’re working on delicate and intricate pieces or larger components in need of rapid assembly, cyanoacrylate adhesive is your ultimate time-saving ally.
Strength and durability are two more exceptional qualities that make cyanoacrylate adhesive a cut above the rest. Once cured, this adhesive forms an unbreakable bond that can withstand immense stress and tension. Say goodbye to worrying about your bonds failing under pressure – cyanoacrylate adhesive has the resilience to tackle any challenge. From the demanding automotive and aerospace industries to sensitive electronics applications, this adhesive guarantees secure and long-lasting results.
The versatility of cyanoacrylate adhesive is yet another feather in its cap. Not only can it flawlessly bond brass to brass, but it also excels at bonding a wide range of metals including steel, aluminum, and copper. This versatility makes it the ideal choice for diverse metal bonding projects, ensuring you always have the perfect adhesive at your fingertips.

Cyanoacrylate adhesive is also a force to be reckoned with when it comes to environmental conditions. It effortlessly shrugs off changes in temperature, moisture, and exposure to harsh chemicals. Whether you’re working indoors or outdoors, in scorching heat or freezing cold, this adhesive remains unyielding. Its bonding strength remains intact, no matter the challenges thrown its way.
Bid farewell to the days of laborious surface preparation before bonding. Cyanoacrylate adhesive requires no special primers or roughening of surfaces. It bonds effortlessly to smooth and clean metal surfaces, saving you valuable time and effort. Now you can focus on the task at hand instead of getting bogged down in tedious prep work.
Preparing the Surfaces Before Applying Cyanoacrylate Adhesive
Unlocking the full potential of cyanoacrylate adhesive and achieving superhero-level bonding with brass requires proper surface preparation. Don’t underestimate the power of a little prep work – it’s the key to a strong and long-lasting bond that can conquer even the toughest challenges.
So, let’s dive into the steps and unleash the bonding magic:
Step 1: Embrace the Cleanliness Crusade
Before you even think about applying any adhesive, channel your inner cleanliness warrior. Grab a clean cloth, don your superhero cape, and wipe those brass surfaces with precision. Say goodbye to dirt, dust, and grease that might be lurking around. For maximum cleanliness power, enlist the help of a mild detergent or solvent specifically designed for metal cleaning. Remember, cleanliness is the secret weapon for a solid bond.
Step 2: Tarnish, Begone.
Brass has a sneaky side – it tends to oxidize over time, leaving behind an annoying layer of tarnish. And guess what? That tarnish can be the archenemy of your bonding process. But fear not. Equip yourself with a brass cleaner or polish and prepare to battle. Apply the cleaner to a soft cloth and wage war against the tarnish until your brass surfaces shine like never before.
Step 3: Texture for Tenacity
Now it’s time to rough things up a bit – in a good way. Creating a rough surface texture will make the adhesive grip onto the metal with unwavering strength. Arm yourself with fine-grit sandpaper (around 320-400 grit) and gently sand the areas where you’ll work your bonding magic. But remember, we’re aiming for just enough texture, not excessive force that could damage the brass surface.
Step 4: Banishing Grease Monsters
Even after all that cleaning, those pesky grease monsters might still be hiding on your brass surfaces, ready to sabotage your bonding mission. But fear not, brave warrior. Unleash the power of a degreaser specially formulated for metal surfaces. Wield it like a weapon, wiping down those brass pieces with determination. Leave no trace of grease behind – only squeaky clean surfaces shall remain.
How to Apply Cyanoacrylate Adhesive for Bonding Brass to Brass
If you’ve ever wondered how to achieve a strong and durable bond when gluing brass to brass, look no further. Brass, a versatile metal used in various applications, can be effectively bonded using cyanoacrylate adhesive, also known as super glue. In this comprehensive guide, we will walk you through the step-by-step process of applying cyanoacrylate adhesive to ensure a secure and long-lasting bond between brass pieces.
Prepare the Surfaces:
Before applying the adhesive, it is crucial to prepare the surfaces by thoroughly cleaning them. This ensures that no dirt, oil, or debris interferes with the bonding process. To achieve this, use a degreasing solvent or rubbing alcohol along with a clean cloth. By starting with clean surfaces, you create an optimal environment for the adhesive to form a strong bond.
Enhance Adhesion Strength:
To maximize the bonding strength between brass pieces, it is advisable to lightly roughen the surfaces. This can be accomplished using sandpaper or a file, gently rubbing in one direction. By creating micro abrasions on the surface, you increase the surface area for the adhesive to grip onto. This step significantly improves the overall adhesion strength.
Apply the Cyanoacrylate Adhesive:
With clean and roughened surfaces, it’s time to apply the cyanoacrylate adhesive. Carefully dispense a small amount of adhesive onto one of the brass surfaces, ensuring not to use excessive amounts. Remember, less is more when it comes to cyanoacrylate adhesives. A thin layer is sufficient for achieving a strong bond between brass pieces.
Firmly Press and Hold:
Once the adhesive has been applied, quickly align the two brass surfaces and press them together firmly. Applying pressure during this step helps ensure proper contact between the surfaces and promotes a strong bond. Holding the pieces in place for a few minutes allows the adhesive to set properly. This critical step is essential for achieving a reliable bond between brass pieces.
Allow Sufficient Curing Time:
After pressing and holding the bonded brass pieces, it is crucial to allow sufficient time for the adhesive to cure. Typically, a curing time of at least 24 hours is recommended for cyanoacrylate adhesives to achieve their maximum strength. During this period, it is essential to avoid subjecting the bond to any stress or load. By exercising patience and allowing ample curing time, you ensure a robust and enduring bond.
V76sI2TMjFI” >
Conclusion
The question of whether you can glue brass to brass is a common one among DIY enthusiasts and craftsmen alike. The answer, in short, is yes. Gluing brass to brass is indeed possible, but it requires the right adhesive and proper surface preparation.
To ensure a strong bond between two brass surfaces, it is crucial to clean the surfaces thoroughly. Use a mild detergent or solvent to remove any dirt, grease, or oxidation that may hinder the adhesion process. Once cleaned, dry the surfaces completely before proceeding.
When it comes to choosing an adhesive for gluing brass to brass, epoxy resin is often recommended. Epoxy resins are renowned for their exceptional bonding strength and durability. They can withstand high temperatures and resist various chemicals, making them ideal for joining metals like brass.
Before applying the epoxy resin, make sure to roughen the surfaces slightly with sandpaper or steel wool. This step helps create more surface area for the adhesive to adhere to and enhances the overall bond strength.
Now comes the application process. Apply a thin layer of epoxy resin onto one of the brass surfaces using a brush or spatula. Be careful not to apply too much as excessive adhesive can result in messy joints and weak bonds. Align the two pieces of brass together and firmly press them against each other.
Allow sufficient curing time for the epoxy resin as per the manufacturer’s instructions. It typically takes anywhere from a few hours to a day for the adhesive to fully cure and provide maximum strength.
Once cured, your glued brass joint should be strong and secure. However, keep in mind that glued joints may not be as strong as mechanically fastened ones or welded connections. Therefore, it is essential to consider the intended use and load-bearing requirements when deciding whether gluing brass to brass is suitable for your specific project.
In conclusion, while gluing brass to brass is possible with the right adhesive and proper surface preparation, it may not always be the most suitable method for every application.