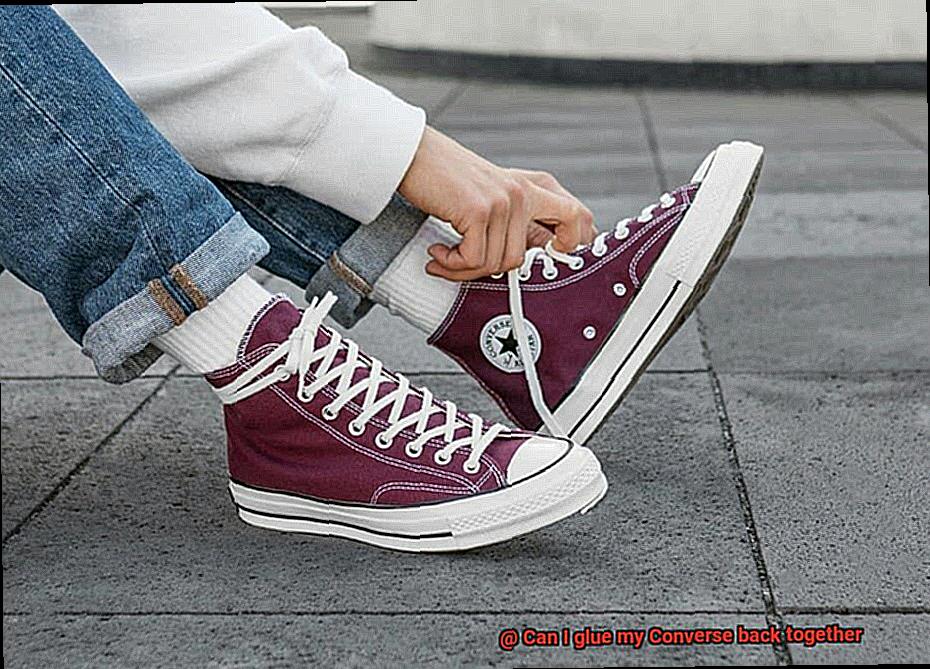
Picture this: you’re strolling down the street, feeling like a rockstar in your worn-in Converse. Suddenly, disaster strikes – a sole separation or a stubborn toe cap peel. It’s a heartbreaking moment for any sneaker enthusiast. But fear not, my fellow shoe lovers. Today, we’re delving into the captivating world of gluing your Converse back together – an art that can resurrect these iconic kicks from the depths of despair.
Think of it as a resurrection for your beloved sneakers. We’ll explore easy DIY fixes and reveal insider tips on the most effective adhesives to give your Converse a second chance at life. So buckle up and get ready for an exhilarating journey through the realm of sneaker salvation.
No more tossing those tattered Chucks aside; it’s time to roll up our sleeves and restore them to their former glory. Are you ready?
Let’s dive right in.
Assessing the Extent of the Damage
Contents
- 1 Assessing the Extent of the Damage
- 2 Choosing the Right Glue for Your Repair
- 3 Preparing the Shoes for Repair
- 4 Applying Glue to Both Surfaces
- 5 Pressing the Two Surfaces Together
- 6 Securing the Bond with Clamps or Heavy Objects
- 7 Allowing Adequate Drying Time for the Glue
- 8 Testing the Strength of the Repair
Converse shoes, with their timeless style and durability, hold a special place in the hearts and wardrobes of many. But as time goes by, even these beloved sneakers can start to show signs of wear and tear.
The soles may begin to separate from the upper part of the shoe, tears in the canvas may appear, or the rubber toe caps might detach. Before grabbing that trusty tube of glue, it is crucial to assess the extent of the damage to determine if gluing alone will suffice.
First and foremost, let’s focus on the soles. Look for any signs of separation between the sole and the upper part of the shoe. If you spot minor separation, gluing might be a viable option.
However, if the separation is extensive or there are multiple areas of damage, gluing alone may not provide a long-lasting solution. It’s time to explore alternative repair methods or consider bidding farewell to your faithful Converse companions.
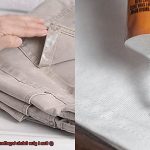
Now, shift your attention to torn canvas. If you come across a small tear in an inconspicuous area, rejoice. Gluing it back together could work wonders. But beware. If the tear is large or located in a prominent spot, gluing alone may not cut it. In these cases, you’ll need to delve into the realms of patching or even replacing the canvas for a repair that’s as aesthetically pleasing as it is durable.
Ah, yes. The infamous rubber toe caps. These cheeky little devils have a tendency to detach from Converse shoes. Assess their condition carefully. Is the cap partially intact or completely detached? If it’s just partially intact, gluing may be enough to secure it back in place. But if it’s completely detached, my friend, we must consider other options like replacement. It’s time to say goodbye to that old cap and welcome a new one with open arms.
Before embarking on any repairs, take a step back and thoroughly inspect the overall condition of your beloved Converse shoes. Keep an eye out for sneaky weak stitching or any structural issues that may not be immediately apparent. These hidden problems can greatly impact the effectiveness of gluing. If you stumble upon any such issues, it’s best to seek professional assistance or explore alternative repair methods.
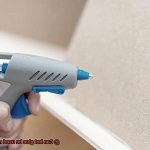
Once you’ve assessed the extent of the damage and determined that gluing is indeed a viable option, it’s time to gather your supplies. Choose a glue specifically designed for shoe repairs, one that’s suitable for bonding rubber or fabric materials. Popular options such as Barge All-Purpose Cement, Shoe Goo, or E6000 Craft Adhesive should do the trick.
Choosing the Right Glue for Your Repair
Before you dash off to the store and grab any old glue, take a moment to understand why selecting the right adhesive is absolutely essential for a successful repair. As an expert in the field, I am here to guide you through the different types of glue available and help you make an informed decision.
First and foremost, material compatibility is the key to a lasting repair. Converse shoes are commonly crafted from canvas or leather, so it is crucial to choose a glue that is suitable for these materials. If you’re dealing with canvas repairs, fabric glue or a robust adhesive like E6000 is highly recommended. These glues are specially designed to bond fabric and offer the necessary flexibility that allows your shoes to bend and move with your feet.
On the other hand, if you’re tackling leather repairs, you’ll want to opt for a leather adhesive that is specifically formulated for repairing leather goods. These glues are often stronger and more durable than fabric glues, providing a secure bond that will withstand the test of time.
In addition to material compatibility, it’s important to consider factors such as drying time. Some glues dry in a flash, while others may require several hours or even an overnight stint to fully cure. If you’re itching to wear your repaired Converse shoes as soon as possible, opt for a fast-drying glue that will have you back on your feet in no time.
Flexibility and waterproof properties are also crucial considerations. Converse shoes brave various weather conditions and need to endure bending and stretching without compromising the integrity of the bond. Look for a glue that offers flexibility and is resistant to moisture, ensuring your repaired shoes can handle whatever life throws their way.
Lastly, don’t forget to peruse product reviews and recommendations from fellow Converse enthusiasts who have successfully repaired their own shoes. This invaluable feedback will give you insight into the effectiveness and durability of different glues, helping you make an informed decision.
Preparing the Shoes for Repair
Today, I will guide you through the art of preparing your Converse shoes for a successful repair. So, let’s dive into the nitty-gritty details and get those shoes ready for some serious repair magic.
Step 1: Clean ’em up.
Before we embark on our repair journey, grab a soft brush or cloth and give those shoes a thorough scrub. We want to bid farewell to any dirt, dust, or debris that could hinder the gluing process. Pay close attention to those stubborn stains – we want your kicks looking fresh and clean.
Step 2: Identify the problem areas.
Take a meticulous look at your shoes and spot any loose or detached parts that require immediate attention. It could be a separated sole, loose stitching, or even layers coming apart. If you come across any loose parts, make sure to clean and dry the area before proceeding further.
Step 3: Roughen it up.
Now comes the time to roughen up the surfaces that need some bonding action. Grab some sandpaper or an abrasive material, and with gentle strokes, create tiny grooves on the surfaces that will be glued together. This step ensures a stronger bond for the glue to adhere to. But fret not; we won’t go overboard.
Step 4: Clean again.
After roughening up the surfaces, wipe away any dust or debris that may have been generated during this process. We want those surfaces squeaky clean for a seamless bonding experience. Use a clean cloth or brush to ensure no residue remains.
Step 5: Choose your weapon… er, glue.
Now comes the fun part – selecting the perfect adhesive for your repair job. Consider factors like the shoe materials and the type of repair you’re conducting. Super glue, rubber cement, or specialized shoe adhesives are all worthy options to explore. Choose wisely, my fellow repair artists.
Step 6: Apply that glue.
It’s showtime. Follow the instructions on your chosen adhesive and apply a thin layer to both surfaces that will be bonded together. Press them firmly and hold them in place for a few minutes. This gives the glue ample time to set and work its magic. Stay patient, my friend; good things come to those who wait.
Applying Glue to Both Surfaces
If you’re here, chances are you’re facing the heart-wrenching dilemma of a cherished pair of Converse in dire need of repair. Fear not, for I am here to guide you through the process of applying glue to both surfaces, ensuring a bond that’s as strong as your love for those kicks. So let’s dive in and give your Converse a second chance to shine.
Preparing the Surfaces:
Before we embark on this gluing adventure, we must first prepare the surfaces properly. Grab a damp cloth or sponge and banish any pesky dirt, dust, or debris that might hinder our adhesive mission. Let’s make sure those surfaces are squeaky clean and thoroughly dry before we proceed.
Selecting the Perfect Adhesive:
Ah, the secret to a successful repair job lies in the choice of glue. Consider the material of your Converse and the type of bond you desire. Will it be super glue, fabric glue, or perhaps specialized shoe glue? Delve into their properties, weigh your options, and pick the one that best suits your needs.
Applying the Glue:
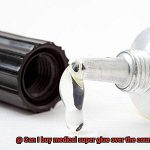
With our trusty brush or small applicator in hand, we set out on the delicate task of applying a thin layer of glue onto both surfaces yearning to be reunited. But beware. We mustn’t get carried away and drown our beloved shoes in excess glue; that would only lead to messy overflow and prolonged drying times.
Waiting for Tackiness:
Patience is key as we wait for the magic to happen. Let’s give the glue a few minutes to become delightfully tacky before we join our surfaces together. This crucial step allows our adhesive to reach its peak bonding state. Check your chosen glue’s instructions for specific drying times, my eager repairer of Converse.
Bonding Time:
The moment has come to reunite our separated surfaces. With precision and care, align them perfectly and press them together with unwavering determination. Apply even pressure across the glued area, ensuring that every nook and cranny finds solace in the warm embrace of our adhesive.
Maintaining Pressure:
Sometimes, a little extra help is needed to secure the bond. Enter clamps and heavy objects, acting as steadfast guardians of our glued parts. They will hold everything in place while the glue dries, ensuring a connection that’s unyielding and steadfast.
Patience is Key:
Ah, the waiting game begins. Allow ample time for the glue to work its magic, as prescribed by its manufacturer. Beware the siren call of haste. Resist using or wearing your repaired Converse until the glue has thoroughly cured. Remember, good things come to those who wait.
Pressing the Two Surfaces Together
When it comes to reviving your beloved Converse shoes, pressing the two surfaces together is the pivotal moment where the magic happens. It’s the step that will bring your worn-out kicks back to life. But before you dive into this crucial process, there are a few key things to keep in mind.
First and foremost, cleanliness is the key to a successful repair. Before pressing the surfaces together, give them a thorough cleaning. Grab some warm water and a mild soap to wash away any dirt, debris, or remnants of previous adhesive. This ensures a fresh start and sets the stage for a strong bond.
Now, it’s time to choose your weapon – the adhesive that will hold everything together. Look for adhesives specifically designed for bonding rubber or fabric materials. Whether you opt for shoe glue, super glue, or epoxy, each has its own set of strengths and weaknesses. Choose wisely, my friend.
With your adhesive of choice in hand, apply it with care. Remember, less is more. Apply it evenly and sparingly to one or both surfaces. Too much glue can create a messy appearance and weaken the bond. So take your time and be precise.
Once the adhesive is applied, it’s time to align and conquer. Gently bring the two surfaces together, ensuring they fit like puzzle pieces. Use your hands to apply firm pressure across the entire surface area. If needed, grab some clamps or heavy objects to hold everything in place while the glue works its magic.
Patience is a virtue in this process. Allow sufficient time for the glue to dry completely before strutting your stuff in your repaired Converse shoes. The drying time may vary depending on the type of adhesive you chose, so refer to the manufacturer’s instructions for guidance. Resist the temptation to test them prematurely – let them cure fully and strengthen their bond.
It’s important to note that gluing your Converse back together is a temporary solution. The durability of the repair depends on various factors. But with proper cleaning, adhesive selection, and careful pressing, you can give your beloved kicks a second chance to shine.
Securing the Bond with Clamps or Heavy Objects
With the right tools and a touch of glue magic, you can effortlessly repair them and restore their former glory. In this article, we will delve into the art of securing the bond using clamps or heavy objects, ensuring that your cherished Chucks get a well-deserved second chance to shine.
The Power of Clamps:
Clamps are the unsung heroes of shoe repair, silently working their magic to provide the necessary pressure for a strong and secure bond between glued surfaces. Let’s explore how to wield their power effectively:
- Choose the Right Clamp: Like a superhero with a sidekick, choose a clamp that complements your shoe repair mission. C-clamps or bar clamps are commonly used for shoe repairs. Ensure that your chosen clamp fits snugly without causing any damage or deformation to your Converse.
- Prepare the Surfaces: Before embarking on your gluing adventure, take the time to clean the surfaces to be bonded thoroughly. Bid farewell to dirt and debris that could potentially sabotage your bond.
- Apply Glue Liberally: Embrace generosity as you apply glue to both surfaces, ensuring an even and ample coverage. Seek out an adhesive specially formulated for shoe repairs, as it possesses the secret recipe for success.
- Align and Press Firmly: With precision and care, align the surfaces and press them together firmly. Take a moment to ensure perfect alignment before proceeding.
- Strategically Position Clamps: As you unveil your clamps, place them strategically to distribute pressure evenly across the glued area. This strategic placement will prevent any weak spots from forming, ensuring a bond that can withstand anything life throws at it.
- Tighten Just Right: The key here is finding the sweet spot between too loose and too tight. Tighten the clamps just enough to create sufficient pressure without inflicting harm. Remember, we want to secure, not crush.
The Weighty Solution:
Clamps may possess superpowers, but sometimes heavy objects can swoop in as an alternative solution or a trusty sidekick. Here’s how to utilize them effectively:
- Clean and Flat Objects: Embrace the power of cleanliness and select flat, clean heavy objects that can evenly distribute weight over the glued area. Books, bricks, or even weights can transform into your allies for this mission.
- Place and Wait: Position these weighty allies on top of the glued area and patiently wait until the glue dries completely. This method ensures a robust bond without the need for clamps. Patience truly is a virtue.
- Patience is Key: Different glues have different drying times, so it’s crucial to consult the manufacturer’s instructions. Engage in the waiting game with bated breath, knowing that the outcome will be worth every second.
Allowing Adequate Drying Time for the Glue
Imagine your beloved Converse shoes have reached a state of disrepair, with soles detached and fabric fraying.
With the right glue and a bit of patience, you can breathe new life into them. In this article, we will delve into the importance of allowing sufficient drying time for glue when repairing Converse shoes.
The Process:
First and foremost, select a high-quality glue specifically designed for shoe repairs. Apply a thin, even layer of glue to both surfaces that require joining. Ensure complete coverage by spreading the glue evenly. Next, press the surfaces firmly together and hold them in place. For a robust bond, utilize clamps or heavy objects to exert consistent pressure while the glue dries.
Why Adequate Drying Time is Crucial:
Rushing the drying process can yield disastrous results. When glue does not have sufficient time to dry, it fails to penetrate the fibers of the shoe material effectively. As a result, a feeble bond forms that will not endure over time. Picture strutting down the street, only to have your newly repaired Converse shoes disintegrate mid-stride – definitely not a fashionable outcome.
Different Types of Glue and Their Drying Times:
Drying times for glue vary based on type. Some glues may dry within minutes, while others require several hours or even overnight to fully cure. It is crucial to adhere to the manufacturer’s instructions regarding drying times to ensure a successful repair.
Potential Problems:
Failure to allow adequate drying time can lead to various problems. Even if the glue appears dry on the surface, wearing or using your repaired Converse shoes prematurely can result in incomplete internal curing. Consequently, the bond weakens and becomes vulnerable to failure when subjected to stress or pressure.
Testing the Strength of the Repair
Before you embark on this repair journey, it is crucial to test the strength of the repair. After all, who wants shoes that crumble with every step?
Let’s dive into the nitty-gritty of testing the strength of the repair. First and foremost, we must familiarize ourselves with the materials used in Converse shoes. The upper part is typically crafted from canvas, while the sole is made of rubber. These materials have distinct properties, making it imperative to select the right glue for a successful repair.
One popular way to assess the strength of the repair is through the pull test. This test involves applying force to the glued area and assessing its ability to withstand weight before giving in. It is essential to conduct this test separately for both the upper and sole parts of the shoe since they may have different adhesive requirements.
But wait, there’s more. Another test that deserves attention is the flexibility test. This entails bending and flexing the repaired area to evaluate if the glue can withstand pressure. A top-notch repair should endure regular movements without showing any signs of loosening or breaking.
However, testing doesn’t end there. Wearing the repaired shoes for an extended period can provide valuable insights into their durability. This will help determine if the repair holds up during normal use and if any additional touch-ups or reapplications of glue are necessary.
Now, let’s not forget about external factors that can impact the strength of the repair. Environmental conditions such as scorching heat, suffocating humidity, and water exposure can affect the effectiveness of the adhesive. To ensure durability in various situations, it is prudent to test your repaired shoes under different conditions.
Lastly, always adhere to proper application techniques when gluing your Converse back together. Begin by meticulously cleaning and preparing the surfaces, followed by using an appropriate adhesive for each specific material. Apply an even layer of glue and allow sufficient drying time before putting it through the ultimate test of strength.
While gluing your Converse shoes may offer a temporary fix, it’s essential to note that it may not be a long-term solution. If the damage is severe or the shoes are in poor overall condition, alternative repair options like stitching or professional shoe repair might be more appropriate.