Ever found yourself pondering the age-old question of whether copper and brass can be glued together? Well, you’ve stumbled upon just the right spot for answers. Today, we’re delving deep into the sticky business of bonding these two magnificent metals with adhesive.
Copper and brass, oh how they shine. These beauties are renowned for their toughness, conductivity, and everlasting charm. But here’s the deal – their distinct compositions can make gluing them a tad tricky. Don’t fret though. With a little know-how and some clever materials, you can create a rock-solid connection between copper and brass.
In this blog post, we’ll take you on an adventure through the captivating realm of metallurgical bonding. We’ll unravel all the ins and outs, from key considerations to potential adhesive options, as well as practical steps for nailing that perfect copper-to-brass bond. So whether you’re an artist extraordinaire or an industrial problem-solver, stick around to discover the secrets of gluing copper to brass like a total pro.

Adhesive Bonding Basics
Contents
- 1 Adhesive Bonding Basics
- 2 Selecting the Right Adhesive for Copper and Brass
- 3 Surface Preparation for Adhesive Bonding
- 4 Mechanical Bonding Techniques to Enhance Strength and Durability
- 5 Tips for Applying Epoxy Adhesives to Copper and Brass
- 6 Benefits of Gluing Copper to Brass
- 7 Challenges with Gluing Copper to Brass
- 8 Troubleshooting Common Issues with Glue Bonds between Copper and Brass
- 9 Conclusion
Adhesive bonding is a remarkable technique that allows us to create robust connections between different materials. But what about bonding copper and brass? In this article, we will delve into the essential elements of adhesive bonding these two metals, uncovering the key factors to consider for a successful bond.
Compatibility:
While copper and brass may share similarities as metals, their distinct properties and compositions necessitate careful adhesive selection. Look for adhesives specifically formulated to bond both copper and brass, ensuring compatibility between the adhesive and the materials being joined.
Surface Preparation:
Proper surface preparation is paramount for any successful bond. Thoroughly cleaning the surfaces of both copper and brass is essential, removing any dirt, oil, or oxidation. Utilize solvents or cleaning agents designed specifically for metal surfaces to achieve maximum adhesion.
The Right Adhesive:
Choosing the right adhesive is critical to achieving a strong bond between copper and brass. Consider epoxy adhesives, known for their excellent adhesion properties and compatibility with various materials, including metals. Opt for epoxy formulations explicitly designed for bonding metals to ensure optimal results.
Manufacturer’s Instructions:
For maximum effectiveness, carefully follow the manufacturer’s instructions regarding application and curing time. Rushing this process may lead to a weak bond or even failure of the joint. Patience is key when it comes to adhesive bonding.
Combining Forces:
To enhance strength and durability, consider utilizing mechanical bonding techniques alongside adhesive bonding. Roughening the surfaces or incorporating mechanical fasteners like screws or rivets can provide an extra layer of security for your copper-brass connection.
Selecting the Right Adhesive for Copper and Brass
The question at hand is how to select the right adhesive for bonding copper and brass. When it comes to gluing these two metals together, choosing the appropriate adhesive is vital to ensure a strong and long-lasting bond. There are several options to consider, each with its own unique characteristics and suitability for different applications.
One of the most popular adhesive choices for copper and brass is epoxy. This versatile adhesive consists of two components, a resin and a hardener, which need to be mixed together before application. Epoxy adhesives are renowned for their exceptional bonding strength and durability, making them ideal for this task.
Before applying any adhesive, it is crucial to thoroughly clean the surfaces of both the copper and brass. Any dirt, grease, or oxidation can impede the effectiveness of the adhesive. A solvent or degreaser can be used to remove these impurities, ensuring a clean surface for optimal bonding.
If you’re looking for a quick fix, consider cyanoacrylate, commonly known as super glue. These adhesives set rapidly and provide strong bonds. However, keep in mind that they may not be suitable for all applications, particularly if you’re dealing with uneven surfaces or significant gaps between the copper and brass.
For certain applications like plumbing or electrical connections, soldering may be preferred over adhesive bonding. Although not technically an adhesive, soldering involves melting a filler metal (usually tin and lead) to join the copper and brass surfaces together. This method provides a secure bond that can withstand high temperatures and pressures.
When selecting an adhesive, factors such as temperature resistance, flexibility, and chemical resistance should be considered. These characteristics can significantly impact the success of your bond based on your project requirements.
It is always recommended to conduct a small test before applying the adhesive to the entire surface. This allows you to assess the bond strength and compatibility of the adhesive with copper and brass.
Lastly, following the manufacturer’s instructions is essential for optimal results. Different adhesives have specific curing times or application techniques that need to be followed.
Surface Preparation for Adhesive Bonding
In the world of adhesive bonding, surface preparation is the secret ingredient that ensures a strong and durable bond. When it comes to bonding dissimilar metals like copper and brass, proper surface preparation becomes even more crucial. In this article, we will explore the importance of surface preparation and delve into the step-by-step process that guarantees a successful adhesive bonding experience.
Step 1: Cleaning the Surfaces
Before embarking on the bonding journey between copper and brass, it is imperative to rid the surfaces of any dirt, grease, or contaminants. Armed with a solvent or degreaser specifically designed for metal surfaces, you can cleanse these metals to perfection. Remember, thorough cleaning is the key that unlocks the door to a seamless adhesion process.
Step 2: Roughening the Surfaces
Smooth and polished metals like copper and brass present a challenge for adhesives due to their low surface energy. To conquer this obstacle, the next step involves roughening the surfaces. Forging a path through this rugged terrain can be achieved by sanding or abrading the surfaces with fine-grit sandpaper or an abrasive pad. By creating a textured landscape, you pave the way for a firm grip between adhesive and metal, resulting in an unbreakable bond.
Step 3: Drying the Surfaces
In the world of adhesive bonding, moisture is a formidable foe that can undermine even the strongest bond. Hence, ensuring complete dryness of both surfaces before applying adhesive is paramount. Armed with a clean, lint-free cloth, wipe away any lingering moisture to guarantee optimal dryness. With this step accomplished, you are ready to take on the final frontier of surface preparation.
Step 4: Priming for Success
To elevate your adhesive bonding experience to new heights, consider incorporating a primer or an adhesion promoter specifically formulated for copper and brass bonding. These magical elixirs facilitate a chemical bonding process between the adhesive and the metal surfaces, fortifying the strength of the bond. Always adhere to the manufacturer’s instructions when utilizing primers or adhesion promoters to unlock their full potential.
Mechanical Bonding Techniques to Enhance Strength and Durability
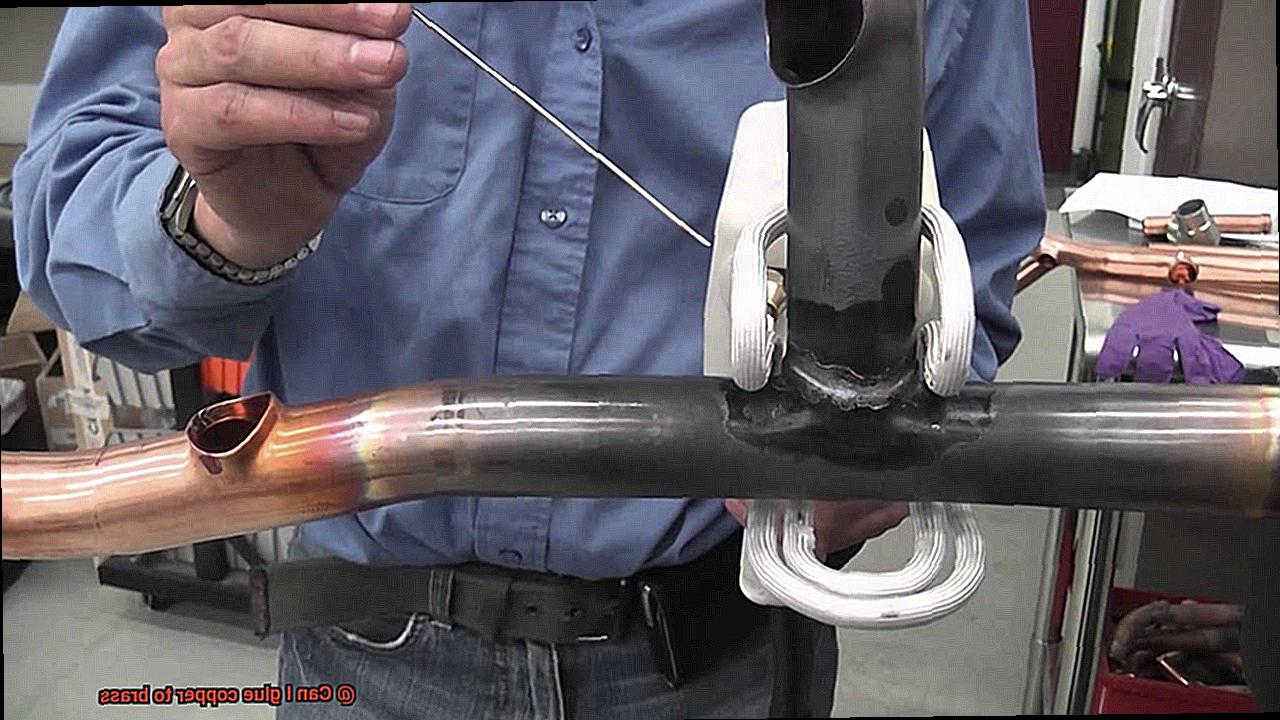
When it comes to bonding copper and brass, relying solely on adhesives may not provide the strength and durability required. That’s where mechanical bonding techniques come into play. In this blog post, we will explore various mechanical bonding methods, such as soldering, brazing, welding, mechanical fasteners, and mechanical interlocking, that can enhance the bond between copper and brass. So, let’s dive in.
Soldering – The Trustworthy Option:
Soldering, a popular choice for joining copper and brass, creates a strong connection by heating the metals and applying solder as a filler material. Whether it’s plumbing or electronic circuitry applications, soldering proves its reliability time and time again.
Brazing – Strength Under Extreme Conditions:
For applications involving high temperatures or mechanical stresses, brazing steps up to the plate. Using a filler material with a higher melting point than solder, brazing ensures a stronger bond. Withstanding temperatures above 450 degrees Celsius, this technique is built to thrive in tough environments.
Welding – Where Strength Meets Expertise:
Welding takes mechanical bonding to new heights by melting the metals at the joint and fusing them together. This technique creates an incredibly strong bond but requires specialized equipment and expertise to execute flawlessly.
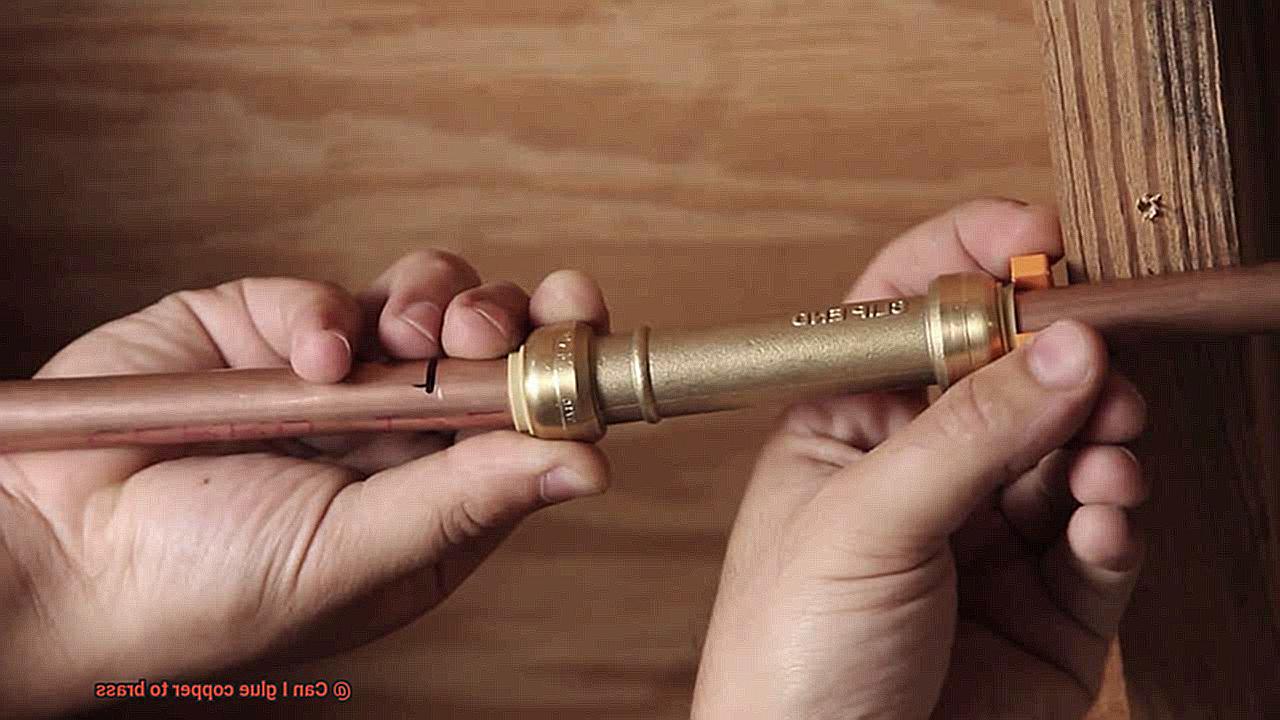
Mechanical Fasteners – Clamping It All Together:
If you prefer a non-permanent solution, mechanical fasteners like screws, bolts, or rivets come to the rescue. These fasteners physically clamp the copper and brass together, creating a secure bond that can be easily disassembled if needed.
Mechanical Interlocking – A Secure Connection:
To enhance the bond even further, mechanical interlocking comes into play. By creating grooves or flanges on the surfaces being joined, this method provides additional strength and durability. The interlocking design adds an extra layer of security to the bond.
Tips for Applying Epoxy Adhesives to Copper and Brass
When it comes to bonding copper and brass materials, epoxy adhesives are a reliable choice due to their exceptional bonding properties. However, achieving a successful bond requires following a few essential steps. In this article, we will provide you with valuable tips for applying epoxy adhesives to copper and brass surfaces, ensuring a strong and durable bond.
Step 1: Thoroughly Clean the Surfaces
Before applying epoxy adhesive, it is crucial to meticulously clean the copper and brass surfaces. Remove any dirt, grease, or oxidation that could hinder the adhesive bond. To achieve this, use a degreasing agent or solvent that effectively eliminates contaminants. A pristine surface is vital for a secure bond.
Step 2: Enhance Adhesion by Roughening the Surfaces
To improve the adhesion between the epoxy adhesive and copper/brass surfaces, gently roughen them using fine-grit sandpaper or a wire brush. This process creates a better bonding surface, allowing the epoxy adhesive to adhere more effectively. A slightly textured surface promotes a stronger bond.
Step 3: Apply a Thin Layer of Epoxy Adhesive
Using a brush or small spatula, evenly apply a thin layer of epoxy adhesive to both the copper and brass surfaces. It is crucial not to apply excess adhesive as it can interfere with the fit of the bonded parts. A thin, uniform layer ensures optimal bonding strength without compromising the assembly.
Step 4: Join the Surfaces Immediately
Once the epoxy adhesive is applied, quickly join the copper and brass parts together while the adhesive is still wet. This immediate joining ensures that the adhesive bonds effectively. To promote good contact between the surfaces, apply gentle pressure using clamps or weights. This pressure aids in achieving a robust bond.
Step 5: Follow Curing Instructions
Adhere to the manufacturer’s instructions regarding curing time and temperature. Epoxy adhesives generally require a specific duration and temperature to reach their full strength. During the curing process, refrain from moving or disturbing the bonded parts, as this can compromise the bond’s integrity. Allow sufficient time for the adhesive to fully cure.
Step 6: Remove Excess Adhesive
Once the epoxy adhesive has fully cured, carefully remove any excess adhesive using a scraper or sandpaper. Take caution to avoid damaging the bonded surfaces while removing the excess adhesive. This step ensures a clean and professional finish.
Benefits of Gluing Copper to Brass
When it comes to joining copper and brass together, gluing is a technique that offers a wide range of benefits. In this article, we will explore the advantages of gluing copper to brass, from simplicity and aesthetics to strength and versatility. Whether you’re a DIY enthusiast or a professional jeweler, understanding the benefits of this bonding method can help you achieve a seamless and durable connection between copper and brass.
Simplicity and Time Efficiency:
Gluing eliminates the need for traditional joining methods like soldering or welding, which often require specialized equipment and skilled labor. With gluing, you can easily bond copper and brass using basic DIY skills, making it a quick and hassle-free process.
Aesthetically Pleasing Joints:
Unlike soldering or welding, which can leave visible marks or discoloration on the metals, gluing creates a seamless and clean bond. This makes it an ideal choice for applications where appearance matters, such as jewelry making or decorative items.
Strength and Durability:
Modern adhesives designed for metal bonding provide excellent strength and long-term durability. When applied correctly, the adhesive can create a bond that is as strong as or even stronger than the metals themselves. This ensures that your copper-to-brass connection will withstand the test of time.
Versatility in Surface Compatibility:
Gluing offers the advantage of bonding copper and brass even if they have irregular or rough surfaces. Unlike soldering or welding, which require smooth and clean surfaces, adhesives can create strong connections between different shapes and sizes of copper and brass pieces.
Non-Permanent Solution:
Glued joints can be easily disassembled if needed, providing flexibility in situations where separation of copper and brass pieces is required without causing damage. This makes gluing a great choice for projects that may need future modifications or repairs.
Heat Resistance:
Certain adhesives designed for metal bonding offer excellent heat resistance, making them suitable for applications where the glued joint may be exposed to high temperatures. This ensures that the bond remains strong even in demanding environments.
Cost-Effectiveness:
Compared to traditional joining methods like soldering or welding, gluing copper to brass is a cost-effective option. It typically requires only a quality adhesive, which is generally more affordable than specialized equipment and materials.
Challenges with Gluing Copper to Brass
Today, we’re tackling a particularly sticky conundrum – the art of gluing copper to brass. While this may seem as easy as sticking two magnets together, there are a few challenges that make it as slippery as an eel covered in oil. So, strap on your adhesive goggles and join us as we navigate the obstacles that come with bonding these two metals.
Chemical Composition Clash:
Our first hurdle lies in the distinct chemical compositions of copper and brass. Copper, being a reactive metal, finds itself at odds with the alloy known as brass – a fusion of copper and zinc. This zinc presence acts like a stubborn gatekeeper, hindering the adhesive’s ability to establish a robust bond between the two metals. It’s like trying to reconcile two headstrong individuals who refuse to see eye to eye.
Smooth Surfaces Slip-Up:
Another challenge we face is the smoothness of copper and brass surfaces. Without any texture or roughness, adhesives struggle to gain a firm grip. Picture trying to hold on to an ice cube with hands slicked with grease – not exactly a sturdy grasp, right? This lack of mechanical interlocking weakens the bond between the adhesive and the metals.
Thermal Conductivity Troubles:
Copper and brass boast excellent thermal conductivity – a boon for swiftly whisking away heat from your piping hot tea. However, this characteristic presents a hurdle when it comes to adhesive curing. The rapid dissipation of heat hampers the adhesive’s ability to set properly. It’s akin to attempting to bake a cake in an oven that insists on switching off intermittently – an exercise in frustration and futility.
Moisture and Corrosion Conundrum:
In real-world scenarios, copper and brass may encounter moisture or corrosive environments. This poses yet another challenge, as certain adhesives can degrade or corrode when exposed to such conditions over time. It’s as if you’re constructing a sandcastle within reach of crashing waves – a recipe for short-lived success.
Temperature Tango:
Lastly, the temperature range in which the bonded copper and brass will exist is of utmost importance. Some adhesives may falter under extreme temperatures, causing the bond to weaken or crumble entirely. It’s like expecting an ice cream cone to remain intact on a blistering summer day – a melting disaster waiting to happen.
Troubleshooting Common Issues with Glue Bonds between Copper and Brass
Are you grappling with the challenge of creating a formidable glue bond between copper and brass? Fear not, for we are here to guide you through the common issues and techniques that will help you conquer this task with finesse.
Whether you’re a DIY enthusiast or a seasoned professional seeking reliable bonding solutions, this comprehensive explanation will equip you with the knowledge needed to create robust connections that withstand the test of time.
Incompatibility of Materials:
Copper and brass, with their contrasting chemical compositions, often hinder adhesive effectiveness. The presence of zinc in brass can vigorously react with certain adhesives, making the bonding process even more intricate.
To overcome this hurdle, it is essential to select an adhesive specifically formulated for use with copper and brass – one that can harmoniously bridge the gap between these two magnificent metals.
Surface Preparation:
Proper surface preparation is paramount in achieving a reliable bond that stands strong against adversity. Meticulously cleanse both copper and brass surfaces, ensuring the removal of any oils, dirt, or oxidation that may impede adhesion. By cleansing these surfaces immaculately, you pave the way for optimal contact between the adhesive and the metals – a crucial factor in creating a bond that goes beyond expectations.
Type of Adhesive:
The choice of adhesive plays a pivotal role in the success of bonding copper and brass. Epoxy or cyanoacrylate (super glue) are often hailed as saviors due to their exceptional bonding properties and compatibility with these metals. However, exercise caution and ensure that the adhesive you choose is suitable for the specific application requirements, adhering diligently to the manufacturer’s guidelines for optimal results.
Temperature and Humidity Considerations:
Extreme temperatures or high humidity levels can ruthlessly tamper with the curing process of adhesives, ultimately compromising the strength of the bond. It is imperative to respect the recommended temperature and humidity conditions during application and curing, treating them as guiding stars that lead you to a bond that stands unwavering against the elements.
Mechanical Stress:
Glue bonds between copper and brass may encounter mechanical stress due to unrelenting vibrations or constant movement. Moreover, the disparity in thermal expansion coefficients between copper and brass can inflict strain upon the adhesive joint.
To alleviate these concerns, consider reinforcing the bond with mechanical fasteners or exploring alternative joining methods like soldering or brazing – fortifications that ensure your bond remains impervious.
Testing and Evaluation:
Troubleshooting any issues with the glue bond necessitates rigorous testing and evaluation. Embrace strength tests such as tensile or shear testing, for they serve as gatekeepers that determine the quality and reliability of your adhesive bond.
Evaluating the bond’s performance under diverse environmental conditions, be it temperature cycling or exposure to chemicals, will further empower you in identifying potential weaknesses and enhancing your craftsmanship.
2wnFRSdhJDQ” >
Conclusion
Yes, it is possible to glue copper to brass.
The key is to use a strong adhesive that is specifically designed for bonding metals. These adhesives are often epoxy-based and can create a durable and long-lasting bond between copper and brass.
It’s important to clean and prepare the surfaces properly before applying the adhesive, ensuring that there is no grease or dirt present. Once the adhesive is applied, pressure should be applied to ensure a strong bond.
So, if you’re wondering whether you can glue copper to brass, the answer is yes.