Picture this: You drop your beloved bong and it shatters into pieces. Ouch. Now you’re left wondering, can you actually glue it back together? Well, you’re not alone in this sticky situation. Gluing a broken bong is a hot topic among enthusiasts, and in this blog post, we’ll dive into the possibilities of salvaging your shattered piece and weigh the pros and cons.
Before we jump into the world of adhesives, let’s get one thing straight – gluing a broken bong isn’t foolproof. But hey, sometimes it can work wonders if the damage is minor and doesn’t mess with its functionality or safety.
Pros of gluing a broken bong:
- Budget-friendly: Fixing your broken bong with glue can save you some serious cash compared to buying a brand new one. If the damage isn’t too severe, a good adhesive might just do the trick.
- Sentimental value: Bongs hold sentimental value for many people. By successfully repairing your broken buddy, you get to keep those memories alive and feel that warm fuzzy attachment all over again.
Cons of gluing a broken bong:
- Fragile fix: Let’s face it – glue bonds aren’t as strong as original glass. The repaired areas may be more fragile and prone to future breakages. So be prepared for potential heartbreak if accidents happen again.
- Airflow issues: Glued joints might mess with the smoothness and efficiency of your bong’s airflow, affecting your smoking experience. Nobody wants their sessions compromised by clogged up smoke lanes.
Safety precautions:
Contents
- 1 What is a Bong and What Materials Are They Made Of?
- 2 Can Glass Bongs Be Glued Back Together?
- 3 Can Ceramic Bongs Be Glued Back Together?
- 4 Can Acrylic Bongs Be Glued Back Together?
- 5 Preparing the Broken Pieces for Repair
- 6 Choosing the Right Adhesive
- 7 Applying the Adhesive
- 8 Testing the Repaired Bong
- 9 Conclusion
If you decide to give gluing a shot, safety should be top priority. Choose a non-toxic adhesive that can handle high temperatures so no harmful substances are released during use. Plus, make sure to clean and dry the broken pieces thoroughly before applying the glue for a solid bond.
What is a Bong and What Materials Are They Made Of?
For centuries, bongs have been a beloved part of smoking culture, offering a unique and enjoyable way to consume cannabis or tobacco. But have you ever wondered about the materials used to create these fascinating devices? In this article, we will delve into the world of bongs, exploring the different materials that make up these smoking masterpieces.
Glass Bongs: The Epitome of Elegance and Durability
Glass bongs are the most popular choice among smokers, and for good reason. Crafted from high-quality borosilicate glass, these bongs offer a visually stunning experience. Each piece is skillfully blown by glass artisans, resulting in exquisite designs that range from simple elegance to intricate mesmerization. Beyond their aesthetic appeal, glass bongs also provide excellent heat resistance and durability, making them a long-lasting investment for enthusiasts.
Acrylic Bongs: Affordable and Tough
If you’re looking for a more budget-friendly option without compromising on quality, acrylic bongs are worth considering. Made from a durable plastic called acrylic, these bongs offer a wide range of colors and designs.
Acrylic bongs are lightweight and resistant to breakage, making them ideal for travel or outdoor use. While they may lack the elegance of glass bongs, they make up for it with their affordability and practicality.
Silicone Bongs: Unbreakable Innovations
In recent years, silicone bongs have gained popularity due to their unbreakable nature. Made from food-grade silicone, these bongs are virtually indestructible. Silicone bongs are flexible, allowing for easy storage and transportation.
They are also incredibly easy to clean since they can be disassembled and washed in the dishwasher. While silicone bongs may not offer the same visual appeal as glass or acrylic, they make up for it with their durability and convenience.
Beyond the Common: Ceramic and Bamboo Bongs
While glass, acrylic, and silicone dominate the bong market, there are other intriguing materials worth exploring. Ceramic bongs offer a unique experience with their excellent heat retention properties and the ability to be decorated with intricate designs.
They can withstand high temperatures, ensuring a smooth smoking experience. On the other hand, bamboo bongs provide a natural and eco-friendly option. These handcrafted pieces have a rustic charm and are known for their smooth hits.
Can Glass Bongs Be Glued Back Together?
The answer is a resounding yes. Glass bongs can indeed be glued back together, but the success of the repair depends on several crucial factors.
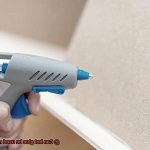
The first step on the road to restoration is selecting the right glue. Epoxy glue is often hailed as the hero in glass repair, as it forms a robust bond and is impervious to heat and water. However, before diving into the gluing process, it is vital to clean and dry the broken pieces thoroughly. Any lingering residue or moisture can impede the adhesive’s effectiveness, leaving you with a less than stellar result.
Once your broken bong is squeaky clean, carefully align the shattered edges. Precision is key here; even the tiniest misalignment can lead to an uneven or weak bond. Take your time and ensure that the fragments fit together like puzzle pieces before proceeding.

Now comes the moment of truth – applying the glue. Remember: less is more. Drowning your pieces in glue will only create messy drips and may compromise the strength of the bond. Apply the adhesive evenly and in just the right amount to guarantee a secure repair.
With the glue in place, hold the broken pieces together firmly for several minutes. This act of gentle pressure ensures proper adhesion and sets the foundation for a successful repair. If you want to take it up a notch, clamps or tape can lend an extra hand in keeping everything in place during this critical bonding period.
After patiently waiting for those crucial minutes to pass, it’s time for some much-needed rest. Let your glued bong sit undisturbed for at least 24 hours. This period allows the adhesive to fully cure and strengthen its grip on the shattered fragments. However, bear in mind that even with a successful repair, the glued area may never be as strong as the original glass. Therefore, it’s essential to exercise caution when handling and using a repaired bong to avoid the risk of further damage.
In some instances, the extent of the damage may be too severe or the bong may have shattered into an irreparable number of pieces. In these cases, it might be more practical to bid farewell to your broken companion and consider purchasing a new one instead.
Can Ceramic Bongs Be Glued Back Together?
Ceramic bongs are renowned for their durability and aesthetic appeal, but accidents can occur, leading to breakage. If you find yourself in this unfortunate situation, take heart, because gluing a broken ceramic bong back together is indeed possible.
However, it’s important to understand the best practices to ensure a successful repair. In this comprehensive guide, we will explore the factors to consider, such as selecting the right adhesive, properly preparing the surfaces, and allowing for sufficient curing time.
Choosing the Right Adhesive:
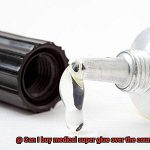
When it comes to gluing ceramic, epoxy resin or super glue are your best options. These adhesives provide strong bonds and are heat-resistant, ensuring that your repaired bong can withstand the rigors of use. Be sure to select an adhesive specifically formulated for bonding ceramics to ensure a long-lasting repair.
Surface Preparation:
Before applying any adhesive, it is crucial to thoroughly clean the broken pieces. Use warm water and mild soap to remove any dirt, dust, or residue that could interfere with the effectiveness of the adhesive. Ensure that the surfaces are completely dry before proceeding with the repair to promote optimal adhesion.
Applying the Adhesive:
Follow the instructions provided by the adhesive manufacturer carefully. Apply a small amount of adhesive to both surfaces that need to be joined and press them together firmly. This ensures maximum contact between the broken pieces. Hold them in place for the recommended curing time to allow for a strong bond to form.
Curing Time:
Curing time is pivotal for a successful repair. It’s essential to give the adhesive enough time to fully cure and bond the broken pieces together.
Follow the manufacturer’s instructions regarding the recommended curing time, which is usually 24 hours. This patience will pay off with a sturdy and reliable repair.
Handling and Care:
It’s important to note that glued ceramic bongs may not possess the same strength as their original state.
The repaired areas might be more prone to future breakage. Therefore, handle the bong with extra care after repair, avoiding excessive stress or impact. Treat it delicately, and it will serve you well.
Alternatives:
In some cases, especially if the break is severe or the pieces do not align properly, it may be more practical to consider replacing the bong instead of attempting a repair. Professional glass and ceramic repair services also exist, but they might come at a higher cost compared to DIY repairs. Evaluate the extent of the damage and decide accordingly.

Can Acrylic Bongs Be Glued Back Together?
But fear not. Gluing an acrylic bong back together can be a viable solution, depending on the extent of the damage and the glue used. Let’s dive into the process and considerations involved in repairing your beloved bong.
First things first, assess the severity of the damage. If your bong has a clean break or a small crack, gluing it back together might just do the trick. However, if it resembles a jigsaw puzzle with multiple cracks or is severely shattered, it may be better to consider investing in a new one.
Selecting the right glue is crucial for a successful repair. Look for adhesives specifically designed for bonding plastics. Two common types that work well with acrylic are epoxy resin and cyanoacrylate (super glue). These adhesives provide strong, long-lasting bonds when used correctly.
Before applying the glue, ensure that the broken pieces are clean and free from dirt or residue. A thorough cleaning will promote better adhesion. Use a gentle cleaner or warm soapy water to clean the surfaces, and make sure they are completely dry before proceeding.
Apply a small amount of glue along the broken edges and press them together firmly for a few minutes until the adhesive sets. Follow the instructions provided by the glue manufacturer carefully to ensure proper application. It’s important to note that while gluing an acrylic bong can restore its functionality, it might not restore its original strength or appearance.
After gluing, allow your bong to dry and cure for at least 24 hours. This will ensure that the adhesive has fully set and bonded the broken pieces together. Once cured, handle your repaired bong with care, as glued areas may be more prone to future breaks or leaks compared to an undamaged bong.
Remember, safety first. When handling adhesives, it’s always a good idea to work in a well-ventilated area and avoid skin contact. Follow any safety instructions provided by the glue manufacturer to protect yourself during the repair process.
Preparing the Broken Pieces for Repair
Before you embark on the journey of repairing your broken bong, it is essential to properly prepare the broken pieces. This section will guide you through the necessary steps to ensure a successful repair.
Step 1: Gather all the broken pieces
To begin, meticulously collect all the broken pieces of your bong. Leave no stone unturned as you search for any small fragments or splinters that may have detached during the unfortunate mishap. Ensuring that you have every part is crucial for a seamless repair process.
Step 2: Clean the broken pieces
Once you have gathered all the pieces, give them a thorough cleaning. Use warm water and mild dish soap to eliminate any dirt, residue, or contaminants from the surfaces. Rinse them meticulously and ensure they are completely dry before proceeding.
Step 3: Assess the damage
Take a close examination of the broken pieces and evaluate the extent of the damage. Are there cracks, chips, or missing parts that require attention? Identifying these aspects will enable you to select the most suitable glue or adhesive for the repair.
Step 4: Sand down rough edges
Smooth out any rough or jagged edges on the broken pieces by delicately sanding them with fine-grit sandpaper. This step guarantees a flawless surface for bonding and facilitates a better fit when reassembling your precious bong.
Step 5: Test fit the pieces
Before reaching for that trusty glue, take a moment to test fit the broken pieces together. This critical step ensures proper alignment before committing to the repair. If any gaps or misalignments are observed, gently adjust and realign until everything fits snugly.
Step 6: Gather necessary supplies
Lastly, gather all the supplies required for the repair process. This includes selecting the appropriate glue or adhesive, donning gloves if necessary, having a clean cloth or paper towel on hand, and acquiring any additional tools specific to your repair needs. Being well-prepared will streamline the gluing process, making it more efficient and effective.
Choosing the Right Adhesive
You’ve had a little mishap with your beloved bong, and now you’re left with a broken piece of glass. Don’t worry, repairing it is easier than you might think. The key to a successful repair lies in choosing the right adhesive. Not all adhesives are created equal, especially when it comes to bonding glass that will be exposed to heat and water.
Here, we’ll explore some of the best adhesive options for repairing your broken bong and their respective advantages and disadvantages.
Epoxy Resin
This is one of the most commonly recommended adhesives for repairing a broken bong. Epoxy is known for its strong bond and resistance to both heat and water. When choosing an epoxy for bonding glass, make sure to select a specific formulation designed for this purpose. General-purpose epoxies may not adhere well to the smooth surface of glass.
Advantages:
- Creates a strong bond that can withstand heat and water
- Durable and long-lasting repair
Disadvantages:
- Requires specific formulation for glass bonding
Cyanoacrylate Glue (Super Glue)
Another popular option is super glue, also known as cyanoacrylate glue. Super glue is fast-drying and creates a strong bond, making it ideal for small repairs on your broken bong. However, it may not be as heat-resistant as epoxy, so it’s important to choose a high-quality super glue that is specifically designed for bonding glass.
Advantages:
- Quick-drying adhesive that forms a strong bond
- Convenient for small repairs
Disadvantages:
Silicone Adhesive/Sealant
If you’re looking to seal the broken pieces of your bong to prevent leaks, silicone adhesive or sealant is worth considering. Silicone is known for its flexibility and resistance to both heat and water. However, it may not create as strong of a bond as epoxy or super glue, so it’s best used for sealing purposes rather than structural repairs.
Advantages:
- Flexible and durable sealant
- Provides excellent heat and water resistance
Disadvantages:
Before using any adhesive on your broken bong, it’s crucial to read the instructions and specifications carefully. Some adhesives may require specific curing times or additional steps for optimal bonding. Additionally, make sure to clean the surfaces to be bonded thoroughly. Any residue or dirt on the glass can hinder the bonding process and weaken the adhesive’s effectiveness.
Applying the Adhesive
Today, we embark on a journey into the realm of adhesives, exploring the process of reuniting your cherished piece. So, let’s dive in.
The first step is crucial: selecting the right adhesive for the task at hand. We have a range of options to consider, including epoxy, super glue, and silicone adhesive. Each possesses its own unique strengths and weaknesses, so choose wisely according to your needs.
Once armed with your adhesive of choice, it’s time to give those fractured surfaces a thorough cleaning. Eliminate any unwanted dirt, dust, or residue that could hinder the bonding process. Remember, a pristine surface is paramount to success.
Now comes the exciting part – the application of the adhesive itself. Follow the manufacturer’s instructions diligently. For epoxy, expertly combine its components akin to a seasoned chemist. Alternatively, evenly apply super glue to both surfaces. Take your time and execute with precision.
With everything prepared, it’s time to reunite those broken fragments. Apply firm pressure and maintain this hold for the recommended duration specified by the adhesive manufacturer. This is where true magic transpires.
Once the adhesive has cured, inspect for any unsightly excess glue that may have escaped from the joint. We wouldn’t want a messy bong repair tarnishing your experience. Employ acetone or rubbing alcohol alongside a clean cloth or cotton swab to swiftly eradicate any residue.
Now, an important note: while gluing your broken bong can serve as a temporary solution, it may not fully restore its strength and functionality. Depending on the severity of the damage, replacing the bong or seeking professional repair services may be necessary – we wouldn’t want any accidents ruining your smoke sesh.
Lastly, exercise patience and allow your repaired bong ample time to dry completely before indulging in another delightful session. This ensures that the adhesive has thoroughly cured, effectively bonding the broken pieces together for a secure and reliable union.
Testing the Repaired Bong
Repairing a beloved bong is a satisfying accomplishment, but ensuring its functionality and safety is equally important. By following a few essential steps, you can confidently test your repaired bong to ensure it meets your smoking needs. Let’s dive into these steps in detail.
First and foremost, allow the glue or adhesive used for the repair to fully cure. While most adhesives require 24 to 48 hours for complete curing, it is crucial to follow the specific instructions provided by the adhesive manufacturer. Patience during this stage is key.
Once the glue has cured, visually inspect the repaired area for any visible cracks, gaps, or weak spots. Gently apply pressure with your fingers to check for signs of instability. We want our repair job to be solid and sturdy.
Now, onto the water test. Fill your bong with water, ensuring it reaches an appropriate level. Slowly pour water into the bong while keeping a close eye on the repaired area. Look out for any leaks or seepage. To avoid any unexpected mess, it’s wise to perform this test over a sink or a tray.
If your repaired bong passes the water test with flying colors, it’s time to move on to the smoke test. Load your bong with your preferred smoking material and ignite it. Take a deep inhale through the mouthpiece and pay attention to any unusual noises, air leaks, or smoke escaping from the repaired area.
During both tests, remain vigilant for any signs of weakness or instability in the repaired area. If anything concerning arises, do not ignore it. It’s better to be safe than sorry, so consider further repairs or replacements if necessary.
Remember, even if your repaired bong initially passes these tests, it is crucial to regularly inspect and maintain it. Over time, heating and cooling cycles, as well as general wear and tear, can affect the integrity of the repair. Stay attentive.
If any issues arise during testing or with continued use of your repaired bong, seeking guidance from a professional glassblower or head shop is highly recommended. They possess the expertise to provide advice and potentially offer additional repairs or replacements if needed.
6GiycPBdfNk” >
Conclusion
Yes, you can certainly glue a broken bong back together. However, it’s important to approach this task with caution and the right materials. Gluing a broken bong requires precision and attention to detail. You’ll need a strong adhesive that is heat-resistant and safe for use on glass. Epoxy resin or specialized glass glue are good options to consider.
Before attempting any repairs, thoroughly clean the broken pieces of the bong to ensure optimal adhesion. Make sure to dry them completely before applying the glue. Apply a thin layer of adhesive along the edges of the broken pieces, ensuring they fit together snugly. Hold them in place firmly for several minutes to allow the glue to bond effectively.
Once the initial bonding is complete, let the glued bong sit undisturbed for at least 24 hours to allow the adhesive to fully cure. This will ensure maximum strength and durability.
It’s important to note that while gluing a broken bong can be a temporary fix, it may not restore its original functionality or aesthetic appeal completely. The glued areas may still be prone to cracking or breaking again under stress.
If your bong holds sentimental value or has unique features that make it irreplaceable, gluing it back together can be a viable option. However, if safety and functionality are your top priorities, it’s recommended to invest in a new bong instead.
In conclusion, yes, you can glue a broken bong back together using appropriate materials and techniques.