Have you ever found yourself stuck in a sticky situation after a crafting session gone awry? Well, fret not.
Today, we’re delving deep into the realm of adhesive mishaps to tackle a burning question: can Gorilla Glue be easily washed off? Whether you’re a seasoned crafter or just a curious soul, stick around (pun intended) as we unravel the truth about this infamously strong glue and explore the methods to combat its tenacious grip.
Get ready to unglue your knowledge and join us on this enlightening adventure.
What is Gorilla Glue?
Contents
- 1 What is Gorilla Glue?
- 2 Why Is It Difficult to Remove Gorilla Glue?
- 3 How to Remove Gorilla Glue with Acetone
- 3.1 Safety First: Precautions to Take Before Using Acetone
- 3.2 Gather Your Supplies: What You’ll Need
- 3.3 Apply Acetone Sparingly: A Little Goes a Long Way
- 3.4 Let It Soak: Patience Is Key
- 3.5 Gently Rub Away: The Magic of Acetone Unleashed
- 3.6 Repeat If Needed: Persistence Pays Off
- 3.7 Clean Thoroughly: Bid Adieu to Residue
- 3.8 A Word of Caution:
- 4 How to Remove Gorilla Glue with Heat
- 5 Using Commercial Adhesive Removers
- 6 Sanding Down the Affected Area
- 6.1 Step 1: Assemble Your Arsenal
- 6.2 Step 2: Patiently Await Full Curing
- 6.3 Step 3: Unleash Your Sanding Prowess
- 6.4 Step 4: Monitor Progress with Precision
- 6.5 Step 5: Conquer Deep Penetrations with Finesse
- 6.6 Step 6: Exemplify the Art of Thorough Cleansing
- 6.7 Step 7: Scrutinize for Lingering Residue
- 7 Professional Help for Stubborn Glue Residues
- 8 Tips and Precautions When Removing Gorilla Glue
- 9 Conclusion
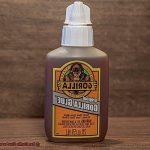
When it comes to adhesive solutions for your DIY projects or repairs, nothing compares to the strength and durability of Gorilla Glue. Developed by the Gorilla Glue Company, this polyurethane-based adhesive has revolutionized the world of bonding, earning its name from its unrivaled strength comparable to that of a gorilla. In this article, we will delve into the wonders of Gorilla Glue, its versatility across various materials, and effective methods for removal.
Versatility and Application:
Gorilla Glue’s versatility knows no bounds as it bonds effortlessly with wood, metal, ceramics, glass, foam, and more. Whether you’re fixing a broken chair, constructing a wooden masterpiece, or embarking on intricate crafts, Gorilla Glue is the adhesive of choice.
With liquid, gel, and tape forms available, it caters to diverse application needs. The liquid form, dispensed through an applicator nozzle, ensures precise application; the gel form excels on vertical surfaces and porous materials; and the tape form eliminates the need for clamping or holding items together during drying.
The Power of the Bond:
What sets Gorilla Glue apart is its exceptional bonding power. Once cured, it forms an unyielding bond capable of withstanding extreme temperatures, moisture, and vibrations. This makes it suitable for both indoor and outdoor projects. However, removing fully dried Gorilla Glue can be challenging due to its resistance to water.
Effective Removal Methods:
While Gorilla Glue proves difficult to remove once completely dried, there are several effective methods you can employ:
- Acetone: Gently dissolve the glue using acetone found in nail polish removers applied with a cloth or cotton ball.
- Heat: Soften the glue by applying low heat with a hairdryer or heat gun, then scrape it off with a plastic scraper or your fingernails.
- Commercial Adhesive Remover: Utilize a commercial adhesive remover specifically designed to tackle strong adhesives like Gorilla Glue.
- Sanding: As a last resort, sanding can help eliminate any remaining glue residue and restore the surface.
Why Is It Difficult to Remove Gorilla Glue?
Gorilla Glue, the adhesive powerhouse that can hold anything together, presents a formidable challenge when it comes to removal. Here’s why:
- Unyielding Bond: The true strength of Gorilla Glue lies in its powerful adhesive properties. Once it sets, it forms an unbreakable bond between surfaces, making it a Herculean task to separate them.
- Resistant Chemical Composition: Gorilla Glue contains a polyurethane adhesive that boasts exceptional resistance to solvents and water. Ordinary household cleaners or a splash of water alone will prove futile against this tenacious glue. You’ll need something stronger, something that can rise to the challenge.
- Expanding Foam: One of Gorilla Glue’s remarkable traits is its ability to expand and foam up when exposed to moisture. This unique foaming action allows the glue to infiltrate every crack and crevice, creating an even more indomitable bond. So not only is the glue difficult to remove, but it also insidiously infiltrates every nook and cranny, further complicating extraction.
- Thick and Sticky: Gorilla Glue’s high viscosity makes it thick and sticky, ensuring a firm grip on whatever it touches. While this attribute enhances its adhesion to surfaces, it also amplifies the difficulty in removing it. Whether it clings to your skin or the material you’re working with, be prepared for a sticky situation.
- Concrete-like Solidification: Once Gorilla Glue dries, it hardens into a rock-solid mass. Any attempts at dissolving or loosening its grip will likely prove futile. It’s akin to trying to break concrete – an arduous feat.
To safely and effectively remove Gorilla Glue without causing damage or leaving residue behind, consider these methods:
- Acetone: Harness the power of acetone, a potent solvent that can break down Gorilla Glue’s adhesive properties. Soak a cloth or cotton ball in acetone and apply it to the affected area. Allow it to sit for a few minutes before gently scrubbing or peeling off the glue.
- Heat: Introducing heat to the equation can soften Gorilla Glue, facilitating its removal. Utilize a hairdryer or heat gun on low heat to warm up the glue. Once it has softened, cautiously peel or scrape it away.
- Commercial Adhesive Remover: Specialized adhesive removers designed to tackle formidable glues like Gorilla Glue are available on the market. Follow the instructions on the product and use it as directed for optimal results.
- Sanding: As a last resort, consider sanding. Employ sandpaper or a sanding block to gradually eliminate the stubborn glue, taking care not to damage the underlying surface.
How to Remove Gorilla Glue with Acetone
Don’t worry, we’ve got you covered. In this article, we’ll show you how to remove Gorilla Glue with the powerful solvent, acetone. With just a few simple steps and some precautionary measures, you can bid farewell to that stubborn adhesive and restore your surfaces to their former glory.
Safety First: Precautions to Take Before Using Acetone
Before diving into the glue removal process, prioritize safety. Acetone is a highly flammable substance, so choose a well-ventilated area and keep any open flames or sparks far away. Additionally, protect your hands with gloves while working with this potent solvent.
Gather Your Supplies: What You’ll Need
To tackle the Gorilla Glue challenge, arm yourself with essential supplies. Grab a bottle of acetone, some soft cotton balls or cloth, and those trusty gloves. With these tools in hand, you’re ready to take on the task.
Apply Acetone Sparingly: A Little Goes a Long Way
Remember, less is more when it comes to acetone application. Dab a small amount onto a cotton ball or cloth, ensuring it’s not dripping wet. Be cautious not to oversaturate the area as excessive acetone can cause damage.
Let It Soak: Patience Is Key
Patience is a virtue. Allow the acetone-soaked cotton ball or cloth to sit on the Gorilla Glue for a few minutes. This will give the acetone enough time to penetrate and soften the adhesive.
Gently Rub Away: The Magic of Acetone Unleashed
Once the glue has softened, unleash the magic of acetone by gently rubbing the area with the cotton ball or cloth. Avoid scrubbing too hard, as this could harm the surface beneath. Let the acetone work its wonders as you apply light pressure to remove the glue.
Repeat If Needed: Persistence Pays Off
If stubborn remnants of Gorilla Glue remain, don’t give up just yet. Repeat steps 3-5 until the adhesive is completely removed. Remember, it may take some time depending on the glue’s thickness and size.
Clean Thoroughly: Bid Adieu to Residue
After successfully removing the Gorilla Glue, take a moment to celebrate your victory. But don’t forget the final step: cleaning. Wash the area thoroughly with soap and water to eliminate any leftover residue from the acetone.
A Word of Caution:
While acetone is a powerful solvent for Gorilla Glue removal, it may not be suitable for all surfaces. Delicate materials like fabrics may be at risk of damage, so it’s best to consult professionals or follow manufacturer instructions for those cases.
How to Remove Gorilla Glue with Heat
Utilizing a Hairdryer or Heat Gun
When confronted with the challenge of removing Gorilla Glue, employing heat can be an exceptional solution. Direct heat can be applied to the affixed area using either a hairdryer or a heat gun. For small amounts of glue, a hairdryer typically suffices. However, when dealing with larger areas, a heat gun may be necessary as it is capable of reaching higher temperatures. It is crucial to adhere to the manufacturer’s instructions when using a heat gun to avoid any mishaps.
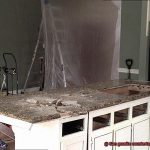
Safeguarding the Surrounding Area
Before applying heat to the glue, it is imperative to take precautions in order to protect the surrounding surfaces. Shield them by covering them with a drop cloth or newspaper to prevent any harm caused by the heat. Additionally, wearing protective gloves will aid in shielding your hands from the searing glue and any potential splatters.
Softening the Glue with Intense Heat
Once adequately prepared, hold the heat source approximately 6-8 inches away from the glued area and commence applying heat. With a gentle back and forth motion, move the heat source to ensure even distribution of the heat across the glue. The objective is to soften the glue, rendering it more pliable and easier to remove.
Delicately Scraping Away the Glue
As the glue begins to warm up, it will undergo liquefaction and become more malleable. At this stage, it is time to gently scrape away the softened glue using either a plastic scraper or an old credit card. Caution should be exercised so as to not exert excessive pressure during the scraping process, as this could result in damage to the underlying surface. Should there be any stubborn areas, it is advisable to reapply heat to further soften the glue before attempting to scrape it away.
Eliminating Residue with a Solvent
After successfully removing as much of the glue as possible, there may still be remnants of residue remaining. To eradicate this residue, a mild solvent such as acetone or rubbing alcohol can be employed. Apply a small quantity of the solvent to a clean cloth and gently rub the remaining glue until it dissolves. It is important to remember to follow any safety instructions and use the solvent in a well-ventilated area.
Thoroughly Cleaning the Area
Once the glue and residue have been successfully eliminated, it is vital to cleanse the area with mild soap and water in order to ensure the complete removal of any traces of solvent. Thoroughly dry the surface before utilizing it once again.
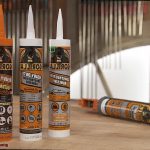
Using Commercial Adhesive Removers
When it comes to removing Gorilla Glue, a powerful adhesive known for its strength and durability, commercial adhesive removers can be a lifesaver. These products are designed to break down the bond created by Gorilla Glue and make it easier to remove from various surfaces. However, using commercial adhesive removers requires careful consideration and proper technique to ensure effective and safe removal.
Before diving into the step-by-step instructions, it’s crucial to note that different adhesive remover products may have specific application methods and safety precautions. To avoid any mishaps, always read and follow the instructions provided by the manufacturer.
Additionally, it’s wise to test the adhesive remover on a small, inconspicuous area first to ensure it doesn’t discolor or damage the surface being treated.
Step 1: Protect the surrounding area
To prevent accidental damage during the removal process, start by protecting the surrounding area with plastic or other materials. This step is especially important if the surface is sensitive or easily damaged.
Step 2: Apply the adhesive remover
Soak a clean cloth or sponge with the commercial adhesive remover and gently rub it onto the Gorilla Glue. Allow the adhesive remover to sit for a few minutes to penetrate the glue and weaken its bond. It’s essential to follow the recommended dwell time mentioned on the product label.
Step 3: Scrape off the softened glue
Once the adhesive remover has had time to work its magic, use a scraper or a plastic putty knife to gently scrape off the softened Gorilla Glue. Take care not to scratch or damage the surface underneath. If necessary, repeat the process of applying adhesive remover and scraping until all traces of Gorilla Glue have been removed.
Step 4: Clean the area
After successfully removing the Gorilla Glue, clean the area with soap and water or a mild household cleaner to eliminate any residue from the adhesive remover. This final step ensures that the surface is clean and ready for use.
It’s important to note that some surfaces may be more sensitive or porous than others, requiring additional care when using commercial adhesive removers. In such cases, it’s advisable to consult a professional for guidance on the best approach to remove Gorilla Glue without causing damage.
Sanding Down the Affected Area
Gorilla Glue is renowned for its formidable strength and ability to create unyielding bonds. However, when this powerful adhesive finds its way into unintended places, it can present quite a challenge. Fear not. In this comprehensive guide, we will explore the art of sanding down the affected area when faced with Gorilla Glue mishaps. So don your protective gear and prepare to immerse yourself in the world of precision restoration.
Step 1: Assemble Your Arsenal
Before embarking on the sanding process, it is crucial to gather all the necessary tools. Equip yourself with sandpaper or a trusty sanding block, along with protective eyewear and a dust mask. Remember, safety is paramount.
Step 2: Patiently Await Full Curing
Exercise your patience muscles here. Allow ample time for the glue to dry and fully cure before engaging in the sanding endeavor. Attempting to sand wet glue will only lead to frustration and an inefficient outcome.
Step 3: Unleash Your Sanding Prowess
Clad in your protective gear, commence the sanding ritual by employing gentle circular motions on the affected area. Begin with a coarse-grit sandpaper, then gradually progress to finer grits as needed. The objective is to delicately eradicate the layer of hardened glue without causing harm to the underlying material.
Step 4: Monitor Progress with Precision
Regularly cleanse away any dust or debris to scrutinize the evolution of your efforts. This vigilant assessment will enable you to determine if further sanding is required. Remember, apply just enough pressure to avoid unsightly scratches or deep gouges.
Step 5: Conquer Deep Penetrations with Finesse
Should the glue have insidiously infiltrated porous substances like wood or fabric, you may need to employ more assertive techniques, such as scraping or employing a specialized chemical solvent designed expressly for adhesive removal. Exercise caution and adhere strictly to the manufacturer’s instructions when utilizing solvents.
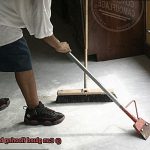
Step 6: Exemplify the Art of Thorough Cleansing
Once the glue has been successfully sanded away, devote ample time to meticulously purging the area of any lingering dust particles. A damp cloth or sponge will suffice in ensuring a pristine and polished surface.
Step 7: Scrutinize for Lingering Residue
Before celebrating your victory, inspect the surface meticulously to ensure that every trace of glue has been banished. If necessary, repeat the sanding process or explore alternative methods, such as harnessing heat or solvents, to achieve a flawless finish.
Professional Help for Stubborn Glue Residues
Its incredible strength and durability make it the go-to choice for all your sticking needs. But what happens when its grip becomes too tight? Those stubborn residues left behind can be a real headache to remove. Fear not, for we have the ultimate solution – professional help. In this blog post, we will explore why seeking expert assistance is crucial when dealing with these tenacious Gorilla Glue residues.
The Unyielding Challenge:
Gorilla Glue is notorious for bonding almost anything together with an iron grip. Consequently, removing its residues can feel like an uphill battle. These sticky remnants cling to surfaces with the same determination as a toddler gripping their favorite toy.
The Expert’s Arsenal:
Professional cleaners and cleaning services possess the experience and knowledge needed to handle various tough stains and residues, including Gorilla Glue. They are armed with secret weapons and techniques that effectively eliminate those pesky residues.
Seeking Guidance from the Source:
Why not go straight to the horse’s mouth? Reaching out to Gorilla Glue’s manufacturer can provide tailored advice specific to their product. They may offer ingenious recommendations or even specialized products designed specifically for removing their stubborn adhesive from different surfaces.
Surface-Specific Strategies:
Every surface has its own personality, requiring different cleaning methods to avoid damage. Providing detailed information about the type of surface enables professionals to craft a precise plan of attack that guarantees both residue removal and surface preservation.
Specialized Solvents: Taming the Beast:
Professional cleaners often wield powerful solvents and adhesive removers formulated explicitly for tackling tough adhesives like Gorilla Glue. These magical potions break down the adhesive bonds without harming the underlying surface. Remember, always follow the provided instructions for safe and effective removal.
The Art of Physical Techniques:
Sometimes, the battle requires more than just solvents. Scraping and sanding may be necessary to conquer those stubborn residues. However, these techniques should only be performed by experienced professionals who understand how to handle them without causing harm.
Tips and Precautions When Removing Gorilla Glue
Gorilla Glue is a powerful adhesive known for its strength and durability. However, there may be instances where you need to remove it. Whether you’re faced with a spill or need to clean up a project, it’s important to approach the removal process with caution and follow specific tips and precautions. In this blog post, we will explore five sub-sections that provide comprehensive guidance on safely removing Gorilla Glue.
Read and Follow Instructions:
Before attempting to remove Gorilla Glue, it’s crucial to read and follow the manufacturer’s instructions. These instructions often contain specific recommendations on how to effectively remove the glue without causing damage. By following these guidelines, you can ensure the safety of yourself, the surface, and the object being cleaned.
Use Warm, Soapy Water:
A common method for removing Gorilla Glue is to use warm, soapy water. Start by soaking the affected area in warm water for a few minutes. This helps soften the glue and makes it easier to wash off. Remember to use mild soap and avoid harsh chemicals that may damage the surface. Gently scrub the area with a soft brush or sponge to further loosen the adhesive.
Test Solvents:
If warm, soapy water isn’t enough, you can try using solvents like rubbing alcohol or acetone. However, it’s important to test these substances on a small, inconspicuous area first to ensure they won’t cause any damage or discoloration. Work in a well-ventilated area and avoid inhaling fumes while using solvents. Apply a small amount of solvent to a cloth or cotton ball and gently rub the affected area, allowing it some time to soften before attempting removal.
Be Patient:
Removing Gorilla Glue may require time and effort, so it’s important to be patient throughout the process. Rushing or applying excessive force can lead to damage or staining of the surface. Take your time and work gently, allowing the chosen method to work effectively. If needed, repeat the process multiple times until the glue is completely removed.
Seek Professional Help:
In some cases, Gorilla Glue may be difficult to remove or may cause damage to the surface. If you find yourself struggling or unsure, it’s best to seek professional help. Professionals can assess the situation and provide guidance or assistance in safely removing the glue without causing further damage. They have the expertise and knowledge to handle challenging situations effectively.
CoNOAlIFCBQ” >
Also Read: How To Remove Gorilla Glue From Metal?
Conclusion
Yes, Gorilla Glue can be washed off. Despite its strong adhesive properties, it is not impossible to remove. With the right techniques and products, you can successfully get rid of Gorilla Glue from surfaces or even your skin.
To start, if the glue is still wet, you should act quickly. Use a damp cloth or sponge to gently wipe away as much of the glue as possible. Avoid rubbing vigorously, as this can spread the glue and make it harder to remove.
If the glue has already dried, don’t panic. There are still ways to tackle this sticky situation. One option is to use warm soapy water. Fill a bowl or basin with warm water and add some mild dish soap. Soak the affected area in this solution for a few minutes to soften the glue.
Another effective method is using acetone or nail polish remover. Moisten a cotton ball or cloth with acetone and carefully dab it onto the glue. Allow it to sit for a few minutes before gently rubbing in circular motions. This will help break down the adhesive and make it easier to wash off.
For tougher cases, you may need to use a commercial adhesive remover specifically designed for Gorilla Glue. These products are available at hardware stores or online retailers and are formulated to dissolve stubborn adhesives without damaging surfaces.
Remember, always follow safety precautions when using any chemical substances and read the instructions carefully before applying them.
In conclusion, while Gorilla Glue may seem like an unyielding adversary, it can indeed be washed off with patience and the right approach. Whether you’re dealing with a small spill or an accidental bonding mishap on your skin, these methods should help you restore surfaces back to their original state without leaving behind any sticky residue.