When it comes to fixing things or getting creative with projects, we all need a reliable adhesive in our toolkit. Enter Gorilla Glue, the superhero of adhesives that can bond just about anything. But what about glass? Can this mighty glue work its magic on those delicate surfaces? Today, we’re diving into the world of Gorilla Glue and exploring whether it’s a match made in heaven for glass bonding. So grab your safety goggles and let’s get started.
Advantages of Using Gorilla Glue on Glass:
- Versatility: Gorilla Glue is like a chameleon—it can bond almost any material you throw at it, including glass. This means you can mend your broken glass objects or create stunning glass masterpieces without breaking a sweat.
- Super Strength: When it comes to bonding, Gorilla Glue doesn’t mess around. It creates an unbreakable bond that can withstand all sorts of stress and strain. So say goodbye to flimsy connections and hello to durable bonds that will stand the test of time.
- Brave against the Elements: Whether you’re displaying your glass creation indoors or braving the great outdoors, Gorilla Glue has got your back. It can handle extreme temperatures like a champ, from scorching heat to freezing cold, without compromising its grip on the glass.
Disadvantages and Safety Precautions:

- The Foggy Dilemma: One potential downside of using Gorilla Glue on glass is the risk of fogging or hazing. This happens when too much glue is applied or when it’s not spread evenly across the surface. But fear not. To avoid this cloudy situation, simply apply a thin and even layer of glue onto your glass canvas.
- Patience is a Virtue: Gorilla Glue requires some extra TLC during the curing process. This means you’ll need to clamp your glass pieces together while the glue works its magic. Plus, compared to other adhesives, it might take a bit longer for Gorilla Glue to fully cure. So sit back, relax, and let time do its thing.
- Safety First: Remember, my fellow DIYers, safety should always be our top priority. When working with Gorilla Glue (or any adhesive for that matter), protect those precious eyes with goggles and keep
What is Gorilla Glue?
Contents
- 1 What is Gorilla Glue?
- 2 Can Gorilla Glue be Used on Glass?
- 3 Preparing the Glass Surface for Adhesion
- 4 Applying Gorilla Glue to the Glass Surface
- 5 Holding the Pieces Together Until Drying is Complete
- 6 Removing Excess Glue Before it Dries
- 7 Considerations for Different Types of Glass
- 8 Aesthetics – Is Gorilla Glue Transparent When Dry?
- 9 Conclusion
When it comes to tackling your DIY projects, having a reliable adhesive is essential. Enter Gorilla Glue, the adhesive powerhouse that has gained a strong reputation for its incredible bonding strength and versatility.
Whether you’re working with wood, metal, ceramics, or plastic, Gorilla Glue is the go-to adhesive for craftsmen, DIY enthusiasts, and professionals alike.
Here, we’ll explore what makes Gorilla Glue so special and how it can be used effectively on different materials.
Unleashing the Bonding Power:
Gorilla Glue’s secret lies in its unique polyurethane-based formulation. This adhesive is moisture-activated, requiring moisture to cure and create an unbreakable bond. Once applied, the glue expands and penetrates the material’s fibers, resulting in a durable bond that stands the test of time.
Versatility at Its Finest:
Gorilla Glue’s versatility is a key factor in its popularity. It can be used on a wide range of materials, from wood to metal, stone to fabric. This makes it an indispensable tool for various projects around the house or in professional settings.
Plus, its waterproof nature ensures that it can withstand exposure to water, mild chemicals, and extreme temperatures, making it suitable for both indoor and outdoor applications.
Using Gorilla Glue on Glass:
While Gorilla Glue excels in bonding most materials, glass requires some special considerations. Glass surfaces are typically smooth and non-porous, posing a challenge for adhesion. However, with proper preparation and application techniques, Gorilla Glue can still be used effectively on glass surfaces.
- Clean the glass: Before applying Gorilla Glue to glass, ensure that the surface is pristine and free from dirt, oils, or residues that may hinder adhesion. Use isopropyl alcohol or glass cleaner for a thorough cleaning.
- Roughen the surface: Enhance the bond between the glue and the glass by lightly roughening the surface using fine-grit sandpaper or a glass etching solution. This creates tiny grooves that improve adhesion.
- Apply the glue: Using a brush or spreader, apply a thin and even layer of Gorilla Glue on the glass surface. Avoid excessive glue, as it can lead to messy results and compromise bond strength.
- Join the surfaces: Carefully join the two surfaces together and apply gentle pressure. Holding them in place until the glue dries completely, usually taking around 1-2 hours, is crucial.
- Clean excess glue: As Gorilla Glue expands as it cures, wipe away any excess glue immediately before it dries to ensure a clean finish.
Can Gorilla Glue be Used on Glass?
Glass, a beautiful and versatile material, can be used in a wide range of DIY projects and crafts. However, bonding glass surfaces can be challenging due to its smooth and nonporous nature. But fear not. With the right preparation and application techniques, Gorilla Glue can be used on certain types of glass, creating a strong and durable bond that will stand the test of time.
Let’s dive into the process step by step to discover how you can effectively use Gorilla Glue on glass:
- Prepare the surface: Before applying Gorilla Glue, it’s crucial to ensure that the glass surface is squeaky clean. Remove any dirt, dust, or oils that could hinder the bond. Use alcohol or a specialized glass cleaner for optimal results.
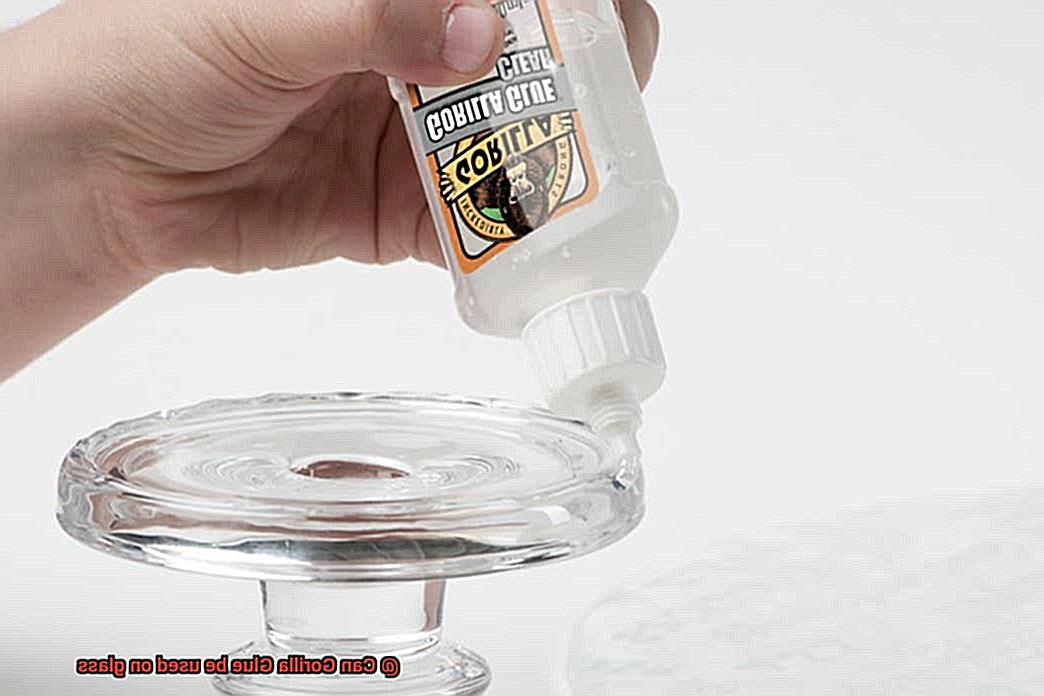
- Choose the right type of Gorilla Glue: When it comes to bonding glass, opt for the clear variant of Gorilla Glue. Specifically formulated for transparent applications, it offers better aesthetics and dries to a clear finish, minimizing visible residue or marks.
- Apply a thin layer of adhesive: Use a brush or applicator to apply a thin layer of Gorilla Glue to one of the surfaces being bonded. Remember, less is more. The glue expands while curing, so excessive application can lead to messy results and affect the appearance of the bond.
- Press the surfaces together: Once the adhesive is applied, firmly press the two surfaces together. To ensure proper contact and bonding, consider clamping or applying some weight if needed.
- Allow for curing time: Patience is key. Leave the bonded pieces undisturbed for at least 24 hours to allow the glue to fully cure and achieve maximum strength. This will guarantee a strong and durable bond that won’t let you down.
While Gorilla Glue can be used on certain types of glass, it’s important to note that it may not be suitable for all glass applications. For glass exposed to high temperatures or constant moisture, a specialized adhesive designed for those conditions might be more appropriate.
Preparing the Glass Surface for Adhesion
Today, we’re going to unlock the secrets of preparing a glass surface for adhesion with Gorilla Glue. Get ready to take your projects to the next level.
First things first, let’s talk cleaning. Before applying any adhesive, it’s crucial to clean the glass surface thoroughly. Oils, fingerprints, dust – they all need to go. Grab a gentle glass cleaner or rubbing alcohol and give that glass a good scrub. Just be sure to avoid harsh chemicals or abrasive cleaners that can damage the glass.
Now, let’s roughen things up a bit. If your glass has a smooth, glossy finish, lightly sanding the surface with fine-grit sandpaper can improve adhesion. These micro abrasions provide more surface area for the adhesive to grip onto. But remember, don’t go too crazy with the sanding or you might end up with scratches or cracks.
Next up, degreasing. Even after cleaning, there might still be traces of oils or grease that can interfere with adhesion. That’s where a trusty degreasing agent like acetone or isopropyl alcohol comes in. Grab a lint-free cloth and wipe that glass down until it shines like never before.
Some experts swear by primers for glass surfaces. These magical potions create a chemical bond between the glue and the glass, enhancing adhesion even further. Check out what the primer manufacturers recommend and follow their instructions carefully.
If you’re only bonding specific areas of the glass, masking tape is your best friend. Protect those surrounding areas from excess glue or potential damage during application. Your projects will thank you for this extra step.
Now it’s time to apply the Gorilla Glue. Follow the manufacturer’s instructions for your specific type of glue, and remember – less is more. Apply a thin, even layer of glue on one of the surfaces to be bonded. We don’t want excess glue squeezing out and ruining the look of your masterpiece.
And finally, patience is key. Depending on your project, you might need to apply pressure or use clamps to hold the glass pieces together while the glue cures. Check out the Gorilla Glue packaging for recommended curing times and techniques. And remember, let that adhesive dry completely before subjecting your bonded glass to any stress or load.
By following these steps and properly preparing the glass surface, you’ll achieve optimal adhesion with Gorilla Glue or any other adhesive on glass. So go ahead, unleash your creativity, and let your projects shine. And as always, read and follow all safety precautions and product instructions provided by the manufacturer for best results.
Applying Gorilla Glue to the Glass Surface
Gorilla Glue is a renowned adhesive known for its strength and versatility. However, using it on glass surfaces can be challenging due to the smooth and non-porous nature of glass. In this informative guide, we will explore the secrets to successfully bonding glass with Gorilla Glue. So grab your safety goggles, and let’s get started.
Step 1: Preparing the Glass Surface
Before applying Gorilla Glue, it is crucial to clean the glass surface thoroughly. Remove any dirt, dust, or oils that may hinder the adhesive’s performance. Use isopropyl alcohol or a glass cleaner to ensure a clean bonding surface.
Step 2: Less is More
When it comes to Gorilla Glue and glass, a minimal amount is sufficient. Applying an excessive amount of glue can result in a messy application and weaken the bond. Aim for a thin and even layer of glue on the glass surface.
Step 3: Roughening Things Up
Since glass is smooth and non-porous, enhancing the bond between Gorilla Glue and glass requires some roughening. Gently scuff the glass surface using sandpaper or a fine-grit abrasive pad. This creates micro abrasions that provide more grip for the adhesive. Be cautious not to damage the glass while roughening it.
Step 4: Applying Pressure for Perfection
After applying the glue to the glass surface, exerting pressure during the drying process is crucial for a strong bond. Use clamps specifically designed for delicate materials like glass. Alternatively, use rubber bands or tape to hold the pieces together firmly.
Step 5: Patience is a Virtue
Gorilla Glue needs time to work its magic. The drying time can vary depending on factors such as temperature and humidity. Follow the manufacturer’s instructions for the specific type of Gorilla Glue being used. Generally, allow the glue to cure for approximately 24 hours.
Step 6: Handle with Care
Once the glue has fully cured, handle the bonded glass with care. Despite the strong bond created by Gorilla Glue, glass is still fragile. Avoid subjecting it to excessive force or sudden impacts. Keep your creations away from extreme temperatures and harsh conditions to ensure their longevity.
Holding the Pieces Together Until Drying is Complete
Today, we embark on a journey into the world of adhesives, exploring the crucial step of holding glass pieces together until Gorilla Glue has fully dried. So, don’t your gloves and prepare to immerse yourself in the intricate details of perfecting your adhesive bonds.
Preparation is Key:
Before even thinking about applying Gorilla Glue, take a moment to meticulously cleanse those glass surfaces. Dust, dirt, and stubborn grease can prove to be pesky adversaries, hindering the glue’s magical powers. Armed with mild detergent or glass cleaner, give those surfaces an intensive scrub-down, ensuring they are bone dry before progressing further.
Applying Just Right:
Remember, moderation is key when it comes to Gorilla Glue. A delicate, thin layer is all that’s required to achieve a robust bond between your glass pieces. Resist the urge to go overboard with the glue – excess won’t strengthen your bond; it will only create a messy situation.
Align and Hold Firmly:
Once you’ve expertly applied the glue, it’s time to bring those glass pieces together in harmonious alignment. Precision becomes paramount at this stage; align them flawlessly to ensure a seamless finish. Now comes the pivotal moment – holding them firmly in place until the glue dries completely. Utilize clamps or apply pressure with your gloved hands (remember those.). But beware – do not squeeze too forcefully; we desire a bond, not shattered dreams.
Patience is a Virtue:
Herein lies the challenge – drying time. The setting process for Gorilla Glue typically requires 1-2 hours, while full curing necessitates a patient wait of 24 hours. Variables such as temperature and humidity impact these time frames. So stash away your stopwatch and embrace the virtue of patience during this crucial stage. Trust us, good things come to those who wait.
Handling with Care:
The glue has dried, and your glass pieces have melded into a breathtaking, bonded entity. However, bear in mind that Gorilla Glue expands as it cures. If any excess glue oozes out, remain calm and composed. Allow it to dry thoroughly before delicately removing it with a sharp blade or sandpaper for that final touch of finesse.
Removing Excess Glue Before it Dries
When it comes to removing excess glue before it dries on glass surfaces, time is of the essence. Gorilla Glue becomes a formidable opponent once it sets, so quick action is necessary. If the glue is still wet, grab a plastic scraper or a blunt-edged tool and gently scrape off as much of the excess as possible. Take care not to scratch or damage the glass during this process.
However, if the glue has already started to dry and harden, don’t panic. Acetone is your secret weapon. Test a small, inconspicuous area on the glass first to ensure it won’t cause any damage or discoloration. If all looks good, apply a small amount of acetone to a clean cloth or cotton swab and start gently rubbing the glue residue until it dissolves away. Remember to work in a well-ventilated area and avoid direct contact with your skin or eyes.
For smaller areas of excess glue, a warm soapy water soak can work wonders. Fill up a basin or sink with warm water and add a few drops of dish soap. Submerge the glass item in the water, making sure the glued area is fully covered. Let it soak for at least 30 minutes, then grab a soft brush or sponge and gently scrub off the softened glue.
If the glue has fully cured and seems impenetrable, fear not. Heat is your ally here. Set your hairdryer to low heat and direct it towards the glue for a few minutes. As the glue softens, carefully scrape it off with a plastic scraper or a blunt-edged tool.
If you prefer a commercial solution, there are adhesive removers available on the market. Just follow the manufacturer’s instructions, test on a small area first, and bid farewell to excess glue in no time.
Remember, prevention is always better than cure. So next time you’re working with Gorilla Glue and glass surfaces, take some extra precautions. Masking tape or painter’s tape can be your best friends, protecting your precious glass from accidental glue spills.
Considerations for Different Types of Glass
Bonding glass surfaces requires selecting the right adhesive, and Gorilla Glue is known for its strength and versatility. However, it’s crucial to understand that not all types of glass are suitable for this adhesive. In this article, we will explore the considerations to keep in mind when using Gorilla Glue on different types of glass surfaces.
Understanding Glass Types:

Glass composition and properties can greatly affect the effectiveness of Gorilla Glue. Tempered glass, which undergoes a special heating and cooling process for increased strength, may have surface treatments or coatings that prevent adhesion. Regular annealed glass, commonly used in everyday applications, is generally suitable for bonding.
Surface Preparation:
Proper surface preparation is vital for a strong bond. Thoroughly clean the glass surface to remove any dirt, oils, or residues that could hinder adhesion. To enhance the bond between the glue and the glass, consider lightly roughening the surface with fine-grit sandpaper or a glass etching solution.
Thickness and Application:
Consider the thickness of the glass and the intended application. Thicker glass provides more surface area for bonding, resulting in a stronger bond. However, if the glass will be subjected to high stress or load-bearing situations, specialized adhesives designed for those purposes may be necessary.
Compatibility with Specialty Glass:
Specialty glass, such as frosted or textured glass, may have surface treatments or coatings that affect adhesive performance. Always test a small inconspicuous area before applying Gorilla Glue to ensure compatibility.
Follow Manufacturer’s Instructions:
To achieve optimal results, carefully follow the manufacturer’s instructions provided by Gorilla Glue. Different products within their line may have specific recommendations or limitations for use on glass. Adhere to the recommended curing time and any safety precautions.
Aesthetics – Is Gorilla Glue Transparent When Dry?
Renowned for its incredible strength, Gorilla Glue is a go-to choice for many DIY enthusiasts. But if transparency is a key factor in your project, hold on before you grab that bottle.
The truth is, Gorilla Glue is not transparent when dry. Instead, it dries to a yellowish color that can be quite noticeable on clear or light-colored surfaces like glass. This yellowing effect is primarily caused by a chemical called phenol. When exposed to air and moisture, phenol reacts and causes the glue to darken over time. Even if you try applying a thin layer or using less glue, the yellow tint may still persist.
But don’t lose hope just yet. Gorilla Glue has a transparent solution waiting for those seeking aesthetics. Enter Gorilla Clear Glue, specially formulated to dry transparent. This variation is perfect for applications where transparency is crucial, particularly when working with glass.
When using Gorilla Glue on glass, it’s vital to consider the purpose of the bond and the significance of aesthetics. If transparency is an absolute must, it’s best to opt for Gorilla Clear Glue or explore other adhesive options designed specifically for bonding glass. Additionally, it’s wise to conduct a small test in an inconspicuous area of the glass before applying the glue to a larger surface. This way, you can determine if the yellowing effect is acceptable for your project.
If aesthetics reign supreme and transparency is non-negotiable, fear not. There are alternative adhesive options available that are specifically formulated to bond glass and offer superior transparency when dry. These specialized adhesives will ensure your glass projects shine with clarity and beauty.
HYpbo5ze4OE” >
Also Read: Can I use Gorilla Glue on glasses?
Conclusion
Yes, Gorilla Glue can indeed be used on glass.
Its strong adhesive properties make it an excellent choice for bonding glass surfaces together. Whether you’re repairing a broken vase or creating a stunning glass art piece, Gorilla Glue will provide a secure and long-lasting bond.
So, go ahead and unleash your creativity – Gorilla Glue has got your glass projects covered.