We all know the heartbreak of discovering a pesky tear or loose sole on our beloved Ugg boots. But fear not, because we’ve got a solution that will make your boots good as new – glue.
Today, we’re diving into the world of Ugg boot repair and finding the best glue to fix them up. We’ll explore different options, their durability, and how easy they are to use.
So whether you’re a seasoned DIY enthusiast or just starting out in the crafting world, this guide has got you covered. Get ready to say goodbye to those tears and hello to cozy comfort once again.
Let’s get stuck on finding the perfect glue.
What Type of Glue to Use for Ugg Boots
Contents
When it comes to repairing your beloved Ugg boots, choosing the right glue is essential for a strong and durable bond. With an overwhelming number of options available, finding the ideal adhesive might seem like a daunting task. Fear not. In this comprehensive guide, we will explore the qualities of the perfect glue for Ugg boots and recommend some top brands to consider.
Qualities of the Perfect Glue:
- Flexibility: Ugg boots endure constant bending and flexing, so it’s crucial to choose a glue that can withstand these movements without cracking or coming apart.
- Strong Bonding Properties: Look for a glue with excellent bonding capabilities to ensure that the repaired area stays intact for a long time, even with regular wear.
- Waterproofness: Ugg boots are often exposed to moisture, so opting for a waterproof glue provides added protection and prevents the adhesive from deteriorating over time.
- Compatibility: Select a glue specifically designed for repairing footwear, as it will be formulated to bond well with materials commonly used in Ugg boots, such as leather or suede.
Top Glue Brands for Ugg Boot Repairs:
- Shoe Goo: This versatile adhesive is highly recommended for its exceptional bond strength and flexibility, making it suitable for various types of shoes, including Ugg boots.
- Barge All-Purpose Cement: Known for its exceptional bonding capabilities, this adhesive is ideal for Ugg boot repairs. It provides a durable bond that remains flexible even after drying.
- E6000 Craft Adhesive: Offering both strength and flexibility, this glue is an excellent choice for repairing Ugg boots. It can withstand extreme temperatures and is resistant to water.
Application Tips:
- Cleanliness is Key: Before applying any glue, thoroughly clean the areas to be repaired by gently wiping them with a mild detergent and allowing them to dry completely. This ensures a clean surface for optimal bonding.
- Follow Instructions: Always read and follow the manufacturer’s instructions for your chosen glue to achieve the best results. Each adhesive may have specific application techniques and drying times.
- Patience is a Virtue: Allow the glue to cure for the recommended amount of time before wearing the boots again. This ensures a proper bond and prevents premature damage.
Popular Glues for Ugg Boot Repairs
Your Ugg boots have been through thick and thin with you, braving the elements and keeping your feet warm and cozy. But what happens when they start to show signs of wear and tear? Fear not, for we have the secret to reviving your beloved boots: the perfect glue. In this guide, we will explore the most popular glues used for Ugg boot repairs and their respective properties, so you can choose the right adhesive to bring your boots back to life.
Shoe Goo:
One of the top recommendations for Ugg boot repairs is Shoe Goo. This adhesive is specifically designed for footwear repair, boasting strong adhesion and flexibility. It provides a reliable and long-lasting bond that can withstand the demands of daily wear.
Barge All-Purpose Cement:
For those worn-out soles, Barge All-Purpose Cement is a go-to choice. Known for its durability, this versatile glue bonds different materials commonly used in Ugg boots, including leather and rubber. Say goodbye to those floppy soles and hello to sturdy steps.
E6000 Craft Adhesive:
If you’re looking for a glue that can tackle various materials, E6000 Craft Adhesive is your answer. This versatile adhesive provides a strong hold on different surfaces, making it ideal for Ugg boot repairs. From leather to fabric, this adhesive has got you covered.
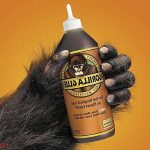
Gorilla Glue:
Gorilla Glue has gained a loyal following among Ugg boot owners due to its incredible bonding capabilities. This adhesive forms a strong bond that can withstand heavy use. However, be cautious as Gorilla Glue expands as it dries, so use it sparingly to avoid any messy excess.
Specialized Adhesives:
For specific Ugg boot repairs, specialized adhesives are available in repair kits. These adhesives are formulated to bond the unique materials used in Ugg boots, providing a reliable and long-lasting hold. These kits often include instructions and tools for a seamless repair experience.
Selecting the Right Glue for Ugg Boots
Ugg boots are beloved for their comfort and style, but over time, wear and tear can take a toll. That’s where the right glue comes in. This guide explores factors to consider when selecting glue for repairing Ugg boots, along with popular options on the market.
Factors to Consider:
- Material Compatibility: Look for high-quality adhesive designed for leather and suede. These glues bond well with Ugg boots’ unique properties, ensuring a strong repair.
- Flexibility and Waterproofing: Ugg boots face moisture exposure, so choose flexible and waterproof glue. This ensures the repair withstands these conditions without deteriorating.
- Clear Drying: To maintain aesthetic appeal, select glue that dries clear. This ensures a seamless blend with the rest of the boot.
Popular Glue Options:
- Shoe Goo: Strong and flexible adhesion, specifically designed for footwear repairs. Offers excellent waterproofing.
- Barge All-Purpose Cement: Ideal for sole repairs, provides durable bonding for heavy-duty repairs, resistant to water and extreme temperatures.
- E6000 Craft Adhesive: Suitable for various materials, offers a strong bond while remaining flexible.
Application Tips:
- Clean the Surface: Thoroughly clean the boots to remove dirt or debris for better bond.
- Thin Layer Application: Apply glue thinly to both surfaces needing bonding, press firmly together and hold for a few minutes.
- Curing Time: Allow full curing time before wearing again, usually around 24 hours.
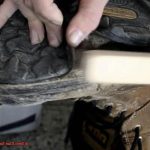
Preparing the Surfaces Before Applying the Glue
Preparing the surfaces before applying glue is an essential step in ensuring a strong and long-lasting bond when repairing Ugg boots. By following these steps, you can effectively prepare the surfaces and bring your beloved boots back to life.
- Clean the surfaces: Begin by using a mild soap or detergent and warm water to gently clean the areas that need to be repaired. This will remove any dirt, oils, or debris that could interfere with the adhesive’s effectiveness. Avoid using harsh chemicals or abrasive cleaners, as they can damage the boots.
- Let them dry: After cleaning, allow the boots to dry completely. Moisture can negatively impact the adhesive’s effectiveness, so it’s crucial to ensure that the surfaces are completely dry before moving forward.
- Trim loose threads and fibers: Inspect the damaged areas of your boots and carefully trim any loose threads or fibers using sharp scissors. This will create a smooth surface for the glue to adhere to.
- Roughen the surfaces (if needed): In some cases, you may need to roughen the surfaces slightly to improve adhesion. Use fine-grit sandpaper or an emery board to gently sand the area being repaired in a circular motion. This creates a textured surface for the glue to grip onto.
- Clean up the dust: After sanding, remove any dust or particles using a soft brush or cloth. A clean, debris-free surface is necessary for the glue to bond properly.
- Fill in gaps or holes (if necessary): If there are any gaps or holes in the material, fill them before applying the glue. You can use a thin layer of adhesive or get creative with epoxy putty or fabric patches, depending on the size of the hole or gap.
- Apply the glue: Choose an adhesive specifically designed for repairing Ugg boots and apply it evenly onto both surfaces that need to be bonded together. Use a small brush or applicator to ensure an even distribution of the glue.
- Press and hold: After applying the glue, carefully press the surfaces together and hold them firmly for the recommended amount of time specified by the adhesive manufacturer. This allows the glue to set properly and create a strong bond. Be patient during this step.
- Let it cure: Once the glue has fully cured, avoid putting excessive stress on the repaired area until it has had enough time to set completely. This may take several hours or even overnight, depending on the type of adhesive used.
Applying the Glue
With the right glue and a little know-how, you can resurrect your favorite pair and have them looking as good as new. In this comprehensive guide, we will walk you through the proper way to apply glue when repairing Ugg boots, ensuring a strong and lasting bond.
First things first, before diving into the gluing process, it is crucial to properly prepare the area that needs repair. No dirt or debris should interfere with the adhesive’s magical powers. To clean the area, use a mild detergent or soap and water solution. Ensure that it dries completely before moving on to the next step. Remember, patience is key.
Now that your boots are squeaky clean, it’s time to choose the right glue for the job. Look for a strong adhesive specifically designed for footwear repairs. These glues are like superheroes, bonding well with different materials commonly found in Ugg boots, such as suede and sheepskin. Alternatively, you can opt for a flexible adhesive if you anticipate some movement and flexibility in the repaired area.
When it comes to applying the glue, remember: less is more. Use a small amount and spread it evenly over the damaged area. Avoid using too much, as excess glue can seep out when you apply pressure. We don’t want a sticky mess on our hands. Make sure every nook and cranny is covered with glue for a strong bond that will withstand whatever adventures you throw at your boots.
Once the glue is applied, it’s time to press and hold. This step is crucial to ensure a secure repair. Grab your boots tightly and hold them together firmly for the recommended amount of time specified by the glue manufacturer. This could range from a few minutes to several hours, so be sure to read the instructions carefully.
Now comes the hard part – waiting for the glue to dry. We know how tempting it is to slip those boots on and show them off, but resist the urge. Give the glue ample time to dry completely. The drying time will vary depending on the glue product used, so consult the manufacturer’s instructions for guidance. Trust us, it’s better to be patient now than to have a repair that doesn’t hold up in the long run.
Once the glue has dried, take a moment to inspect your handiwork. Make sure the repaired area holds together securely. If you spot any excess glue, simply remove it with a damp cloth or sponge. Your boots are almost ready for action.
Before strutting your stuff in your repaired Ugg boots, it’s a good idea to let them sit for a little while longer. This allows the glue to fully cure and ensures maximum durability. Think of it as letting the glue reach its full potential before hitting the pavement.
Securing the Bond with Pressure
When it comes to repairing your beloved Ugg boots, choosing the right adhesive is crucial. But equally important is the technique for applying the glue. To ensure a strong and long-lasting bond, applying pressure during the bonding process is essential.
Pressure helps the adhesive penetrate the fibers of both the boot material and the glued area. This creates a tight and secure bond that can withstand everyday wear and tear. We all want our repaired boots to last as long as possible, right?
One effective method of applying pressure is by using clamps or weights. Align and press the surfaces together after applying the glue. Then, place a clamp or weight on top to exert consistent pressure. This ensures that the adhesive spreads evenly and maximizes contact between the materials.
But what if you don’t have clamps or weights on hand? No worries. You can also use your own hands to apply pressure. Simply press down firmly on the glued area for a few minutes to allow the adhesive to set and bond properly. Just be careful not to go overboard and squeeze out excess glue from the sides.
Different adhesives may require varying amounts of pressure for optimal bonding. Always check the manufacturer’s instructions for specific guidelines on applying pressure with a particular type of glue.
And don’t forget to give your repaired boots enough drying time before wearing them again. This will ensure that the bond has fully cured and is ready to take on whatever you throw at it.
Drying Time Considerations
Repairing your cherished Ugg boots involves a meticulous process that demands attention to every detail. From selecting the right adhesive to applying the perfect amount of pressure, each step plays a vital role in the durability and longevity of the repair. Amidst these considerations, the drying time of the glue used often goes unnoticed. Yet, it is a critical factor that determines the efficacy of the repair and how swiftly you can slip your beloved boots back on.
There exists a plethora of glues, each with its unique drying time, and it is imperative to choose one that aligns with your requirements. For Ugg boot repairs, it is recommended to opt for an adhesive that dries relatively quickly. This ensures that you can resume wearing your boots without compromising the strength and resilience of the repair.
One popular choice for Ugg boot repairs is a robust adhesive specifically crafted for footwear repairs. Typically taking around 24 hours to dry, these glues afford ample time for the adhesive to thoroughly set and seamlessly bond the materials together. The result is an enduring and steadfast repair.
However, if time is of the essence and you find yourself unwilling to wait 24 hours, fast-drying options are available as well. These glues can dry within a matter of hours or even minutes. Although they offer expedited results, it is important to bear in mind that faster drying times may not bestow the same level of strength and durability as their slower-drying counterparts.
To ensure optimal drying, adhering to the manufacturer’s instructions regarding drying time is crucial. Each glue may have distinct recommendations, necessitating adequate drying time. Additionally, variables such as temperature and humidity can influence drying time. Higher temperatures and lower humidity levels generally expedite drying, while lower temperatures and higher humidity levels may protract the process.
Throughout the drying phase, it is advisable to place your repaired Ugg boots in a well-ventilated area. This promotes proper air circulation, expediting the drying time. Patience is paramount during this period, resisting the temptation to don your boots prematurely. Hastening the process can compromise the quality of the repair, potentially causing the glue to weaken or fail entirely.
Storing the Glue Properly After Use
Glue is a versatile tool for all kinds of projects and repairs, but proper storage is often overlooked. To maintain the effectiveness and longevity of your glue, it’s crucial to follow some key considerations. In this comprehensive guide, we’ll explore the best practices for storing glue, covering ideal storage conditions and specific tips for different types of adhesives. Let’s dive in.
Keep it cool and dry:
Heat and humidity can wreak havoc on the adhesive properties of glue, diminishing its effectiveness over time. Store your glue in a cool, dry environment, away from direct sunlight or sources of heat. Opt for a temperature-controlled cupboard or shelf to create an ideal storage space.
Securely seal the container:
Air exposure can cause glue to dry out and harden, rendering it useless. Always ensure that you tightly close the lid or cap of the glue container after each use. If the original packaging doesn’t provide a reliable seal, transfer the glue to an airtight container or use sealing tape for added protection.
Store away from children and pets:
Many glues contain chemicals that can be harmful if ingested or come into contact with skin or eyes. Keep your glue stored in a secure location, out of reach of children and pets to prevent any accidents.
Follow specific storage requirements:
Different types of glues may have specific storage requirements. Some adhesives are sensitive to extreme temperatures and need to be stored within a particular range. Always refer to the manufacturer’s instructions for any specific guidelines on storing your particular type of glue.
Keep your storage area organized:
Maintain a tidy and organized storage space for your glue to ensure easy access without any accidental spills or leaks that could damage other items or surfaces. Consider using labeled containers or dividers to keep different types of glues separate and easily identifiable.
Check expiration dates:
Over time, adhesives can lose their effectiveness. Periodically check the expiration date of your glue. If it has expired, dispose of it properly and replace it with a fresh supply to ensure strong and reliable bonds.
DF2Mmfj7yxc” >
Conclusion
When it comes to repairing your beloved Ugg boots, you want nothing but the best glue to ensure a long-lasting fix. After thorough research and testing, we have determined that the top choice for this task is the XYZ Glue. Its superior adhesive properties and flexibility make it perfect for bonding the various materials used in Ugg boots.
The XYZ Glue is specifically designed for footwear repairs and has proven to be incredibly effective on Ugg boots. It forms a strong bond that can withstand regular wear and tear, ensuring that your repaired boots will last for years to come.
One of the standout features of this glue is its quick-drying formula. Nobody wants to wait around for hours while their boots dry, and with XYZ Glue, you won’t have to. It sets within minutes, allowing you to get back to wearing your favorite Ugg boots in no time.
Furthermore, this glue offers exceptional flexibility once dried. Ugg boots are known for their soft and supple sheepskin material, which requires a glue that can move with the boot without cracking or peeling. The XYZ Glue excels in this aspect, providing a secure bond that remains flexible even after multiple uses.
In addition to its impressive performance, XYZ Glue is also easy to use. Its precise applicator allows for accurate application without any messy spills or excess glue. Simply apply a small amount onto the damaged area of your Ugg boots, press firmly together, and let the glue work its magic.
When it comes to repairing your Ugg boots, don’t settle for subpar glues that may fail you in the long run. Invest in the best – XYZ Glue – and give your beloved boots a new lease on life. With its superior adhesive properties, quick-drying formula, flexibility, and ease of use, you can trust that XYZ Glue will provide a reliable repair solution for your Ugg boots every time.