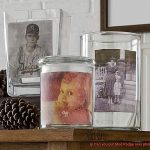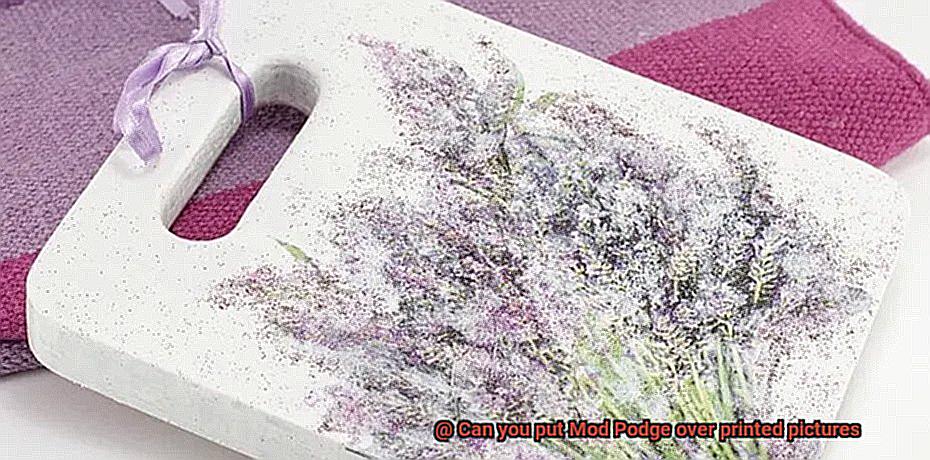
Are you a DIY enthusiast who loves to create personalized artwork using printed pictures? But, are you worried about how to protect your masterpiece? Well, fret no more. I have the perfect solution for you – Mod Podge. This versatile craft product has been around for decades and is a must-have in every crafter’s toolkit. And the best part? You can put Mod Podge over printed pictures without ruining them.
In this blog post, I will guide you through the proper steps to apply Mod Podge over printed pictures without damaging them. Mod Podge acts as a glue, sealer, and finish all in one, protecting your artwork from scratches, chipping, and fading. You can use it to create a glossy or matte finish depending on your preference.
There are different types of Mod Podge available in the market like outdoor Mod Podge and dishwasher-safe Mod Podge. With these variants, you can now create personalized mugs or outdoor signs with ease knowing that they will withstand the elements.
Whether you want to revamp an old piece of furniture or create a unique gift for someone special, Mod Podge is your go-to solution for protecting and preserving your printed pictures. So let’s dive right in and explore the magic of this incredible craft product together.
What is Mod Podge?
Contents
- 1 What is Mod Podge?
- 2 Can You Put Mod Podge Over Printed Pictures?
- 3 Considerations Before Applying Mod Podge
- 4 How to Apply Mod Podge Over a Printed Picture
- 5 Potential Effects of Mod Podge on a Printed Picture
- 6 Tips for Getting the Best Results with Mod Podge and Printed Pictures
- 6.1 Tip #1: Before applying Mod Podge, make sure that your printed picture is completely dry.
- 6.2 Tip #2: Use high-quality printer and paper for your printed pictures.
- 6.3 Tip #3: When applying Mod Podge, use a foam brush or sponge instead of a regular paintbrush.
- 6.4 Tip #4: Apply the Mod Podge in thin, even layers, allowing each layer to dry completely before adding the next one.
- 6.5 Tip #5: For a glossy finish, use gloss Mod Podge as your final coat.
- 7 Alternatives to Using Mod Podge on Printed Pictures
- 8 Conclusion
Mod Podge is a crafting wonder that has been around for over 40 years and remains as popular as ever. It is a water-based glue, sealer, and finish that can be used in an endless number of DIY projects. Whether you’re an experienced crafter or a beginner, Mod Podge is a must-have addition to your crafting toolkit.
One of the best things about Mod Podge is its impressive versatility. It can be used on a wide range of surfaces, from paper to wood to fabric and beyond. This makes it the perfect adhesive for decoupage projects where you want to affix paper or fabric to a surface. You can even use it to create a faux-finish on furniture or home decor items.
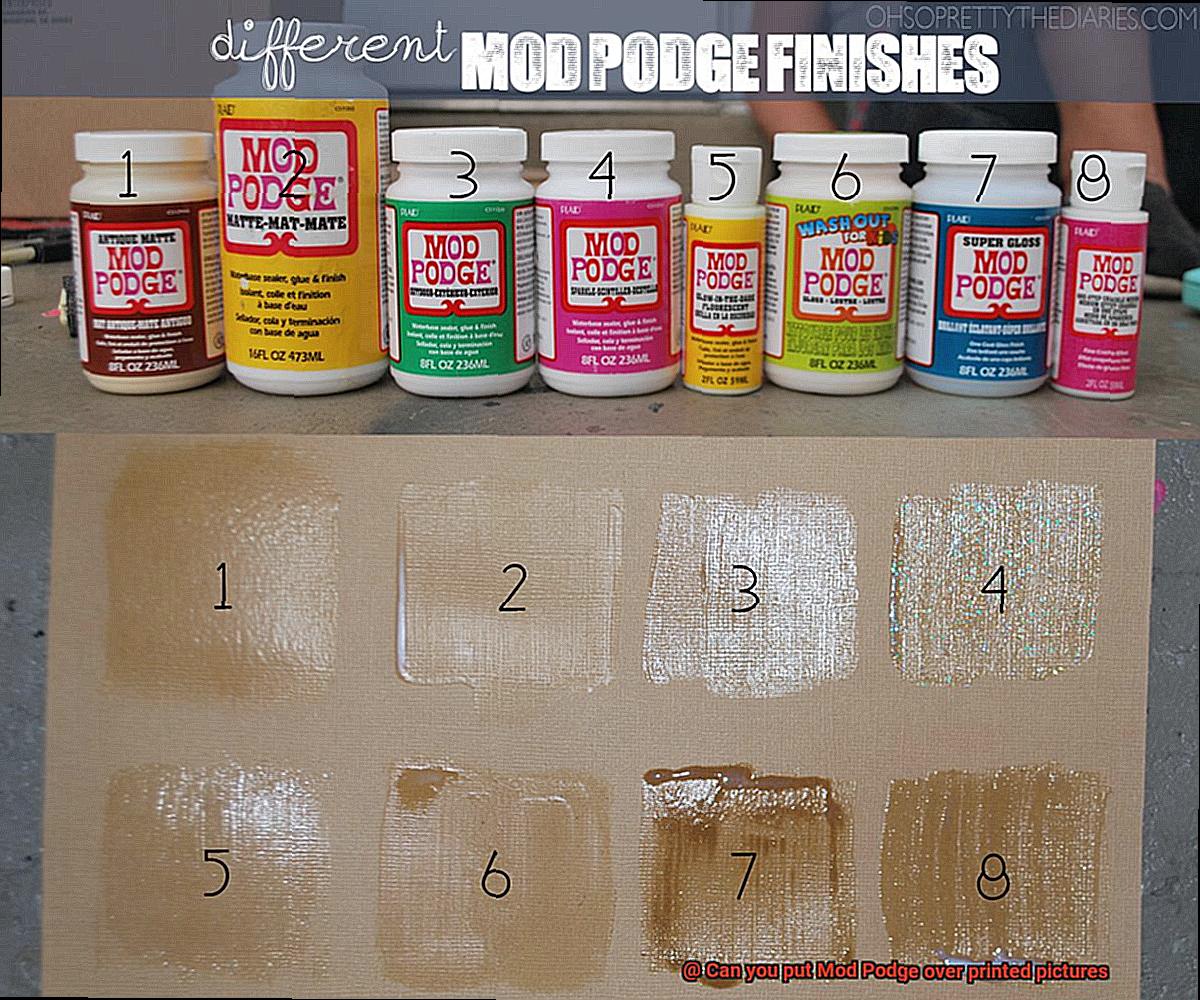
Mod Podge comes in various formulas, including glossy, matte, satin, and outdoor. Each formula provides a different finish to your project, allowing you to choose the one that best suits your vision. Glossy Mod Podge gives your project a super shiny finish while matte Mod Podge offers a more understated look. Satin Mod Podge falls somewhere in between with a slightly glossy appearance. Meanwhile, Outdoor Mod Podge is ideal for projects that will be exposed to the elements as it provides extra protection against moisture and weathering.
When working with Mod Podge, it’s important to ensure that your surface is clean and dry before applying the glue. If you’re using it on paper, wait until the ink is completely dry before applying Mod Podge to avoid smudging or smearing. To avoid distortion of your image or colors bleeding, use a thin layer of glue.
Another fantastic feature of Mod Podge is that it dries clear, leaving no visible residue behind. Plus, it provides a protective layer that helps prevent damage from moisture or general wear and tear. So not only does it look great, but it also keeps your projects looking their best for longer.
In addition to decoupage projects, Mod Podge can also be used as a sealer for painted surfaces or to create a unique finish on furniture or home decor items. Plaid Enterprises, the company behind Mod Podge, has been a leading manufacturer of craft supplies since 197And it’s no surprise that Mod Podge has become synonymous with decoupage because of its ease of use and versatility.
Can You Put Mod Podge Over Printed Pictures?
Well, the good news is, you can. In fact, using Mod Podge over printed pictures not only protects them from wear and tear but also enhances their colors, making them more vibrant and professional-looking.
But before you start applying Mod Podge, there are a few things to keep in mind. First and foremost, it is crucial to use a high-quality inkjet printer that produces sharp and vivid images. Using a low-quality printer or printing on cheap paper may result in a blurry or unclear image, making it difficult for Mod Podge to adhere properly.
To avoid any smudging or smearing of the ink, it is recommended to let the ink dry for at least 24 hours before applying the glue. This will ensure that the ink has fully cured and is ready for the protective barrier that Mod Podge provides.
When it comes to applying Mod Podge over printed pictures, remember that less is more. Use a thin layer of glue and apply it evenly with either a foam brush or a squeegee. Applying too much glue or layering it too thickly can cause buckling or bubbling in the paper, ruining your artwork.
Mod Podge dries clear and creates an effective barrier between your picture and the outside world, protecting it from fading, yellowing, or cracking over time. Plus, its glossy finish adds a professional look to your artwork.
Considerations Before Applying Mod Podge
Before you start, it’s crucial to keep a few essential considerations in mind to ensure that your project turns out beautifully.
First and foremost, make sure that your printed picture is completely dry before applying Mod Podge. Moisture can cause unsightly bubbles or wrinkles, ruining the overall effect and wasting your hard work.
Using high-quality prints is another critical element to consider. Low-quality prints may not hold up well under the application of Mod Podge, resulting in a disappointing outcome. Ensure that your prints won’t smear or smudge easily under the adhesive.
Choosing the right type of Mod Podge is also an essential consideration. Gloss, matte, and satin finishes each offer unique properties and advantages that should be considered when selecting the right type for your project.
Moreover, it’s necessary to think about the surface on which you’ll be applying Mod Podge. Some surfaces may require extra preparation, such as sanding or priming, to ensure that the adhesive adheres correctly.
Finally, always do a test run before applying Mod Podge over your final printed picture. This will help you determine if any adjustments need to be made to achieve the desired result.
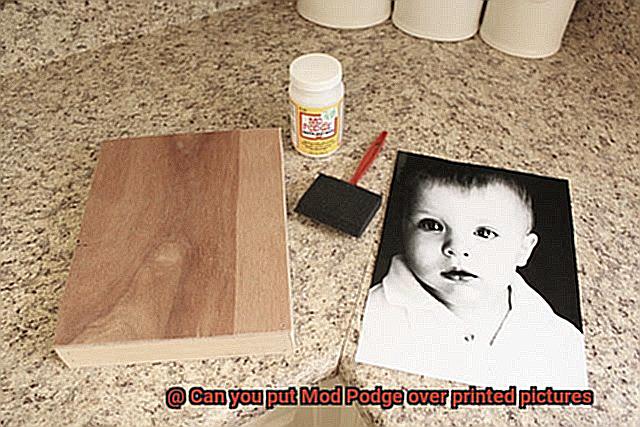
How to Apply Mod Podge Over a Printed Picture
Here are some tips and tricks to help you achieve the best results:
- Choose high-quality ink and paper – To prevent any smudging or bleeding of the ink, make sure to use high-quality ink and paper when printing your pictures. This will ensure that the picture is clear and vibrant, even after applying Mod Podge.
- Ensure the picture is completely dry and clean – Before applying Mod Podge, make sure that the printed picture is completely dry and free from any dust or debris. Any imperfections will show through the Mod Podge once it dries.
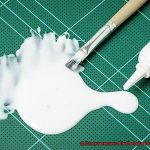
- Apply thin layers of Mod Podge – When applying Mod Podge over a printed picture, it’s important to use thin layers. A thick layer can cause the ink to bleed or become distorted. Start by applying a thin layer of Mod Podge over the entire surface of the picture using a foam brush. Make sure to apply it evenly and avoid leaving any streaks or bubbles.
- Work quickly and avoid over-brushing – It’s important to work quickly when applying Mod Podge over a printed picture. Avoid going over the same area multiple times as this can cause the ink to smear. Be gentle with your brush strokes to avoid leaving any marks on the surface.
- Test on a small section – Mod Podge can alter the appearance of a printed picture, so it’s a good idea to do a test on a small section of the image before applying it to the entire picture. This will allow you to see how the Mod Podge affects the colors and finish of the picture.
Once you’ve prepared your printed picture, apply a second layer of Mod Podge in the same manner as the first layer once it has dried completely, which usually takes around 20-30 minutes. If you want to add extra protection to your printed picture, you can also apply a final layer of Mod Podge on top of the second layer.
It’s important to note that Mod Podge can sometimes cause slight yellowing of the image over time. To minimize this, use a high-quality Mod Podge with UV protection and keep the finished project out of direct sunlight.
Potential Effects of Mod Podge on a Printed Picture
When it comes to using Mod Podge on printed pictures, there are potential effects that need to be taken into account. Here’s what you need to know:
Firstly, applying Mod Podge to a printed picture can cause the ink to smudge or bleed. Since most printed pictures use water-based ink, the moisture in the glue can reactivate the ink and cause it to run or smudge. To avoid this, make sure your picture is completely dry and clean before applying Mod Podge.
Secondly, Mod Podge can lead to discoloration or yellowing over time. Despite being advertised as a clear, non-yellowing formula, it can still result in discoloration when applied over printed pictures. This is especially true if the picture is exposed to direct sunlight or heat, which can accelerate the yellowing process. To prevent this from happening, avoid placing your finished project in direct sunlight.
Lastly, Mod Podge can create a glossy or matte finish on the surface of the picture. Although this may be desirable for some crafts, it may not be suitable for all types of pictures. For example, glossy Mod Podge can create a glare on photographs and make them difficult to view. Be sure to choose the right finish for your project.
To achieve the best results when using Mod Podge on printed pictures, apply thin layers while working quickly to avoid over-brushing. Test on a small section before applying it to the entire picture and consider using a spray sealant specifically designed for photographs if possible.
Tips for Getting the Best Results with Mod Podge and Printed Pictures
If you’re planning on using Mod Podge on printed pictures for your next crafting endeavor, there are a few important tips to keep in mind to ensure the best possible results.
Tip #1: Before applying Mod Podge, make sure that your printed picture is completely dry.
This is essential to prevent any ink smudging or bleeding onto your project.
Tip #2: Use high-quality printer and paper for your printed pictures.
Low-quality materials can result in a poor-quality image that may not adhere well to the Mod Podge. Dye-based ink is also recommended over pigment-based ink, which tends to be more challenging to work with.
Tip #3: When applying Mod Podge, use a foam brush or sponge instead of a regular paintbrush.
This will help prevent any streaks or brush marks on the finished project.
Tip #4: Apply the Mod Podge in thin, even layers, allowing each layer to dry completely before adding the next one.
Thick layers of Mod Podge can cause paper wrinkling or bubbling, ruining the overall appearance of your project.
Tip #5: For a glossy finish, use gloss Mod Podge as your final coat.
If you prefer a matte finish, use matte Mod Podge instead. This final layer will protect and seal your project from environmental factors and moisture damage.
Alternatives to Using Mod Podge on Printed Pictures
There are several options available that can provide a protective coating for your pictures without the use of Mod Podge.
Clear acrylic spray is a simple alternative that involves spraying the picture with a clear protective coating. This method provides a similar effect to Mod Podge, without the need for brushing or spreading. It’s quick and easy – just make sure to use it in a well-ventilated area and allow it to dry completely before handling.
If you want a durable and long-lasting protective layer, using a laminating machine is the way to go. While this method requires more equipment and time, it provides a waterproof and sturdy barrier. Simply insert the printed picture into a laminating pouch and feed it through the machine. The heat and pressure seal the pouch, ensuring that your memories are protected from any damage.
For those who prefer natural options, beeswax is an excellent alternative. After melting the beeswax in a double boiler or wax melter, brush it onto the printed picture, and allow it to cool and harden before handling. Beeswax provides a protective layer while also giving your pictures a unique texture and shine.
If you need a temporary solution, clear packing tape can do the trick. Cut a piece of tape slightly larger than the picture and carefully place it over the top, smoothing out any bubbles or wrinkles. This method is perfect for when you need to protect your pictures quickly and temporarily.
Conclusion
In conclusion, Mod Podge is a crafting essential that can work wonders in protecting and preserving your prized printed pictures. Acting as a glue, sealer, and finish all rolled into one, it offers a glossy or matte finish to suit your preference. With varying types of Mod Podge available in the market, including outdoor and dishwasher-safe variants, you can create personalized artwork that will stand the test of time.
It’s important to note that when applying Mod Podge over printed pictures, using high-quality inkjet printers and paper is crucial to prevent smudging or bleeding of the ink. Additionally, applying thin layers of glue evenly with either a foam brush or squeegee ensures that no buckling or bubbling occurs in the paper.
While Mod Podge is an excellent option for protecting your pictures, there are other alternatives available such as clear acrylic spray, laminating machines, beeswax, or clear packing tape. However, none quite match up to the versatility and convenience offered by Mod Podge.
By following these tips and tricks for using Mod Podge over printed pictures while considering its potential effects on image quality, you can create stunning artwork that looks professional and lasts for years.