Picture this: You’ve stumbled upon a mind-blowing DIY project that involves etching, coloring, and transforming a plain piece of wood into a jaw-dropping masterpiece. But here’s the catch – you’re fresh out of wood glue, and this project needs an adhesive that can handle the unconventional. Fear not, my fellow creative souls. Today, we embark on an enchanting journey into the world of Mod Podge to uncover its secrets as a potential substitute for glue on wood.
Imagine a versatile glue that not only sticks like magic to wooden surfaces but also adds an extra layer of protection and leaves behind a flawless finish. Enter Mod Podge – the beloved all-in-one sealant, finisher, and adhesive that has become every crafter’s best friend. While it’s traditionally used for decoupage and paper crafts, Mod Podge has gained quite the reputation among crafters for its successful application on various materials, including wood.
In this captivating blog post, we shed light on the fascinating realm of Mod Podge and its applications on wooden surfaces. Join us as we explore its adhesive properties, how it enhances the durability of your wooden creations, and its seamless compatibility with finishes and stains. Plus, we’ll dish out some techniques and tips to ensure your Mod Podge endeavors result in flawlessly bonded masterpieces that stand the test of time.
So, whether you’re a seasoned pro or just dipping your toes into the world of crafting, get ready to be blown away by the transformative powers of Mod Podge. Say goodbye to the limitations of traditional wood glues and open up a world bursting with endless possibilities. Let’s uncover the truth behind the burning question: Can Mod Podge be used as glue on wood?
Stay tuned as we unlock the potential magic of Mod Podge and witness your wooden creations come alive like never before.
Advantages of Using Mod Podge on Wood
Contents
- 1 Advantages of Using Mod Podge on Wood
- 2 Limitations of Using Mod Podge on Wood
- 3 How to Prepare the Wood Surface for Mod Podge Application
- 4 Tips for Applying Mod Podge to Wood
- 5 Additional Layers of Protection with Mod Podge
- 6 Alternatives to Using Mod Podge on Wood
- 7 Common Mistakes to Avoid When Applying Mod Podge on Wood
- 8 Conclusion
Step into a world of endless possibilities with Mod Podge, the secret weapon of crafters and woodworkers alike. With its unrivaled versatility and ease of use, Mod Podge has become a go-to choice for enhancing woodworking projects. In this captivating journey, we will uncover the remarkable advantages of using Mod Podge on wood and how it can elevate your creations to new heights.
Versatility:
Prepare to be amazed by the boundless potential of Mod Podge on wood. Acting as both a formidable adhesive and an impeccable sealer, it effortlessly tackles any woodworking challenge. Whether you’re bonding paper, fabric, or other materials to wood, Mod Podge forms an unbreakable bond that stands the test of time.
Easy Application:
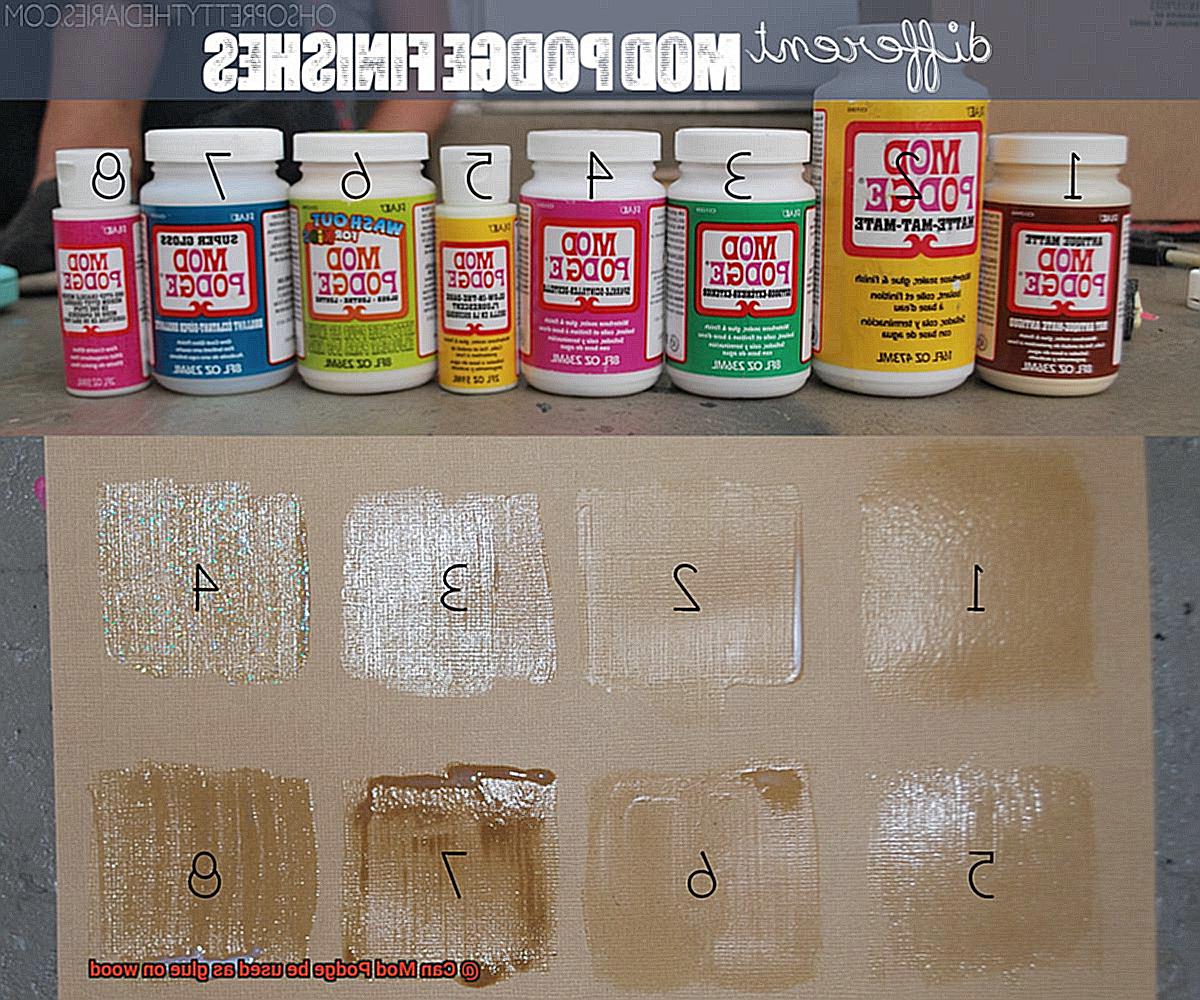
Crafting has never been so effortless. Mod Podge offers a symphony of formulations, including matte, glossy, and satin, allowing you to curate the perfect finish for your masterpiece. Its liquid form glides onto wooden surfaces with grace, embracing them with a brush or sponge applicator. Experience the smooth consistency as it bestows flawless coverage, leaving no trace of visible brush strokes.
Dries Clear:
Watch in awe as Mod Podge performs its vanishing act. Once dried on wood, it transcends invisibility, leaving behind no evidence of its presence. This enchanting quality is especially valuable when working with intricate designs where an invisible adhesive is paramount.
Protective Coating:
Behold the shield that safeguards your wooden creations. As a protective topcoat, Mod Podge weaves a robust layer that shields against the elements. Moisture, dirt, and even the relentless sun’s UV rays are no match for this guardian angel. Bask in the glory of your wooden project’s prolonged lifespan and eternal radiance.
Non-Toxic and Water-Based:
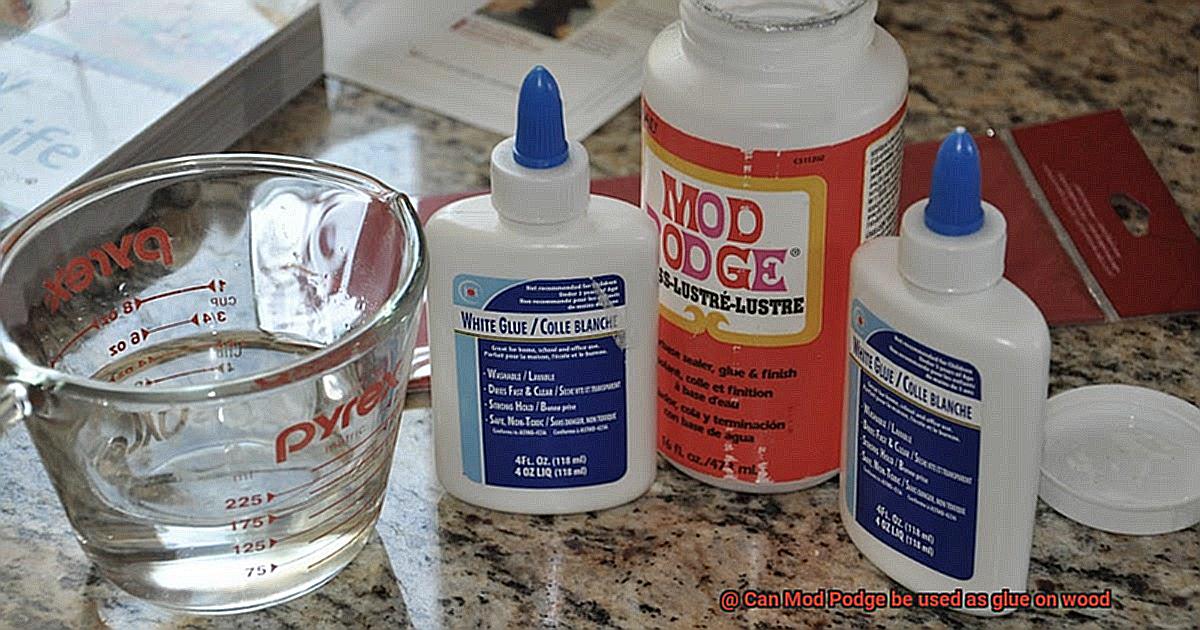
Seize the power of safety in your hands. Mod Podge is a gentle giant, non-toxic and water-based, ensuring the well-being of both your loved ones and the environment. Fearlessly embrace wood surfaces that may come into contact with food or be handled by children. And when the crafting dust settles, a simple soap and water cleanup will restore serenity to your work area.
Limitations of Using Mod Podge on Wood
Today, we embark on a journey to uncover the limitations of using Mod Podge on wood. While this enchanting adhesive has its merits, it’s crucial to grasp its boundaries to achieve optimal results. So, grab your favorite crafting beverage and let’s delve into the realm of Mod Podge limitations.
Waterproof Woes:
Imagine this: you’ve painstakingly crafted a magnificent wooden masterpiece adorned with Mod Podge, proudly displaying it outdoors. Alas, the heavens open up, subjecting your creation to the fury of rain. Herein lies the first limitation – Mod Podge is not a waterproof adhesive. Its water-based composition renders it vulnerable to softening and stickiness when exposed to moisture. Thus, if your woodwork is destined for damp environments or frequent encounters with water, exploring alternative adhesives becomes imperative.
Tackling Heavy Duty:
While Mod Podge works wonders for lightweight decorations and embellishments, it may falter when entrusted with securing hefty objects or items that undergo frequent handling. The bond strength it provides might prove inadequate for such demanding applications. Consequently, for robust drawer pulls or door knobs, opting for a more heavy-duty adhesive capable of standing the test of time becomes a prudent choice.
Wear and Tear Woes:
Wooden surfaces that flex or move pose yet another challenge for Mod Podge. Over time, this adhesive can turn brittle and develop cracks. Such deterioration can result in glued objects loosening or even detaching entirely. Therefore, if your project is poised to endure substantial wear and tear, exploring alternative adhesives boasting superior durability becomes paramount.
The Glossy Conundrum:
Mod Podge dries to a lustrous finish, which may not align with every project’s aesthetic aspirations. For those seeking a matte or satin appearance, additional sealants or topcoats may be necessary to achieve the desired look. Remember, it’s all about customization and uncovering the perfect finish for your wooden masterpiece.
The Fading Effect:
A world filled with vibrant, long-lasting colors is every crafter’s dream. However, Mod Podge can succumb to yellowing over time, particularly when exposed to sunlight or UV rays. This unfortunate consequence can mar the appearance of your project, especially if color retention and clarity are paramount.
How to Prepare the Wood Surface for Mod Podge Application
Before you dive into your crafting project, it’s crucial to prepare the wood surface properly. By following these simple steps, you’ll ensure a seamless Mod Podge application and an exquisite finished project.
Step 1: Banish the Dust.

To kickstart your wood preparation, cleanliness is key. Take charge with a damp cloth or a soft brush, meticulously wiping away any dust or debris. This meticulousness primes the wood for optimal Mod Podge adhesion and guarantees a flawless finish.
Step 2: Evoking Silkiness.
If your wood surface feels rough or uneven, it deserves a touch of affection. Embark on a gentle sanding expedition using fine-grit sandpaper. Glide gracefully in the direction of the wood grain, treating it as delicately as a cherished heirloom. Unleash the smoothing prowess of sanding to create a velvety-smooth canvas for the Mod Podge enchantment.
Step 3: Farewell to Residue.
After your sanding escapades, remnants of sanding residue may linger. Fear not, for we shall banish them. Summon a clean cloth and unleash its absorbent powers to sweep away any lingering dust particles. A pristine surface is paramount for the Mod Podge’s bonding prowess.
Step 4: Prime Time Extravaganza.
Eager to elevate your project to new heights? Embrace the art of priming. Select a primer tailored explicitly for wood surfaces, offering it the royal treatment it deserves. The primer shall bestow upon your wood surface an even foundation, rendering it an ideal stage for the Mod Podge’s grand performance. Follow the instructions on the primer bottle religiously and grant it ample time to dry before proceeding.
Step 5: The Enigmatic Mod Podge Unveiled.
Now, the moment you’ve been waiting for – the grand entrance of Mod Podge. Pour a modest amount onto your wood surface and unleash your artistic prowess, spreading it with finesse using a foam brush or a soft bristle brush. Engage in a dance of precision, working in moderate sections to prevent the Mod Podge from succumbing to premature drying.
Step 6: Smooth Sailing Towards Perfection.
As you bestow the Mod Podge upon your wood surface, navigate the treacherous waters of corners and edges. These perilous regions demand your undivided attention, but fear not, for you are armed with infinite patience. Should bubbles or wrinkles dare to mar your creation, conquer them valiantly with your brush or even your fingertips. Your wood surface shall emerge victorious, adorned with an impeccable coat of Mod Podge.
Tips for Applying Mod Podge to Wood
Mod Podge is a versatile crafting adhesive that can transform ordinary wood into stunning works of art. Whether you’re a seasoned crafter or just starting out, applying Mod Podge to wood requires attention to detail and a few handy tips. In this guide, we will explore the best practices for achieving a professional and long-lasting result when working with Mod Podge on wood.
Begin with a Flawless Canvas:
Before diving into your Mod Podge project, take the time to prepare the wood surface. A clean and smooth canvas is essential for optimal adhesion. Wipe down the wood using a damp cloth or sponge, ensuring that all dust, dirt, and debris are removed. For an extra smooth finish, gently sand any rough edges or splinters that could hinder the Mod Podge’s ability to adhere.
The Right Tools for the Job:
To achieve a flawless finish, choose your application tool wisely. Opt for a brush or foam applicator instead of using your fingers or a cloth. These tools allow for precise and even distribution of the Mod Podge, eliminating the risk of uneven coverage or pesky fingerprints.
Thin is In:
When it comes to applying Mod Podge to wood, less is more. Instead of slathering on one thick layer, it’s best to apply multiple thin layers. This strategy ensures proper drying and minimizes the chances of unsightly bubbling or wrinkling. Begin by gently brushing on a thin coat of Mod Podge, making sure to cover the entire surface evenly. Allow each layer to dry completely before adding the next.
Patience Pays Off:
Drying time is a critical factor when working with Mod Podge on wood. Rushing through this step can compromise your final result. Depending on environmental conditions and layer thickness, each coat may take anywhere from 15 minutes to an hour to dry. Exercise patience and resist the temptation to move on before the Mod Podge is completely dry. This will ensure a professional and long-lasting finish.
Smooth as Silk:
For an impeccably smooth finish, consider sanding between each layer of Mod Podge. Using a fine-grit sandpaper, gently sand the dried layer to eliminate any imperfections or roughness. This step creates a seamless transition between layers while enhancing adhesion. Remember to wipe away any sanding residue before applying the next layer.
Seal the Deal:
Once you’ve applied all desired layers of Mod Podge and they have dried completely, it’s time to seal your masterpiece. Protecting your wood and Mod Podge from potential damage or moisture is crucial for longevity. Select a clear acrylic sealer or varnish that suits your project and follow the manufacturer’s instructions for application. This final step adds an extra layer of protection and enhances the overall durability of your creation.
Additional Layers of Protection with Mod Podge
In our previous section, we delved into the transformative powers of Mod Podge on wood projects. However, when it comes to safeguarding your creations from the elements and wear and tear, Mod Podge alone may fall short. Fear not. In this section, we will unlock the secrets to adding extra layers of protection with Mod Podge on wood surfaces. Grab your brushes and join us as we embark on an adventure to create long-lasting and resilient masterpieces.
The Power of Extra Protection:
While Mod Podge excels as an adhesive for wood, it may not provide ample protection for surfaces exposed to moisture or heavy use. This is where additional layers of protection become essential. By applying a protective barrier over your Mod Podge, you can ensure your projects endure the test of time.
Option 1: Polyurethane Sealer:
A beloved choice for enhanced durability is a clear polyurethane sealer. Not only does it create a robust shield against moisture, heat, and everyday wear and tear, but it also pairs perfectly with Mod Podge. Here’s how you can make magic happen:
- Allow the Mod Podge to fully dry and cure, typically within 24 hours.
- Select a polyurethane sealer suitable for wood surfaces.
- Employ a brush or foam applicator to apply the sealer, adhering to manufacturer’s instructions.
- Ensure even coverage over the entire surface.
- Allow the sealer to thoroughly dry before handling or using the project.
Option 2: Acrylic Spray Sealer:
For those seeking simplicity without sacrificing protection, a clear acrylic spray sealer is your answer. It adds a shielding layer effortlessly without the need for traditional brushwork. Follow these straightforward steps:
- Confirm the Mod Podge is fully dry and cured.
- Vigorously shake the can of acrylic spray sealer.
- Position the can approximately 8-12 inches away from the project surface.
- Apply a light, sweeping coat of the sealer, guaranteeing complete coverage.
- Allow the sealer to dry completely before applying additional coats, if desired.
Alternatives to Using Mod Podge on Wood
Today, we’re breaking free from the confines of Mod Podge and delving into the realm of alternative adhesives for your wood projects. While Mod Podge has its charm, it may not always be the best choice when it comes to bonding wood pieces together. So, get ready to discover incredible alternatives that will elevate your creations to new heights.
Wood Glue: The Mighty Bonding Warrior
First on our list is the mighty wood glue, a true champion in the world of woodworking. Crafted specifically for bonding wood surfaces, this adhesive creates an unbreakable bond that withstands the test of time. From crafting furniture to constructing intricate wooden sculptures, wood glue will be your steadfast companion, ensuring your projects remain intact.
Epoxy Resin: The Indomitable Powerhouse
If you’re seeking an adhesive that combines strength and waterproof properties, prepare to be amazed by epoxy resin. This dynamic duo consists of a resin and hardener, which must be mixed before application. Once cured, epoxy resin forms an indomitable bond between wood pieces, defying even the harshest environments. Don’t let moisture dampen your creativity – let epoxy resin be your secret weapon for joinery.
Cyanoacrylate Glue (Super Glue): The Swift Savior
In need of a quick fix? Look no further than cyanoacrylate glue, affectionately known as super glue. This superhero of adhesives bonds swiftly and firmly to various materials, including wood. However, beware its superpower – it dries in a flash. Exercise precision during application to ensure your wood pieces are united with utmost accuracy.
Hot Glue: The Versatile Craftsman
For smaller woodworking projects or when a temporary bond is desired, the trusty hot glue comes to the rescue. Equipped with a reliable hot glue gun, you can effortlessly adhere wood pieces together, unleashing your creativity without delay. Keep in mind that hot glue may not possess the same level of strength and durability as other adhesives, so use it wisely.
Common Mistakes to Avoid When Applying Mod Podge on Wood
Mod Podge is a marvelous medium for enhancing and safeguarding wood projects. However, there are several pitfalls that can mar your masterpiece if you’re not careful. In this article, we’ll explore these common errors and arm you with expert tips to ensure flawless results. So, grab your paintbrush and let’s dive in.
Neglecting Proper Surface Preparation:
The key to a successful Mod Podge application lies in preparing the wood surface meticulously. Prior to application, take the time to clean the wood thoroughly, removing any dust, dirt, or debris. A light sanding followed by a wipe-down with a damp cloth will ensure a pristine canvas for your creativity.
Overloading with Mod Podge:
Remember, less is more when it comes to applying Mod Podge on wood. Resist the temptation to slather it on thickly, as this can lead to unsightly bubbles, streaks, or an uneven finish. Instead, opt for thin and even coats, allowing each layer ample time to dry before proceeding. This method grants you greater control and yields a polished, professional outcome.
Selecting the Wrong Mod Podge Variant:
Not all Mod Podges are created equal. Choosing an inappropriate variant for your wood project can result in subpar adhesion and durability. Avoid disappointment by opting for a Mod Podge specifically formulated for wood applications. By doing so, you’ll ensure that your creation stands the test of time.
Allowing Excessive Drying Time Between Layers:
Mod Podge sets relatively quickly, so it’s crucial to work efficiently when applying multiple layers. Procrastinating between coats can compromise adhesion and necessitate additional sanding or reapplication. Stay on track by aiming to apply subsequent layers within a reasonable timeframe while allowing sufficient drying time for each coat.
Neglecting the Final Seal:
While Mod Podge offers some degree of protection, it may not withstand heavy use or exposure to moisture without reinforcement. Preserve your wood project’s longevity by sealing it with a clear sealer or varnish once the Mod Podge layer has dried. This additional protective layer will fortify your creation and keep it looking impeccable for years to come.
Conclusion
Yes, Mod Podge can indeed be used as a glue on wood. Its adhesive properties make it a versatile option for various crafting projects involving wood surfaces. Whether you’re sticking paper, fabric, or other materials onto wood, Mod Podge can provide a strong bond that holds everything securely in place.
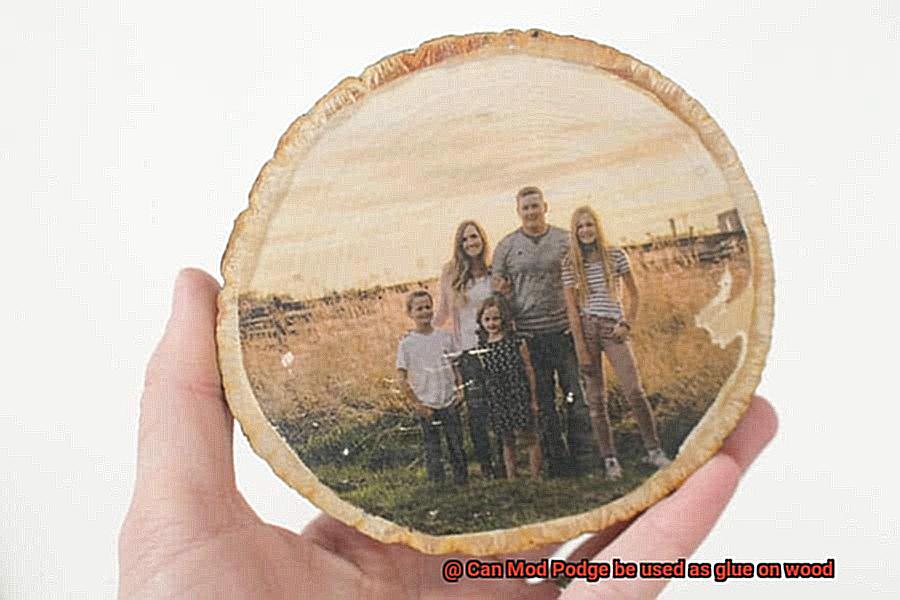
Not only does Mod Podge act as an adhesive, but it also serves as a sealant and finisher. Once applied and dried, it creates a protective layer over the wood, enhancing its durability and longevity. This makes it an excellent choice for preserving and beautifying wooden items like furniture, frames, or decorative pieces.
The beauty of using Mod Podge on wood is its versatility. It works well with different types of wood surfaces – from raw to painted or stained – ensuring a reliable adhesion regardless of the project’s complexity. Plus, its water-based formula means easy cleanup with soap and water while still providing a strong hold.
So whether you’re embarking on a DIY woodworking adventure or simply looking to add some flair to your wooden crafts, consider using Mod Podge as your go-to glue. Its dependable bonding capabilities and protective qualities will help bring your creative visions to life while keeping your wooden masterpieces intact for years to come.
In conclusion, Mod Podge is not just any ordinary glue; it’s an indispensable tool for any woodworking enthusiast or craft lover. With its adhesive strength and sealing properties, this versatile product proves that when it comes to gluing materials onto wood surfaces, Mod Podge is the perfect choice.