There’s something undeniably satisfying about rolling up our sleeves and getting down to business, whether we’re fixing, crafting, or creating. And in the world of adhesives, Liquid Nails reigns supreme with its unparalleled versatility and unwavering reliability. But amidst all the chatter about this adhesive wonder, one question persists: just how long does it take for Liquid Nails to transform from a runny liquid to a rock-solid bond?
In this captivating blog post, we embark on an exhilarating journey to unravel the mysteries behind Liquid Nails’ setting process. We’ll explore both the casual DIY realm and the professional arena, peeling back the layers to expose the secrets of its rapid metamorphosis. So hold on tight as we dive into the intricate timeline that lies beneath the surface of this sticky sensation.
What is Liquid Nails?
Contents
- 1 What is Liquid Nails?
- 2 Factors That Affect Setting Time
- 3 General Setting Time Guidelines
- 4 Tips for Optimal Results
- 4.1 Clean and Prepare the Surfaces:
- 4.2 When cleaning the surfaces, pay attention to any smooth or non-porous materials. Using sandpaper to roughen them up slightly will create a better bond. This step is especially important when working with metals, glass, or plastic surfaces. By removing any contaminants and creating a rougher surface, you enhance the adhesive’s ability to grip and create a strong bond.
- 4.3 Use the Right Amount of Adhesive:
- 4.4 Finding the right balance is key when it comes to applying liquid nails. Too little can result in a weak bond, while too much can cause a messy application. Follow the manufacturer’s instructions regarding the recommended amount of adhesive for your specific project. Typically, a thin bead of adhesive placed approximately every 6-8 inches is sufficient for most applications.
- 4.5 Apply Even Pressure:
- 4.6 When applying pressure, make sure it is distributed evenly across the entire bonded area. This will help the liquid nails fully penetrate and create a strong bond with the materials. Use clamps or weights that are appropriate for the size and shape of the objects you are bonding. Applying even pressure will prevent any gaps or weak spots in the bond, ensuring optimal results.
- 4.7 Allow Sufficient Drying Time:
- 5 Longer Setting Times in Certain Conditions
- 6 Techniques to Speed Up the Curing Process
- 7 Strength of the Bond Takes Time to Reach Maximum Potential
- 8 Testing Bond Strength Before Subjecting it to Stress or Loads
- 9 Conclusion
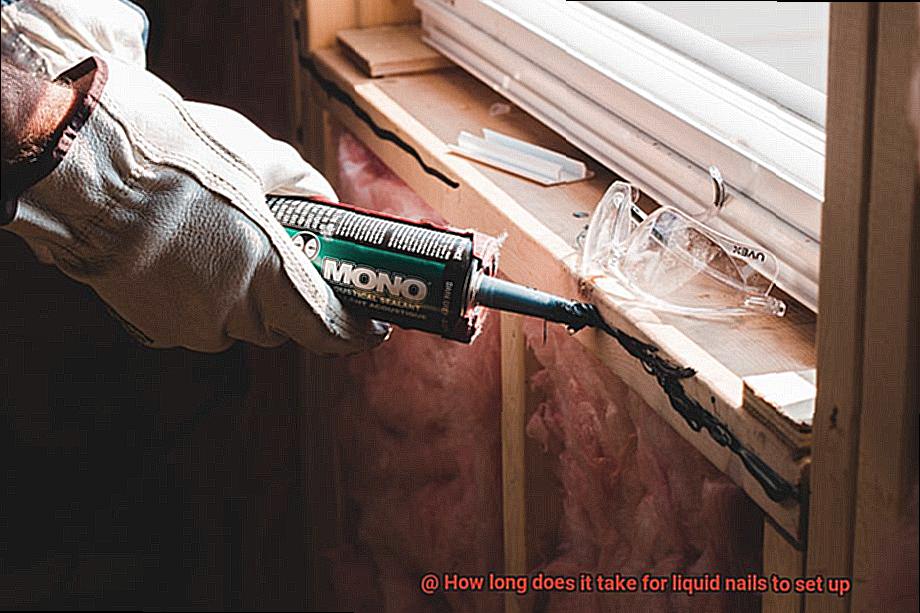
When it comes to construction and DIY projects, having a reliable adhesive is essential. That’s where Liquid Nails comes in. This popular construction adhesive is known for its strong bonding properties and versatility, making it a go-to choice for many builders and homeowners.
So, what exactly is Liquid Nails? It is a type of construction adhesive that typically comes in tubes or cartridges. With its thick consistency, similar to toothpaste, Liquid Nails is easy to apply without excessive dripping or running. This adhesive is formulated to withstand heavy loads and resist impacts, making it suitable for bonding a variety of materials together, including wood, metal, and concrete.
Now, let’s talk about the setting time of Liquid Nails. The answer can vary depending on several factors. The temperature and humidity of the environment, the type of materials being bonded, and the thickness of the adhesive layer all play a role in determining the setting time.
In general, Liquid Nails typically takes around 24 hours to fully set up and cure. However, it’s important to note that this is just a general guideline and the actual setting time may vary. To get precise guidance on setting times for different applications and conditions, it’s always best to refer to the manufacturer’s instructions.
While Liquid Nails may appear dry on the surface within a few hours, it may still be in the process of curing underneath. This is why it’s crucial to allow the adhesive to cure undisturbed for at least 24 hours before subjecting the bonded materials to any stress or load.
It’s worth mentioning that in some cases, such as when bonding porous or heavy materials or in high humidity conditions, the setting time of Liquid Nails may be longer than 24 hours. So, if you’re working on a project with these factors in play, it’s important to exercise patience and allow the adhesive ample time to fully cure.
If you’re in a hurry and need to work with the bonded materials sooner, there are certain techniques you can employ. Applying heat through the use of a heat gun can help accelerate the curing process. However, it’s important to follow safety precautions and not overheat or damage the materials being bonded.
While Liquid Nails provides a strong and durable bond once fully cured, it’s important to note that it may take longer for the adhesive to reach its full strength. This can range from a few days to several weeks, depending on the specific product and conditions.
Factors That Affect Setting Time
Whether you are an avid DIY enthusiast or a professional contractor, understanding these factors is vital for achieving flawless results in your projects. So, let us embark on this adhesive journey and discover the secrets behind optimal setting time.
Temperature:
Imagine a sunny day, basking in warm rays while working on your project. Beware. Higher temperatures accelerate liquid nails’ setting time, while colder temperatures slow it down. Remember, it’s not just about the air temperature but also the temperature of the materials being bonded. Plan accordingly to harness the power of temperature to your advantage.
Humidity:
Humidity can be both a friend and a foe to your glue. High humidity levels hinder drying as moisture in the air interferes with solvent evaporation. Conversely, low humidity levels expedite drying. Consult manufacturer instructions or technical data sheets to navigate the intricate dance between humidity and setting time.
Substrate:
Just as people have diverse personalities, substrates exhibit varying effects on liquid nails’ setting time. Porous surfaces like wood or concrete absorb some adhesive, prolonging drying time. In contrast, non-porous surfaces like metal or glass allow for swifter drying. Smooth surfaces foster superior contact and faster setting times.
Thickness:
Remember the wise saying, “thin is in”? Well, it holds true for liquid nails too. Thicker adhesive layers require more time to dry compared to thin layers. Follow the manufacturer’s recommendations regarding layer thickness for optimal performance and setting time – moderation is key.
Ventilation:
Ah, the refreshing embrace of fresh air. Adequate ventilation is essential for a triumphant bonding experience with liquid nails. Proper airflow expedites solvent evaporation and accelerates the setting time. In poorly ventilated areas, the drying process may become a slow, laborious waltz – an undesirable outcome.
Type of Liquid Nails:
Just as there is a glue for every scenario, different types of liquid nails boast varying setting times. Some formulations are tailored for quick setting, while others allow for longer working durations. Choose the one that aligns with your project requirements and consider its specific setting time demands.
Conclusion:
Congratulations, esteemed glue enthusiasts. You have now mastered the art of liquid nails’ setting time factors. By considering temperature, humidity, substrate, thickness, ventilation, and the type of liquid nails employed, you guarantee a triumphantly bonded experience. So go forth, create awe-inspiring projects, and let your bond be as unyielding as your knowledge.
General Setting Time Guidelines
Let’s dive in and uncover the secrets to achieving the perfect bond.
Setting time refers to the duration it takes for liquid nails to fully cure and reach its maximum strength. And trust me, rushing this process is a recipe for disaster if you want a bond that can withstand the test of time.
The setting time of liquid nails can vary depending on a few key factors. The type of liquid nails used, environmental conditions, and the materials being bonded all play a role in determining how long it takes for the glue to set.
Different types of liquid nails may have different setting times. So, consulting the manufacturer’s instructions or product label for specific information is always a good idea. They know their glue best.
In general, most liquid nails products require at least 24 hours to reach full strength. But don’t be fooled. Just because the glue feels dry to the touch doesn’t mean it’s fully cured. It’s like a cake that looks done on the outside but still needs more time in the oven.
Patience is key when working with liquid nails. Waiting for the specified curing time ensures a strong and secure bond. Don’t rush it.
Now, let’s talk about some other factors that can influence setting time. Temperature, humidity, and ventilation all play a role in how quickly (or slowly) liquid nails cures. Higher temperatures and lower humidity levels speed up the process, while colder temperatures and higher humidity levels slow it down. Choose the right conditions for your project.
If time is of the essence or you simply can’t wait to see the final result, fear not. Quick-drying or fast-setting versions of liquid nails are available. These variants reduce curing time without compromising strength. Just follow the manufacturer’s instructions for these specific products to achieve the best results.
Lastly, don’t forget to use clamps or supports when necessary. These tools maintain pressure on the bonded materials during the curing process, promoting better adhesion and preventing any movement that could compromise the bond.
Tips for Optimal Results
This powerful adhesive can create a strong and durable bond between a variety of materials. To ensure you get the best results, we’ve put together some tips and tricks that will help you achieve optimal results with liquid nails.
Clean and Prepare the Surfaces:
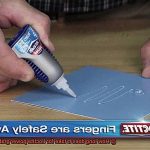
Before applying liquid nails, it’s crucial to prepare the surfaces properly. Clean them thoroughly to remove any dirt, dust, or debris that could hinder the adhesive’s effectiveness. A mild detergent or cleaning solution recommended by the manufacturer will do the trick. Don’t forget to remove loose paint, old adhesive, or any other obstacles that might prevent a solid bond.
When cleaning the surfaces, pay attention to any smooth or non-porous materials. Using sandpaper to roughen them up slightly will create a better bond. This step is especially important when working with metals, glass, or plastic surfaces. By removing any contaminants and creating a rougher surface, you enhance the adhesive’s ability to grip and create a strong bond.
Use the Right Amount of Adhesive:
Finding the right balance is key when it comes to applying liquid nails. Too little can result in a weak bond, while too much can cause a messy application. Follow the manufacturer’s instructions regarding the recommended amount of adhesive for your specific project. Typically, a thin bead of adhesive placed approximately every 6-8 inches is sufficient for most applications.
When applying the adhesive, remember that less is often more. Start with a small amount and add more if needed. It’s easier to add more adhesive than to remove excess once it has been applied. By using the right amount of liquid nails, you ensure that it spreads evenly and creates a strong bond without any mess.
Apply Even Pressure:
To ensure a strong bond, it’s essential to apply even pressure to the surfaces being joined. Use clamps, weights, or any other means of applying pressure until the adhesive sets. Be careful not to apply excessive pressure that could squeeze out too much adhesive or cause misalignment of the bonded surfaces.
When applying pressure, make sure it is distributed evenly across the entire bonded area. This will help the liquid nails fully penetrate and create a strong bond with the materials. Use clamps or weights that are appropriate for the size and shape of the objects you are bonding. Applying even pressure will prevent any gaps or weak spots in the bond, ensuring optimal results.
Allow Sufficient Drying Time:
Patience is key when working with liquid nails. The adhesive needs time to set up and achieve optimal strength. The drying time can vary depending on factors such as temperature, humidity, and the materials being bonded. As a general guideline, allow at least 24 hours for the adhesive to fully cure before subjecting it to any stress or load.
Longer Setting Times in Certain Conditions
When it comes to using liquid nails for your projects, it’s crucial to understand the factors that can influence the setting time. In specific conditions, such as extreme temperatures, high humidity levels, or when working with certain materials, the setting time of liquid nails can be longer than usual. In this article, we will delve into how temperature, humidity, and the type of material being glued can impact the setting time of liquid nails, providing you with the knowledge necessary to optimize your adhesive bonding experience.
Temperature:
Temperature is a critical factor in the setting process of liquid nails. High temperatures accelerate the setting time, allowing the adhesive to cure faster. Conversely, low temperatures significantly slow down the setting time. To achieve optimal results, refer to the manufacturer’s guidelines for the recommended temperature range when applying liquid nails. By doing so, you ensure that the adhesive cures within a reasonable timeframe, maximizing its bonding potential.
Humidity:
Humidity levels also influence the setting time of liquid nails. Higher humidity can prolong the setting process due to moisture in the air interfering with the adhesive’s curing process. This factor becomes particularly important in humid environments or during rainy seasons. To avoid any potential issues, ensure proper ventilation in your workspace and follow the manufacturer’s guidelines for recommended humidity levels. By doing so, you create an environment conducive to optimal adhesive bonding.
Type of Material:
The type of material being glued plays a significant role in determining the setting time of liquid nails. Porous surfaces, such as wood or drywall, readily absorb liquid nails, allowing for faster adhesive curing.
On the contrary, non-porous materials like metal or glass may require longer setting times due to their resistance to absorption. When working with non-porous surfaces, it’s crucial to exercise patience and allow sufficient drying time to achieve a strong bond. By understanding the specific demands of different materials, you can adapt your approach accordingly and ensure successful adhesion.
Manufacturer’s Instructions and Precautions:
To optimize your glue application experience, always adhere to the manufacturer’s instructions and recommendations. The product label or packaging usually provides information on the expected setting time for different conditions. Following these guidelines is vital for ensuring proper adhesion and avoiding any potential issues.
Additionally, if longer setting times are anticipated due to specific conditions, providing additional support or clamping can help ensure a strong and secure adhesive bond. By taking necessary precautions and allowing sufficient time for the liquid nails to set up properly, you maximize the bonding potential of the adhesive and enhance the durability of your projects.
Techniques to Speed Up the Curing Process
I’ve got some tricks up my sleeve that will have your adhesive drying in no time. Let’s dive into these techniques:
- Temperature: Did you know that higher temperatures can actually accelerate the curing process? It’s true. By using heat lamps or heaters to warm up your work area, you can speed up the chemical reactions involved in curing. Just be sure to follow the manufacturer’s recommendations on temperature limits to avoid any adhesive mishaps.
- Accelerators or Catalysts: These magical substances are added to the liquid nails before application to kick-start the curing process. They come in various forms like powders or liquids and should be mixed with the adhesive according to the manufacturer’s instructions. Choose the right accelerator for your specific liquid nails, as different adhesives require different formulations.
- Ventilation: Good airflow helps remove moisture and volatile compounds released during curing, allowing for quicker drying and bonding. Open those windows or set up some fans to get that air flowing and speed things up.
- Applying Pressure: This technique ensures proper contact between the adhesive and the surfaces being bonded, enhancing bonding strength and reducing curing time. Grab your clamps or weights and hold those materials securely together while the liquid nails work their magic. Check out what the manufacturer recommends for optimal results.
- Fast-Curing Variants: Consider using a fast-curing variant of liquid nails. Many manufacturers offer specialized versions of their adhesive that dry more quickly than standard options. These speedy options may have specific instructions and require different application techniques, so be sure to read and follow the manufacturer’s guidelines.
Strength of the Bond Takes Time to Reach Maximum Potential
In this blog post, we will embark on a fascinating journey through the science behind the curing process of liquid nails and explore why patience is the secret ingredient for achieving a bond that withstands the test of time. So, let’s dive into this captivating world.
The Intricate Dance of Curing:
Liquid nails adhesive boasts versatility and formidable bonding capabilities. However, it’s important to recognize that its true power lies in the artistry of its curing process. This dance involves the evaporation of solvents and a delicate chemical reaction between adhesive components, leading to an exquisite hardening and strengthening performance.
Timing is Everything:
To unlock the adhesive’s full potential, one must pay homage to the wisdom of the manufacturer’s instructions regarding drying and curing times. These timings are influenced by variables such as temperature, humidity, and the materials being bonded. Though liquid nails may begin to set up within 24 hours, it takes time for it to unleash its ultimate strength.
The Enigmatic Factors at Play:
Temperature and humidity play pivotal roles in this enchanting curing process. Higher temperatures ignite a passionate flame within the adhesive, accelerating its journey towards full strength. Conversely, lower temperatures demand a more intricate waltz, slowing down the pace. Meanwhile, higher humidity levels imbue the bond with an aura of mystery, prolonging the time it takes for it to reach its zenith.
Rushing: A Betrayal of Brilliance:
In a world that craves instant gratification, it may be tempting to hasten this artistic process or subject the bond to heavy stress prematurely. However, such impatience is akin to robbing a masterpiece of its potential. To honor the bond and preserve its strength and durability, one must embrace patience and allow the adhesive to fully cure before placing it under significant loads.
A Symphony of Strength:
To witness the full might of liquid nails adhesive, it is advised to grant it at least 7 days to fully cure before testing its limits. This symphony of time and patience ensures that the adhesive attains its maximum potential, delivering a bond that stands tall, resilient, and unwavering.
Testing Bond Strength Before Subjecting it to Stress or Loads
Testing the bond strength of liquid nails before subjecting it to stress or loads is an essential step to ensure a strong and durable bond. This process allows you to assess the adhesive’s capability to withstand various forces and determine its suitability for the intended application.
The setting time of liquid nails can vary depending on factors like temperature, humidity, and the materials being bonded. Conducting your own tests is crucial to determine the actual curing time in your specific conditions. Don’t rely solely on the manufacturer’s guidelines. Take matters into your own hands.
There are various methods available for testing bond strength, each with its own advantages and limitations. Let’s dive into a couple of them, shall we?
First up is the pull-off test. Apply a force perpendicular to the bonded surfaces, gradually increasing it. Picture it like a tug-of-war between the adhesive and your might. Keep pulling until…snap. This test gives you a quantitative measure of the adhesive’s resistance to separation and helps identify any weak spots in the bond.
Now, let’s talk shear testing. Imagine applying a force parallel to the bonded surfaces, slowly cranking up the pressure. It’s like playing a game of chicken with your adhesive – who will fail first? Shear testing is particularly useful for applications where lateral or sliding loads come into play.
But before you get all excited about testing, remember that proper surface preparation is key. Cleanliness is next to godliness when it comes to bonding surfaces. Make sure they’re squeaky clean, free from any grime or gunk that might weaken the bond.
While bond strength testing is important, it’s not the be-all and end-all. Material compatibility, environmental conditions, and proper application techniques also play huge roles in ensuring a long-lasting and durable bond.
ccdw8KeK74g” >
Conclusion
The setting time of liquid nails can vary depending on various factors such as temperature, humidity, and the type of surface it is applied to. On average, it takes about 24 hours for liquid nails to fully set up and cure. However, it’s important to note that this is just an estimate and the actual drying time may differ in practice.
To ensure the best results, it is recommended to follow the manufacturer’s instructions and allow sufficient time for the liquid nails to dry before subjecting them to any stress or load. Patience is key when working with adhesive products like liquid nails, as rushing the drying process can compromise its effectiveness.
In ideal conditions, where the temperature is around 70°F (21°C) and humidity levels are moderate, liquid nails can start forming a strong bond within 15-30 minutes. However, it will continue to harden over the next several hours until reaching its maximum strength after a day or so.
Keep in mind that colder temperatures and higher humidity levels can significantly prolong the drying time of liquid nails. If you’re working in a colder environment or during rainy seasons, it’s advisable to allow extra time for the adhesive to set up properly.
In conclusion, while there isn’t an exact timeframe for how long it takes for liquid nails to set up, allowing a full day for curing is generally a safe bet.