Picture this: you’re cradling a fragile ceramic treasure, an heirloom passed down from generation to generation. Its intricate artistry and sentimental value make it irreplaceable. But, alas. A mishap occurs, leaving behind a disheartening crack or chipped edge. Fear not. Behind the scenes of ceramic restoration lies a captivating art that will breathe new life into these beloved items.
In this article, we’ll unravel the secrets of repairing ceramic items with finesse, passion, and a touch of magic. Whether it’s an antique gem, your favorite tea cup, or even a cherished porcelain unicorn, we’ve got you covered on this journey to resurrecting their former glory.
With each repair, you become a true magician – seamlessly mending fragmented pieces and restoring their once-impeccable beauty. Throughout our exploration, we’ll provide insights into the necessary tools, techniques, and materials required to master the art of ceramic restoration.
We’ll dive deep into various types of repairs – from gluing shattered pieces to filling cracks and tackling those pesky chipped edges. Plus, we’ll share invaluable tips on color-matching to ensure your restored ceramic item becomes an awe-inspiring masterpiece.
Join us as we venture into the enchanting world of ceramic restoration where broken pieces are not lost but lovingly resurrected – transforming them into symbols of resilience and breathtaking beauty. Are you ready to embark on this wondrous journey of ceramic repair? Then let the enchantment begin.
Gather the Necessary Tools and Materials
Contents
- 1 Gather the Necessary Tools and Materials
- 2 Clean the Ceramic Surface
- 3 Assess the Damaged Pieces
- 4 Apply Adhesive to One of the Broken Edges
- 5 Secure the Pieces in Place While Drying
- 6 Remove Excess Glue After Curing
- 7 Replace Missing Pieces, if Necessary
- 8 Allow Adhesive to Fully Cure Before Use or Displaying
- 9 Conclusion
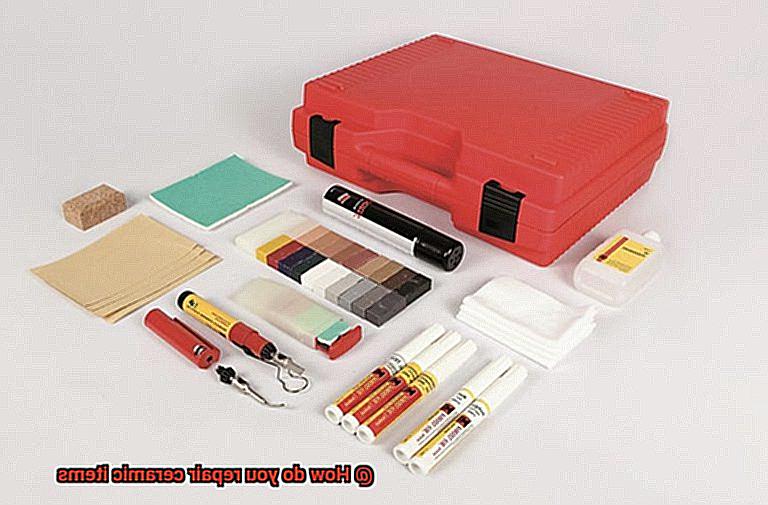
Embarking on a ceramic repair project requires more than just skill and patience. To ensure a flawless restoration, it is crucial to gather the necessary tools and materials. In this guide, we will delve into the importance of assembling the right equipment, providing you with a comprehensive list of essential items. By following these guidelines and employing expert techniques, you will be well-prepared to tackle any ceramic repair challenge that comes your way.
Prioritizing Safety: Shielding Yourself for Success
When venturing into the world of ceramic repair, safety should always be your first concern. Equip yourself with protective gloves and safety goggles to safeguard against potential injuries caused by handling delicate ceramics and working with powerful adhesives. Remember, a safe repair ensures a stress-free restoration process.
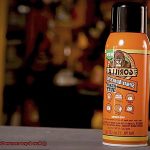
The Glue that Holds it All Together: Epoxy’s Mighty Bond
The key to a successful ceramic repair lies in selecting the right adhesive. Epoxy glue is renowned for its exceptional bonding properties and durability, making it an ideal choice for fixing broken ceramics. Ensure that you choose epoxy glue specifically designed for ceramic repairs to guarantee a secure and long-lasting bond.
Smooth Surfaces: The Power of Sandpaper
Achieving seamless repairs requires meticulous surface preparation. Utilize fine-grit sandpaper to gently smooth out rough edges on the broken ceramic item. This essential step creates an optimal surface for adhesive adhesion, ensuring a flawless restoration that stands the test of time.
Stability is Key: Clamping Down on Perfection
To hold broken pieces securely in place during the drying process, rely on clamps or weights tailored to the size and shape of your ceramic item. Carefully selected clamps or heavy objects like books or weights exert pressure on the repaired area, guaranteeing stability and a strong bond between the fragments.
The Art of Mixing: Blending Epoxy to Perfection
Epoxy glue often requires thorough mixing before application. Employ small disposable cups or stir sticks as your trusty mixing tools. Follow the manufacturer’s instructions meticulously, ensuring the proper blending of adhesive components. This step is crucial in achieving optimal bonding strength, vital for a successful repair.
Clean the Ceramic Surface
Cleaning the ceramic surface is a vital step in the repair process, ensuring a flawless and long-lasting result. To get started, gather your cleaning supplies: mild detergent, a soft cloth or sponge, water, and a toothbrush with soft bristles. Avoid abrasive cleaners and scrub brushes that can harm the ceramic surface.
Begin by removing any loose dirt or debris using a gentle touch. Brush off dust and particles with a soft cloth or brush, being careful not to scratch the surface.
Next, create a cleaning solution by mixing mild detergent with warm water. Dip the cloth or sponge into the solution, wringing out excess liquid. Employing circular motions, gently wipe the ceramic surface, paying extra attention to any stained or soiled areas.
For tougher stains or grime, enlist the help of a toothbrush with soft bristles dipped in the cleaning solution. Firmly but gently scrub the affected area, avoiding excessive force that could damage the ceramic.
Once you have thoroughly cleaned the entire ceramic surface, rinse it with clean water to remove any lingering detergent residue. Ensure all traces of cleaning solution are gone to prevent interference with repair materials.
After rinsing, either pat dry the ceramic item with a clean towel or allow it to air dry completely. Avoid using heat sources like hairdryers, as rapid drying can cause thermal shock and lead to cracks in the ceramic.
It’s important to note that different types of ceramics may require specific cleaning methods or products. If unsure about how to clean a particular ceramic item, consult the manufacturer’s guidelines or seek professional advice.
Assess the Damaged Pieces
Embarking on the journey of restoring a broken ceramic item requires more than just skill and tools. Assessing the damaged pieces is a crucial step that sets the foundation for a successful restoration. Let’s dive deeper into the art of assessing damaged ceramic pieces and explore key points to consider during this evaluation.
Examine the breakage:
A shattered ceramic piece holds clues to its revival. Take a moment to closely inspect the breakage. Is it a clean break, revealing a clear path to restoration? Or are there multiple fractures, like an intricate puzzle waiting to be solved? Look for missing fragments, as they might hold the key to completing the picture. Understanding the nature of the break will guide you towards the most suitable repair technique – whether it’s gentle bonding or meticulous reconstruction.
Evaluate the material:
Ceramics encompass a rich spectrum, each with its own personality and demands. Porcelain, earthenware, stoneware, or bone china – these treasures demand specific repair methods and adhesives due to their unique composition and porosity. Unveiling the true identity of your ceramic item is paramount to selecting the right tools and materials for a seamless restoration.
Consider the value:
Beyond mere aesthetics, some ceramic pieces hold stories that transcend time. They might be heirlooms passed down through generations or rare collectibles with historical significance. In these cases, it’s wise to seek guidance from a professional restorer who possesses the skills and experience necessary to handle such delicate artifacts without compromising their value. Entrusting your precious ceramic item to expert hands ensures its safe passage through time.
Take note of previous repairs:
A broken ceramic piece may have already undergone attempts at resurrection in its lifetime. These previous repairs leave behind whispers of restoration, visible glue lines or mismatched colors that hint at its journey. Acknowledging these signs is essential, as they shape the overall integrity of the piece and might require additional considerations during the assessment process. By unraveling the secrets of past repairs, you can make informed decisions to guide your restoration.
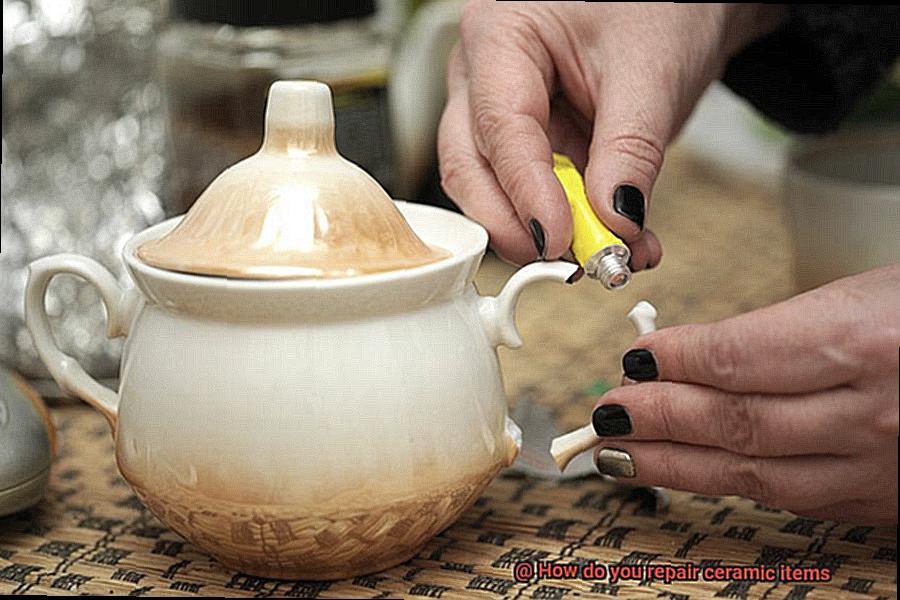
Apply Adhesive to One of the Broken Edges
Embarking on the journey of restoring a broken ceramic item is like uncovering the hidden beauty within shattered fragments. Each fracture tells a story, and through careful evaluation, meticulous preparation, and expert adhesive application, we can breathe new life into these delicate works of art. In this article, we will explore the crucial first step in this intricate process: applying adhesive to one of the broken edges.
Step 1: A Clean Canvas – Preparing for Success
Before diving into the adhesive application process, it is imperative to create a pristine surface on the broken edges of your ceramic piece. Armed with a soft cloth or a gentle paper towel, whisk away any remnants of dirt, dust, or debris that could hinder the bond’s strength. Pay close attention to remnants of previous repair attempts, meticulously removing them to ensure an unyielding connection. By starting with a clean canvas, you set the stage for a seamless restoration.
Step 2: The Perfect Match – Choosing the Right Adhesive
When it comes to ceramics, not all adhesives are cut from the same mold. To ensure optimal bonding strength and longevity, it is vital to select an adhesive specifically formulated for ceramics. Epoxy glue, super glue, or ceramic adhesives are among the popular choices available. Seek guidance from your local hardware store or consult an expert to find the perfect match for your unique ceramic item.
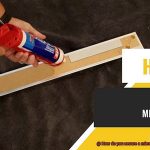
Step 3: Precision Application – A Brushstroke of Perfection
With the chosen adhesive in hand, it’s time to apply it delicately to one of the broken edges. Harnessing the power of a small brush or a toothpick allows for unparalleled control and precision. As you glide the adhesive across the surface, ensure an even spread that blankets every nook and cranny. This meticulous application sets the stage for an unbreakable bond, a testament to your artistry.
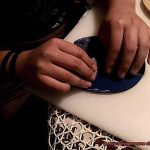
Secure the Pieces in Place While Drying
Embarking on the journey of restoring a broken ceramic treasure requires finesse, skill, and a touch of artistry. In our previous section, we explored the hidden beauty of ceramics and the delicate process of applying adhesives. Now, let’s delve into the crucial step of securing the pieces in place while they dry. With a repertoire of expert techniques and materials at your disposal, you will be well-equipped to breathe new life into your shattered masterpiece.
Rubber Bands: The Unsung Heroes of Restoration
Rubber bands emerge as the unsung heroes in the realm of ceramic repairs. These unassuming tools provide even pressure on the broken fragments, diligently holding them in perfect alignment during the drying process. Remember to wrap the rubber bands tightly around the ceramic item, but exercise caution not to cause additional damage. Strategically place the bands to ensure every piece remains securely held together – a harmonious symphony of restoration.
Masking Tape: A Crisscrossed Tapestry of Stability
As an alternative to rubber bands, masking tape offers a versatile solution to secure ceramic pieces as they dry. Wrap this mighty tape around the broken area in a crisscross pattern, weaving a tapestry of stability and support. It is essential to tread lightly with masking tape, ensuring you apply just enough pressure without risking further damage. Precision is key on this path to perfection.
Specialized Tools: Clamping Down on Perfection
For those seeking an extra layer of support in their ceramic repairs, adjustable clamps are an invaluable choice. These remarkable tools possess adjustable jaws that delicately apply pressure, firmly holding the broken pieces in place throughout the drying process. Rest assured that your beloved ceramic item is in good hands as it steadily regains its former glory.
Support Stands and Cradles: A Serene Foundation
Imagine a gentle support stand or cradle, offering solace to your fragile ceramic item as it dries. This serene foundation holds the broken pieces at just the right angle, preventing any movement or shifting. The adhesive can work its magic undisturbed, ensuring a seamless repair that will stand the test of time. Embrace this moment of tranquility in your restoration journey.
Remove Excess Glue After Curing
However, the lingering glue marks can put a damper on your accomplishment. Fear not, for we are here to guide you through the enchanting process of bidding farewell to those stubborn remnants. In this comprehensive guide, we will delve into a variety of techniques to remove excess glue after it has fully cured on ceramic surfaces. From delicate scraping to invigorating soaking, let us embark on this transformative journey together.
Method 1: The Delicate Blade or Scraper Technique
Unlock the secret to a pristine ceramic surface with the time-tested blade or scraper technique. Armed with a sharp blade or scraper, gently caress the glue, coaxing it away without harming the ceramic’s delicate complexion. Remember, a light touch is essential. With each delicate scrape, witness the glue surrender, taking care not to mar the ceramic’s flawless countenance.
Method 2: Rubbing Alcohol or Acetone Magic
Unleash the captivating powers of rubbing alcohol or acetone in your battle against cured glue. These elixirs possess the ability to work miracles on even the stickiest of situations. Embrace their enchantment by moistening a clean cloth or cotton swab and delicately massaging the excess glue. Apply gentle pressure as these solvents dissolve the adhesive’s grip, making its removal effortless. Be cautious, however, as certain ceramics may be sensitive to their charms. Embark on a small patch test before proceeding with grace and caution.
Method 3: Embrace the Heat.
Harness the transformative might of heat to soften stubborn excess glue. Engage in an enchanting dance with your hairdryer on low heat or a heat gun set to a gentle caress. Direct this warmth towards the adhesive domain, watching as it surrenders to the allure of your touch. With finesse, peel away the softened glue using your nimble fingers or a blunt tool. Beware the siren song of overheating, for it may lead to the ceramic’s demise.
Replace Missing Pieces, if Necessary
In our previous adventure, we learned the magic of bidding farewell to stubborn glue marks on ceramic surfaces. Now, let us embark on a new quest: replacing missing pieces. Whether it’s a chip, a crack, or a broken section, we shall guide you through the steps to revive your ceramic treasure. So, gather your tools and unleash your creativity as we restore the masterpiece.
Assess and Prepare:
Before leaping into the realm of replacing missing pieces, take a moment to assess the condition of your ceramic item. Explore every nook and cranny for other cracks or weak spots that may demand attention before proceeding. Let’s fortify the surrounding area to ensure a triumphant repair.
Small Missing Pieces:
For those elusive tiny pieces that vanished without a trace, fear not. Epoxy or ceramic glue shall be our allies in reuniting these fragments. Begin by cleansing both the missing piece and the area it will embrace, freeing them from any dirt or debris. Apply a delicate layer of glue to both surfaces, align the missing piece with precision, and press firmly for an unbreakable bond. Remember to vanquish any excess glue that dares to seep out.
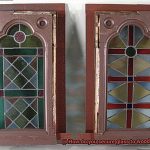
Larger Missing Sections:
When faced with gaping voids in our ceramic canvas, restoration becomes an art form. We must craft replacement pieces that seamlessly mimic the appearance and properties of the original ceramic. This task demands finesse and expertise, making it an endeavor best suited for professional restoration services or skilled DIY enthusiasts.
Creating a Replacement Piece:
To breathe life into a replacement piece, sculpt your chosen material into a form that mirrors the contours of the missing section. Seek aid from reference photos or drawings to ensure absolute accuracy. Once shaped to perfection, wield the glue once more. Apply it meticulously to both surfaces, align the replacement piece with unwavering precision, press firmly, and cleanse away any excess glue. Behold. The puzzle of your ceramic masterpiece is gradually being solved.
Considerations:
Replenishing missing pieces can alter the structural integrity of your ceramic treasure. In the face of uncertainty or when dealing with items of great value or sentimental significance, seek guidance from a professional to navigate this delicate restoration path.
Allow Adhesive to Fully Cure Before Use or Displaying
Today, we embark on a journey that will forever change the way you approach adhesive curing. Join me as we explore the secrets to ensuring your restored ceramic treasures stand the test of time. So, grab a cozy spot, immerse yourself in this tale of patience, and let’s unlock the true potential of adhesive curing.
The Delicate Dance of Curing:
In the realm of ceramic repair, adhesive is the enchanted glue that brings broken pieces back to life. But beware, my friend, for this magic requires time to unfold. Adhesive must dry and harden to create a bond that will endure and withstand the trials of time.
Time and Type: The Twin Factors:
Ah, the duo that dictates it all – time and type. The duration of adhesive curing relies on these two muses. Temperature, humidity, and even the adhesive’s nature all play a part in this symphony. As you embark on your restoration journey, heed the manufacturer’s instructions like a wise compass guiding you through uncharted waters.
Haste Makes Weak Bonds:
Impatience, dear friends, is not a virtue in the realm of adhesive curing. Hastening the process may lead to a weak bond that crumbles under pressure. Resist the urge to rush, for true strength lies within patience itself. Allow your adhesive the time it needs to reach its full potential.
Embracing Pressure for Unbreakable Bonds:
Picture this – a warm embrace that solidifies your masterpiece. Applying pressure during the curing process ensures a bond as strong as steel. Clamps, weights, or other methods recommended by adhesive masters will provide the support your restored ceramic treasure craves.
Safety First: Doubt Is No Foe:
If doubt creeps into your mind, fear not. It is better to err on the side of caution than face the consequences of premature use. Grant your adhesive additional time to guarantee a complete cure. Remember, my friend, patience is the guardian of perfection.
Handle with Tender Love:
Finally, the moment arrives – your restored ceramic treasure is ready to shine. But remember, it still requires gentle care. Treat it as a fragile masterpiece, protecting the repaired area from unnecessary stress. With each touch, you honor the craftsmanship that brought your treasure back to life.
Conclusion
Repairing ceramic items can be a delicate and intricate process, but with the right tools and techniques, it is possible to restore them to their former glory. Whether it’s a chipped mug or a cracked vase, there are steps you can take to fix these beloved pieces.
Firstly, assess the damage. Examine the ceramic item closely to determine the extent of the problem. Is it a small chip or a larger crack? Understanding the severity of the damage will help guide your repair approach.
Next, gather your materials. You’ll need epoxy adhesive specifically designed for ceramics, sandpaper, and possibly some paint or glaze for touch-ups. It’s crucial to use products that are suitable for ceramics to ensure a successful repair.
Before applying any adhesive, clean the area thoroughly. Remove any dirt or debris that may interfere with the bonding process. Gently sand down any rough edges or surfaces to create a smooth and even surface for the adhesive to adhere to.
Now comes the tricky part – applying the adhesive. Follow the instructions on your chosen epoxy adhesive carefully. Apply a thin layer of adhesive to both sides of the broken piece and press them together firmly. Hold them in place until the adhesive sets and dries completely.
Once the adhesive has dried, you can further refine your repair by using sandpaper to smooth out any excess glue or uneven edges. If necessary, apply paint or glaze that matches the original color of your ceramic item for seamless blending.
Finally, handle your repaired ceramic item with care. Avoid subjecting it to sudden temperature changes or excessive force that could cause further damage.
Repairing ceramic items requires patience and precision, but it is a rewarding endeavor that allows you to preserve cherished pieces with sentimental value. By following these steps and using proper materials, you can breathe new life into your beloved ceramics and enjoy them for years to come.
So don’t despair when faced with broken ceramics – roll up your sleeves and embark on the journey of repair.