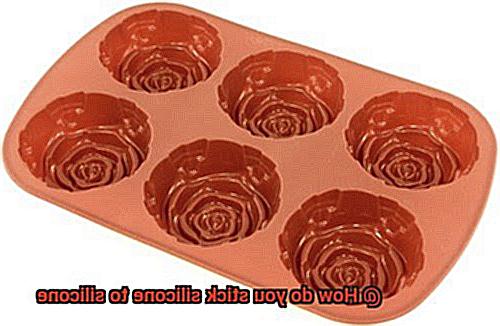
Silicone, the superhero of flexibility and heat resistance, has taken the world by storm with its sealants, adhesives, and everyday household wonders. But what about when you need to stick silicone to silicone? Is it a task only for the pros or can us regular folks conquer this challenge too? Brace yourself for an eye-opening journey as we unravel the secrets behind achieving flawless silicone-to-silicone adhesion.
Picture a world where you confidently mend your beloved silicone kitchenware, secure crucial electronic components, or bring your DIY dreams to life without worrying about things falling apart. This blog post is your ultimate guide to mastering the elusive art of sticking silicone to silicone, ensuring your projects stay rock-solid.
Let’s start by diving into the captivating science behind silicone adhesion. We’ll explore why this material is so incredible and uncover the hurdles faced when bonding two silicone surfaces together. From its water-repelling nature to its low-energy surface, each characteristic holds valuable clues that will help us crack the code of effective adhesion techniques.
As we move forward, get ready for a treasure trove of tried-and-true methods that guarantee exceptional bonding results. We’ll reveal insider tips on using silicone primers strategically and choosing specialized adhesives like a pro. Step-by-step guidance will be at your fingertips as we break down each technique in detail.
But wait, there’s more. We’ve gathered wisdom from industry experts and are excited to share their invaluable tips and best practices with you. Discover the secrets of prepping surfaces like a pro, creating optimal curing conditions, and providing post-application care that ensures long-lasting success.
Get ready to unleash the full potential of silicone bonding as we embark on this adventure together. Let these insights be your trusted compass as you navigate through the intricate world of silicone adhesion – taking your projects to new heights of durability and creativity. Prepare for a journey that will forever change the way you look at silicone bonding.
What is Silicone?
Contents
- 1 What is Silicone?
- 2 Types of Adhesives for Sticking Silicone to Silicone
- 3 Preparing the Surfaces Before Applying Adhesive
- 4 Applying the Adhesive to the Silicone Surfaces
- 5 Aligning and Pressing the Surfaces Together
- 6 Curing Time for Maximum Strength Bond
- 7 Choosing the Right Adhesive for Different Types of Silicone
- 8 Alternative Methods for Sticking Silicone to Silicone
- 9 Conclusion
Silicone, a synthetic polymer composed of silicon, oxygen, carbon, and hydrogen atoms, has revolutionized various industries with its exceptional properties. From its ability to withstand extreme temperatures to its flexibility and durability, silicone offers a wide range of applications. In this article, we will explore the diverse characteristics of silicone that make it the go-to material for sticking silicone to silicone.
Exceptional Heat Resistance:
Silicone stands tall in high-temperature environments without losing its shape or degrading. It tackles hot pans in the kitchen and seals components with ease. Oven mitts, baking mats, and other kitchen utensils thrive in silicone’s remarkable heat resistance.
Flexibility and Elasticity:
Unlike other materials, silicone bends, stretches, and twists without breaking or losing its original shape. It seals leaks in engines and creates watertight seals in plumbing systems effortlessly. Automotive industries and DIY enthusiasts rely on silicone seals for their unmatched durability.
Durable and Long-lasting:
Silicone is built to last. It defies sunlight, moisture, and chemicals, remaining intact even in harsh conditions. Sealants and waterproofing materials designed for outdoor use benefit from silicone’s exceptional durability.
Hypoallergenic and Biocompatible:
Safety is paramount in medical devices and implants. Silicone’s hypoallergenic and biocompatible properties make it the material of choice for these applications. Implants, prosthetics, and medical devices interact safely with human tissues due to silicone’s inert nature.
Excellent Electrical Insulation:
Silicone’s insulating prowess makes it a top contender for electrical components and devices. With no conductivity to electricity, cables, connectors, and insulators find solace in silicone’s reliable performance. High voltages and temperatures pose no threat to silicone’s resilience.
Water Resistance:
Silicone’s resistance to water absorption makes it an exceptional material for waterproofing and sealing purposes. Its tight barrier against moisture prevents water damage in bathrooms, kitchens, and electronic devices alike. The reliability of silicone sealants is unparalleled.
Types of Adhesives for Sticking Silicone to Silicone
When it comes to bonding silicone to silicone, finding the perfect adhesive is paramount. Silicone has unique properties that require specialized adhesives for a strong and durable connection. Fortunately, there are various options available to suit different needs. Let’s delve into the world of adhesives and discover the best ones for sticking silicone surfaces together.
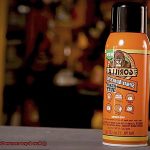
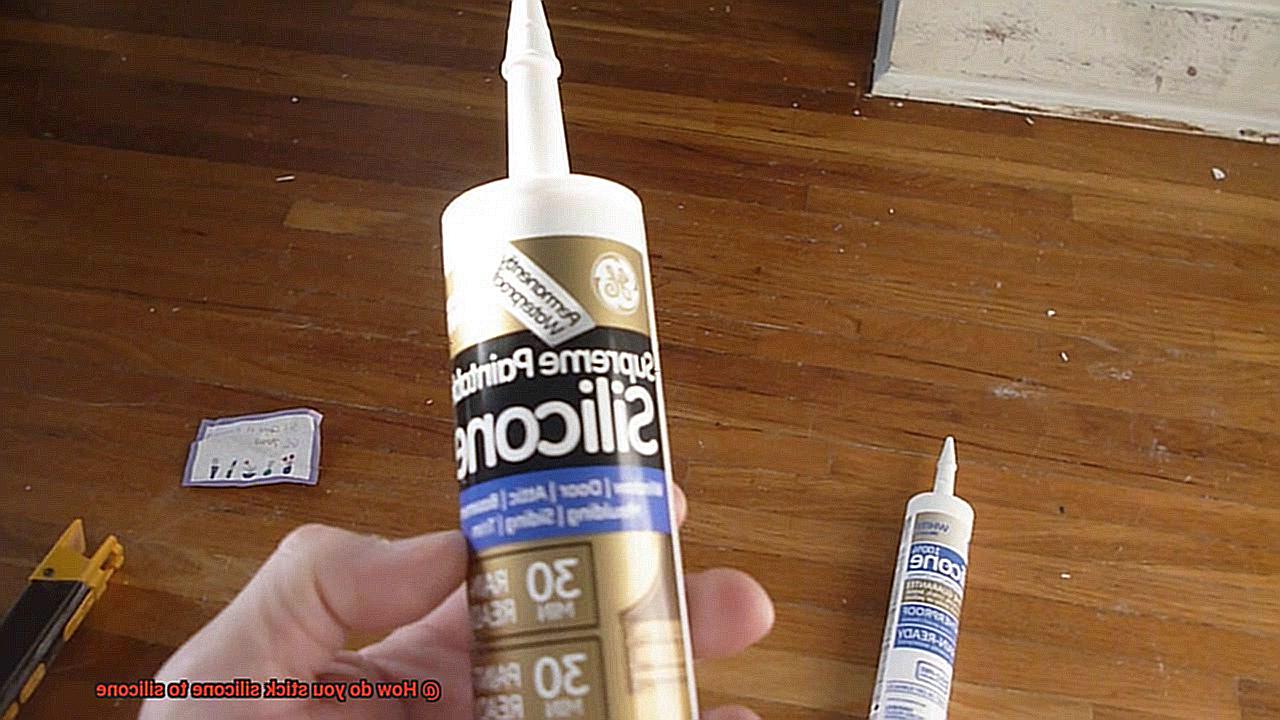
Silicone Adhesive: The Superhero of Silicone Bonding
Silicone adhesive is the ultimate champion when it comes to bonding silicone materials. Specifically formulated for this purpose, it can be easily applied using a caulk gun or similar tool.

This adhesive exhibits exceptional performance, withstanding temperature changes, moisture, and even UV exposure. However, it’s important to exercise patience as silicone adhesive requires time to fully cure and achieve maximum strength.
Two-Part Silicone Adhesive: The Dynamic Duo
If time is of the essence, the two-part silicone adhesive swoops in to save the day. This adhesive consists of a base and a catalyst that must be mixed before application. Once combined, it activates its superhero powers by forming a robust bond between the silicone surfaces.
With a faster curing time compared to silicone adhesive alone, this dynamic duo offers efficiency without compromising on strength.
Epoxy Adhesive: The Reliable Partner
For those seeking a reliable bond, epoxy adhesive serves as an unwavering ally. Renowned for its strength and durability, epoxy is well-suited for bonding silicone surfaces.
However, it’s crucial to ensure compatibility between the chosen epoxy and silicone, as not all types adhere effectively. With epoxy as your partner, you can rely on a rock-solid connection that stands the test of time.
Cyanoacrylate Adhesive: The Swift Fix
When an instant bond is required, cyanoacrylate adhesive, also known as super glue, comes to the rescue. This adhesive dries rapidly and forms a strong connection between silicone surfaces. However, it’s important to note that cyanoacrylate adhesive may not offer the same level of durability as other options. If you need a quick fix, this speedy superhero is the way to go.
Surface Preparation: The Secret to Success
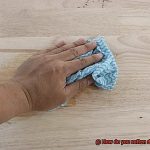
Before applying any adhesive, proper surface preparation is key to achieving a successful bond. Thoroughly clean the silicone surfaces to remove dirt, dust, or oils using a mild detergent or solvent.
Wipe them clean with a cloth, ensuring a pristine surface for optimal adhesion. This crucial step guarantees a strong and long-lasting bond that won’t let you down.
Preparing the Surfaces Before Applying Adhesive
In the realm of sticking silicone to silicone, mere surface contact won’t cut it. To achieve a bond that rivals the strength of superheroes, meticulous surface preparation is essential.
Just like heroes need training before they save the world, your silicone surfaces require special care to form an unbreakable connection. Join us on a journey into the world of surface preparation and unlock the steps needed for a bond that will stand the test of time.
Step 1: The Cleanliness Crusade
Before the adhesive can work its magic, banish any dirt, dust, or grease from your silicone surfaces. Arm yourself with a mild detergent or rubbing alcohol and wage war against impurities. With gentle strokes, cleanse every inch of the surfaces, leaving no trace behind. Rinse off any residue and allow them to dry completely. Remember, a pristine surface is the foundation for a bond that knows no weakness.
Step 2: Roughening the Smooth Surface
Silicone’s smooth and non-porous nature can pose a challenge for adhesives seeking a firm grip. Enter the roughening ritual. Equip yourself with fine-grit sandpaper or an abrasive pad and embark on a mission to create a slightly textured terrain. With careful scuffing, you provide the adhesive with more surface area to cling onto. But beware, this is not a battle of brute force – finesse is key to avoid collateral damage.
Step 3: Embrace the Drying Dance
Before adhesive application takes center stage, make sure your surfaces are bone dry. Moisture lurks as the villain that weakens bonds, so leave no room for its treachery. Give your surfaces ample time to air dry or employ a clean cloth or paper towel for a thorough drying session. Remember, patience becomes your superpower when pursuing the perfect bond.
Step 4: The Prime Time Revelation
Not all heroes wear capes, and not all adhesives require primers. But if your chosen adhesive calls for priming, don’t underestimate its secret power. Primers unleash their potential by enhancing adhesion, ensuring better wetting of the silicone surface, and amplifying bonding capabilities. Follow the manufacturer’s instructions with utmost precision, gently applying a whisper-thin layer of primer onto both surfaces.
Applying the Adhesive to the Silicone Surfaces
If you’re looking to achieve a bond between silicone surfaces that rivals the strength of superheroes, then I’ve got some exciting tips for you. Let’s dive in and explore the secrets to successfully sticking silicone to silicone.
Step 1: The Power of Cleanliness
Before you embark on your adhesive adventure, it’s crucial to clean those silicone surfaces like a boss. Banish any dirt, dust, oils, or residues that dare to stand in your way. Grab a gentle cleanser or some isopropyl alcohol and make those surfaces sparkle. Remember, cleanliness is next to stickiness.
Step 2: Choose Your Adhesive Wisely
Now that your surfaces are squeaky clean, it’s time to choose the perfect adhesive for the job. Look for an adhesive specifically designed for bonding silicone surfaces. Consider factors like flexibility, temperature resistance, and curing time. You want an adhesive that plays well with silicone and suits your specific needs.
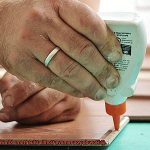
Step 3: Apply Like a Pro
It’s showtime. Grab your trusty brush or applicator and apply a thin, even layer of adhesive onto one of the silicone surfaces. Be sure to cover the entire area where bonding is desired. Less is more here – avoid going overboard with the adhesive as it can lead to messiness and weaken the bond. Apply like a pro for optimal results.
Step 4: Patience is Key
You’ve laid down that adhesive like a champ, now it’s time to let it work its magic. Give it some space and allow sufficient curing time for it to set and create a strong bond. Consult the manufacturer’s instructions for guidance on the curing time, as it can vary depending on the type of adhesive used. During this crucial period, be patient and avoid disturbing those surfaces.
Step 5: Unite and Conquer
Once the adhesive has cured, it’s time to bring those silicone surfaces together. Carefully align them and apply firm, even pressure across the bonded area. This ensures full contact between the surfaces, eliminating any air pockets or gaps that could weaken your bond. Unite and conquer with confidence.
Aligning and Pressing the Surfaces Together
In our previous post, we uncovered the secrets to sticking silicone to silicone like a pro. Today, we’re diving deep into the crucial steps of aligning and pressing those surfaces together. Get ready to unleash the power of a superhero bond between your silicone pieces.
Step 1: Cleanliness is Next to Stickiness
First things first, let’s clean those surfaces like a boss. With the precision of a surgeon, rid your silicone pieces of any dirt, dust, or grease that could sabotage their union. A gentle scrub with mild soap or detergent followed by a thorough rinse will do the trick. Just make sure those surfaces are dry and ready for action before moving on.
Step 2: Adhesive Selection – Choose Your Sidekick
Now it’s time to pick the perfect adhesive for the job. Like a savvy superhero assembling their team, select a high-quality adhesive specifically designed for bonding silicone. Will you choose the strength of a silicone-based adhesive or the specialized prowess of a bonding agent? Follow the manufacturer’s instructions to apply the adhesive onto both surfaces, ensuring an even coating that sets the stage for an unbreakable bond.
Step 3: Aligning – Precision is Key
Step 4: Pressing with Purpose
Once your surfaces are aligned, it’s time to channel your inner hero strength and apply pressure with precision. Like a blacksmith forging steel, press those silicone pieces together firmly, leaving no room for doubt. You can rely on your hands to exert force or call upon clamps and weights as allies. The goal? To create a symphony of contact, where every inch of surface mingles and merges, forming an unyielding bond.
Curing Time for Maximum Strength Bond
In our previous adventure, we uncovered the secrets of achieving a solid connection between silicone surfaces. Today, we embark on a deeper exploration into the realm of maximum strength bonds as we unravel the significance of curing time. So grab your adhesive and prepare to witness the transformation from sticky mess to unyielding bond.
Understanding Curing Time:
Curing time – the unsung hero of adhesive mastery. It is the moment when your adhesive rises from its liquid state to become a formidable force. When it comes to sticking silicone to silicone, understanding and respecting the power of curing time is paramount.
Factors Affecting Curing Time:
Now, let us delve into the factors that influence this magical transformation. The type of adhesive you use, the temperature in your surroundings, the humidity that fills the air, and even the thickness of your adhesive layer – all these elements dance together to determine how long it takes for your bond to reach its full potential.
The Waiting Game:
Patience becomes our ally in this journey. Generally, silicone adhesives require a curing period of 24 to 72 hours for complete transformation. But hold your enthusiasm. Do consult the manufacturer’s instructions for specific curing times as different products may have unique requirements.
No Rushing Allowed:
Resist the temptation to hasten the process. Applying pressure or subjecting your bonded surfaces to excessive heat or moisture before they have fully cured can compromise the strength of your bond. Remember, we aim for an unyielding connection here – one that withstands the test of time.
Accelerating the Cure:
Now, let us uncover a little secret weapon known as curing agents or accelerators. These powerful allies can significantly speed up the curing process. However, wield them with caution. Follow the manufacturer’s instructions diligently, as improper use may impact the adhesive’s performance.
Mother Nature’s Role:
Temperature and humidity, like master puppeteers, have their part to play. Warmer temperatures act as catalysts, accelerating the curing process. On the other hand, colder temperatures slow it down. Likewise, higher humidity levels extend the curing time, while lower humidity levels hasten it. Keep a vigilant eye on these weather patterns, my friends.
Choosing the Right Adhesive for Different Types of Silicone
Silicone, with its remarkable flexibility and durability, is a highly versatile material. However, when it comes to bonding silicone to silicone, it’s crucial to select the right adhesive. With numerous options available, finding the perfect adhesive for your project may seem daunting. But fear not. This blog post will guide you through the process of selecting the ideal adhesive for bonding different types of silicone.
Understanding Silicone Types:
To begin, it’s essential to identify the type of silicone you are working with. There are two primary types: room temperature vulcanizing (RTV) silicone and high-temperature vulcanizing (HTV) silicone. RTV silicone is suitable for everyday repairs, while HTV silicone is designed for high-temperature environments.
Consider the Surface:
Not all adhesives work well with every surface. When bonding silicone to silicone, it’s crucial to choose an adhesive specifically formulated for this purpose. Regular adhesives won’t provide a strong bond in this scenario. Instead, opt for silicone-based adhesives or two-part epoxy adhesives that are specifically designed for bonding silicone surfaces.
Flexibility and Strength:
The demands of your project will determine the necessary balance between flexibility and strength in your adhesive choice. Silicone-based adhesives are renowned for their outstanding adhesion and flexibility, making them ideal for applications involving movement or flexibility requirements. Conversely, two-component epoxy adhesives offer a strong bond but may have limited flexibility.
Environmental Factors:
Take into account the environmental conditions your bonded silicone will be exposed to. Consider factors such as temperature resistance and chemical resistance when selecting an adhesive. Ensure that the chosen adhesive can withstand high temperatures or harsh chemicals without compromising its strength.
Surface Preparation:
Properly preparing the surfaces is paramount to achieving a robust bond between silicone surfaces. Thoroughly clean the surfaces to eliminate any dirt, dust, or oils that may hinder adhesion. Some adhesives may require additional steps such as roughening or priming the surface for optimal bonding.
Test and Follow Instructions:
Before proceeding with full application, it’s wise to conduct a compatibility test on a small, inconspicuous area. This will help determine if further preparation or priming is necessary and ensure compatibility with the materials being bonded. Additionally, adhere strictly to the manufacturer’s instructions, including adhering to recommended curing times and application techniques.
Alternative Methods for Sticking Silicone to Silicone
I am here to share with you some alternative methods that will have your silicone surfaces bonding like never before. So sit back, relax, and let me guide you through this adhesive adventure.
First on our list is the trusty silicone adhesive or sealant. These specially formulated adhesives are designed to provide strong and durable bonds between silicone surfaces. But before you apply the adhesive, ensure that your surfaces are squeaky clean. Remove any dirt, oils, or contaminants with a gentle cleaning agent like isopropyl alcohol. Once your surfaces are pristine, apply a thin, even layer of the adhesive using a caulk gun or similar applicator. Press the two silicone surfaces together firmly for maximum bonding, and you can even use clamps or weights to help out.
Now, let’s explore another fascinating alternative method – silicone-based tape or film. These magical tapes adhere to silicone surfaces like a dream and provide a strong bond. Simply wrap them around your silicone parts and press firmly in place. What’s even better is that these tapes are removable and repositionable, making them perfect for temporary bonds or situations where disassembly may be required in the future.
But wait, there’s more. Heat can also be your ally when it comes to bonding silicone to silicone. By applying controlled heat to the surfaces, the silicone material becomes softer and more malleable, allowing for better adhesion when pressed together. But remember, safety first. Exercise caution and follow proper procedures when working with heat sources. After heating the surfaces, press them together firmly to create a strong bond. The heat temporarily softens the silicone, enabling it to fuse together more effectively.
It’s worth noting that heat bonding may not be suitable for all silicone materials or applications. To avoid any mishaps, I highly recommend testing this method on a small sample before diving into the real deal. Safety always comes first, my friends.
2WnleGj-cew” >
Conclusion
When it comes to sticking silicone to silicone, there are a few key methods you can try.
One option is using a specialized silicone adhesive that is specifically designed for this purpose. These adhesives are formulated to create a strong and durable bond between two silicone surfaces.
Another option is using a silicone sealant or caulk, which not only helps in sticking the silicone together but also provides a waterproof seal. It’s important to ensure that both surfaces are clean and dry before applying the adhesive or sealant.
Additionally, roughening the surfaces slightly with sandpaper can help improve adhesion. Once applied, it’s recommended to let the adhesive or sealant cure for the recommended amount of time before subjecting it to any stress or strain.
Remember, always follow the manufacturer’s instructions and safety precautions when working with adhesives and sealants.