Creating a captivating landscape is an art form. Every blade of grass, every flower petal, and every stone must come together in perfect harmony to create a breathtaking masterpiece. And guess what? Landscape glue is the secret ingredient that brings it all together.
Whether you’re a seasoned landscaper or just an enthusiastic DIY-er, knowing how to whip up your own landscape glue can take your projects to new heights.
So, get ready to dive into this blog post where we’ll spill the beans on an easy-peasy recipe for making your very own landscape glue.
To concoct this magical adhesive, you won’t need any fancy ingredients or break the bank. Here’s what you’ll need:
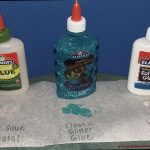
- Outdoor-grade waterproof adhesive: Look for a tough adhesive that can withstand Mother Nature’s tantrums and won’t crumble under pressure.
- Sand: Grab some fine-grit sand that will give your glue some serious bonding power and ensure it sticks like a champ to any surface.
- Polymer-based fortifier: This little gem will make your glue even more durable and weather-resistant, so it can stand up against anything nature throws its way.
Now that you’ve gathered all your materials, let’s get mixing. Start by pouring the adhesive into a clean container. Slowly sprinkle in the sand while giving it a good stir. You want the mixture to be thick enough to stick like glue (pun intended.) but not so thick that it becomes clumpy and impossible to work with. Once everything looks nice and smooth, add the polymer-based fortifier according to the instructions on the package.
But hold on. Before you go slathering this glorious concoction onto anything and everything in sight, make sure your surfaces are squeaky clean and dry as a bone. Get rid of any dirt or gunk that might mess with the adhesive’s superpowers. Trust me, a little prep work goes a long way.
The best part of making your own landscape glue? You can customize it to fit your needs like a glove. Tweak the sand-to-adhesive ratio or experiment with different amounts of fortifier to find that sweet spot between strength and flexibility. It’s like having your own secret recipe for success.
So, my green-thumbed friend, landscape glue is about to become your new bestie in the world of outdoor masterpieces. Why settle for ordinary when you can create extraordinary? Stay tuned because we’ll be back
What is Landscape Glue?
Contents
- 1 What is Landscape Glue?
- 2 Key Ingredients for Making Landscape Glue
- 3 Step-by-Step Guide to Making Landscape Glue
- 3.1 Step 1: Choose the Right Adhesive
- 3.2 Step 2: Prepare Your Workspace
- 3.3 Step 3: Protect Your Hands
- 3.4 Step 4: Load the Adhesive
- 3.5 Step 5: Apply the Glue
- 3.6 Step 6: Press Firmly and Align
- 3.7 Step 7: Repeat as Needed
- 3.8 Step 8: Allow Proper Drying and Curing
- 3.9 Step 9: Regular Maintenance and Monitoring
- 3.10 Step 10: Safety First.
- 4 Mixing Portland Cement and Water
- 5 Consistency of the Mixture
- 6 Hydration Process
- 7 Applying the Glue
- 8 Curing and Drying Time
- 9 Conclusion
Creating breathtaking outdoor spaces goes beyond selecting the right materials; it also requires effectively securing them together. This is where landscape glue, also known as landscape adhesive or landscape sealant, comes into play.
In this blog post, we will explore the world of landscape glue, its uses, benefits, and application techniques, to help you achieve lasting and visually appealing landscapes.
The Power of Landscape Glue:
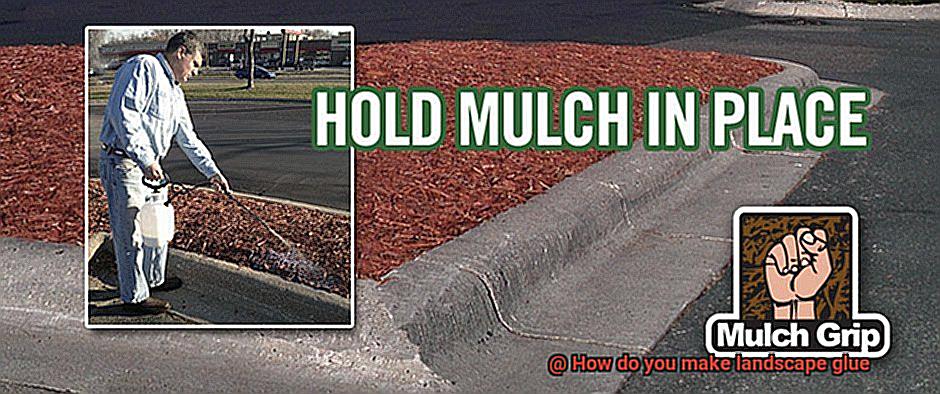
Landscape glue is a specialized adhesive designed for outdoor use in landscaping projects. Its purpose is to create strong and durable bonds between various materials, such as stones, bricks, pavers, and tiles. By using landscape glue, you can construct long-lasting structures in gardens, pathways, or patios that will withstand the test of time.
Weather Resistance:
One standout feature of landscape glue is its ability to withstand outdoor conditions. It can endure exposure to sunlight, rain, snow, and temperature fluctuations without losing its bonding properties. The adhesive is formulated to resist UV radiation from the sun while maintaining its integrity and strength.
Water Resistance and Gap Filling:
Landscape glue acts as a waterproof sealant once dried and cured. This means it prevents water from seeping through the bonded surfaces, offering protection against moisture damage. Additionally, landscape glue can fill in gaps between stones or pavers for a seamless look while preventing weed growth.
Proper Application Techniques:
To ensure optimal results when using landscape glue, it’s essential to follow proper application techniques. First, clean the surfaces to be bonded thoroughly, ensuring they are dry and free from dust or debris. Next, apply the adhesive evenly using a trowel or a suitable tool. Allow the glue to dry completely before subjecting the bonded materials to stress or pressure.
Key Ingredients for Making Landscape Glue
Polyvinyl Acetate (PVA):
At the core of landscape glue lies polyvinyl acetate (PVA), a synthetic polymer celebrated for its exceptional bonding properties. PVA forms a robust and flexible bond between various materials, ensuring longevity and resistance to weather conditions. It acts as the foundation for landscape glue’s strength.
Solvents:

Solvents are vital in landscape glue as they dissolve PVA, making it easier to apply. Water-based solvents are environmentally friendly and offer effortless cleanup, while alcohol-based solvents expedite drying time. The choice of solvent depends on personal preference and project requirements.
Additives:
To enhance performance, landscape glue often incorporates additives such as fillers, thickeners, and stabilizers. Fillers like silica or cellulose improve strength and prevent shrinkage during drying, reinforcing the bond between materials. Thickeners such as polyvinyl alcohol (PVOH) increase viscosity, allowing for better control during application. Stabilizers ensure the longevity of the adhesive, preventing deterioration over time and maximizing durability.
Quality Matters:
Selecting high-quality ingredients is paramount when making landscape glue. Inferior materials may compromise bond strength and overall performance. It is crucial to follow the manufacturer’s instructions regarding ingredient ratios and application techniques for optimal results. Investing in quality ingredients ensures a reliable adhesive that stands up to nature’s challenges.
Step-by-Step Guide to Making Landscape Glue
When it comes to landscaping projects, having a reliable adhesive is crucial for securing materials in place. While commercial landscape glue is readily available, making your own can be cost-effective and allow for customization. In this comprehensive step-by-step guide, we will show you how to create your own landscape glue that can withstand nature’s toughest challenges. So put on your DIY hat and let’s get started.
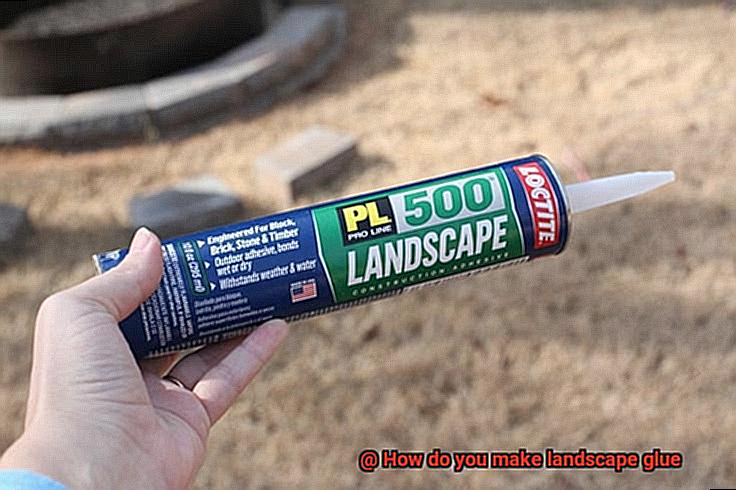
Step 1: Choose the Right Adhesive
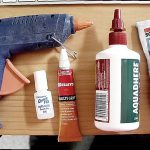
- Select a waterproof and weather-resistant adhesive such as a construction adhesive or a polyurethane-based adhesive.
- Read the label and choose an adhesive that suits your specific needs.
Step 2: Prepare Your Workspace
Ensure your workspace is clean and free of debris and dust for proper adhesion and longevity of the glue.
Step 3: Protect Your Hands
Put on gloves before handling the adhesive to avoid sticky situations.
Step 4: Load the Adhesive
- Use a caulk gun or another applicator tool to load the adhesive according to the manufacturer’s instructions.
- This allows for precise application and control over the amount of glue dispensed.
Step 5: Apply the Glue
- Apply a thin layer of adhesive onto one of the surfaces you want to bond together.
- For example, if securing landscape fabric to the ground, apply the glue onto either the fabric or the ground surface.
Step 6: Press Firmly and Align
- Press the two surfaces firmly together, ensuring proper alignment.
- Apply pressure for a few seconds to allow the adhesive to bond and set.
Step 7: Repeat as Needed
- Repeat the process for each section or area that requires glue.
- Apply the adhesive evenly and be careful to avoid excess glue seeping out from the edges.
Step 8: Allow Proper Drying and Curing
- Follow the manufacturer’s instructions regarding drying and curing times.
- Be patient and let the glue do its magic, usually taking several hours or even a day.
Step 9: Regular Maintenance and Monitoring
- Homemade landscape glue may not have the same durability as commercial products.
- Regularly maintain and monitor the bond to ensure its longevity.
Step 10: Safety First.
- Always follow safety guidelines when working with adhesives.
- Wear gloves, work in a well-ventilated area, and store any leftover adhesive properly to prevent drying out.
Mixing Portland Cement and Water
Mixing Portland cement and water to create landscape glue is a crucial process that requires attention to detail and adherence to safety precautions. By following the correct water-to-cement ratio and employing proper mixing techniques, you can achieve a strong and durable glue that will withstand the elements.
Before you begin, gather all the necessary materials: Portland cement, water, a mixing container, a trowel or handheld mixer, and protective gear such as gloves, goggles, and a dust mask. Safety should always be a priority when working with cement.
Start by measuring out the correct proportions of Portland cement and water. The water-to-cement ratio plays a vital role in determining the consistency and strength of the glue. For a standard mix, use a ratio of approximately 0.5 parts water to 1 part cement. However, keep in mind that this ratio may vary depending on the specific application and desired outcome.
To achieve better control over the consistency of the glue, begin by adding a lower amount of water and gradually increase it as needed. Mixing small batches at a time will prevent the glue from drying out before it can be applied.
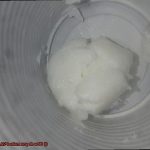
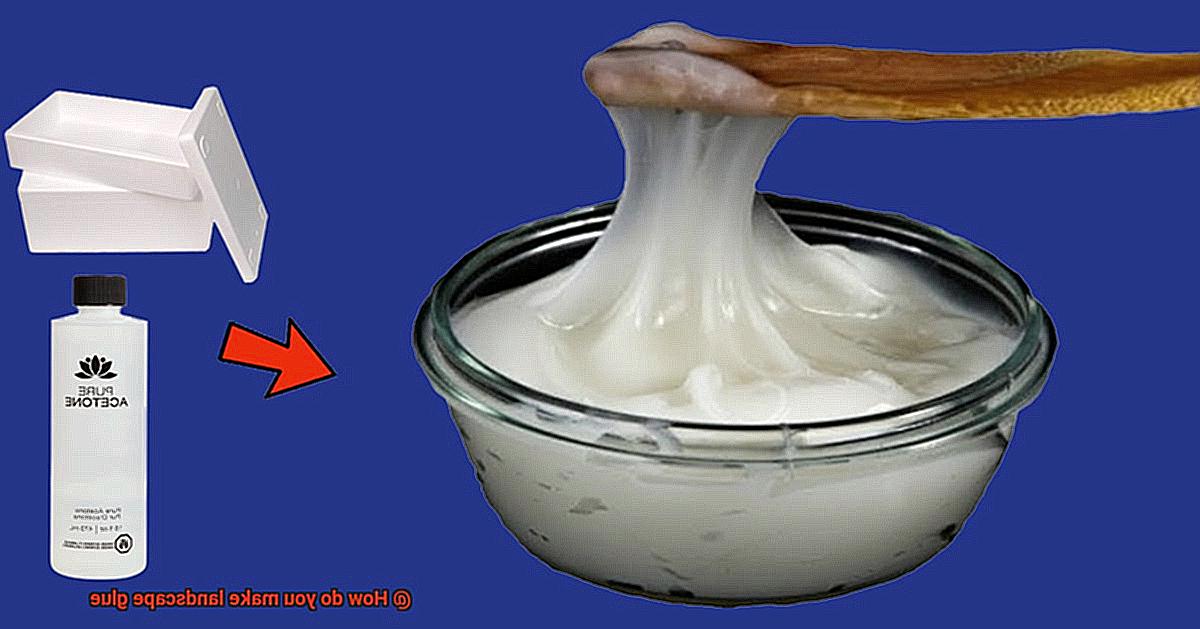
Place the measured amount of Portland cement into the mixing container and slowly add water while continuously stirring and folding the mixture. The goal is to ensure that all dry particles are evenly coated with water. Use a trowel or handheld mixer to achieve a smooth paste-like consistency.
Once mixed, it is crucial to use the landscape glue promptly. Portland cement starts to set within a specific time frame, usually around 30 minutes to an hour, so timing is essential for successful application.
Throughout the entire process, remember to prioritize safety. Wear protective gear, such as gloves, goggles, and a dust mask, to avoid skin irritation and inhalation of cement dust. After use, dispose of any leftover glue properly according to local regulations.
Consistency of the Mixture
Today, we embark on a captivating journey where ingredients, proportions, mixing processes, and even the environment itself converge to create a glue that will withstand the test of time. So, grab your trowels and let’s delve into the art of consistency.
Ingredients: The Building Blocks
Imagine a landscape glue that defies the elements, keeping your cherished garden creations intact. It all begins with the perfect combination of ingredients. Cement, sand, and water form a triumphant trio responsible for the strength and durability of your adhesive masterpiece.
Too much cement yields a thick and burdensome mixture, while too little results in a feeble bond. Striking that sweet balance is paramount.
Proportions: The Magic Formula
Ah, the dance between cement and sand. Here lies the true artistry. Adjusting the ratio can dramatically alter the consistency. More cement begets thickness and fortitude, while more sand bestows pliability, making it easier to spread.
Strike the perfect equilibrium between these two components and unlock the secret to achieving your desired consistency.
Mixing Process: The Symphony of Texture
Now that our ingredients are assembled, it’s time to blend them into a harmonious union. Whether you opt for a trusty trowel or a handheld mixer, the goal remains unchanged – uniformity.
Mix with finesse, ensuring every particle is drenched in water. Like an accomplished chef crafting a luscious sauce, aim for a velvety-smooth paste-like consistency. Your adhesive masterpiece deserves nothing less.
Temperature and Humidity: Nature’s Secret Ingredients
Even in matters of glue consistency, Mother Nature loves to throw her curveballs. Temperature and humidity can influence the drying process, altering the texture of your adhesive creation. Warmer temperatures expedite drying time, while cooler ones decelerate it.
High humidity can throw a wrench in your plans, potentially leading to unintended consistency outcomes. Stay vigilant and make adjustments as needed.
Conclusion: The Artistry Unleashed
Congratulations, glue aficionados. You have now unlocked the secrets behind achieving the perfect consistency for landscape glue. By thoughtfully considering the ingredients, proportions, mixing process, and environmental factors, you can create an adhesive that brings your garden dreams to life.
Remember to don your protective gear like a valiant knight, for safety is always paramount. Now, venture forth and let your creativity flow with the consistent power of landscape glue.
Hydration Process
The hydration process is a crucial step in making landscape glue. It is the chemical reaction between water and the adhesive material that allows the glue to form and harden. This process involves the breaking of chemical bonds in the adhesive material, allowing it to mix with water molecules and form a strong bond.
To initiate the hydration process, water is added to the adhesive material in a controlled manner. This can be done by mixing water with a dry powder or adding water to a liquid adhesive. The water molecules then penetrate the adhesive material, causing it to swell and soften. It’s like giving your glue a big hydrating drink.
As the water molecules continue to interact with the adhesive material, they start to break down its molecular structure. This breaking of bonds allows the adhesive material to mix with water, forming a sticky and pliable substance. Think of it as creating the perfect gluey consistency that will hold everything together.
During the hydration process, it is important to maintain the right ratio of water to adhesive material. Adding too much water can result in a runny and weak glue, while adding too little may prevent proper hydration and bonding. Therefore, careful measurement and mixing are necessary to ensure optimal results.
The duration of the hydration process varies depending on the specific adhesive material used. Some glues may require only a few minutes to fully hydrate and form a strong bond, while others may take several hours or even days. It is important to follow the manufacturer’s instructions regarding the recommended curing time for each type of landscape glue.
Once the hydration process is complete, the glue undergoes a drying phase where excess water evaporates, leaving behind a hardened adhesive. This drying phase can be accelerated by providing proper air circulation and temperature control. It’s like giving your glue some breathing room to set and become the formidable adhesive it’s meant to be.
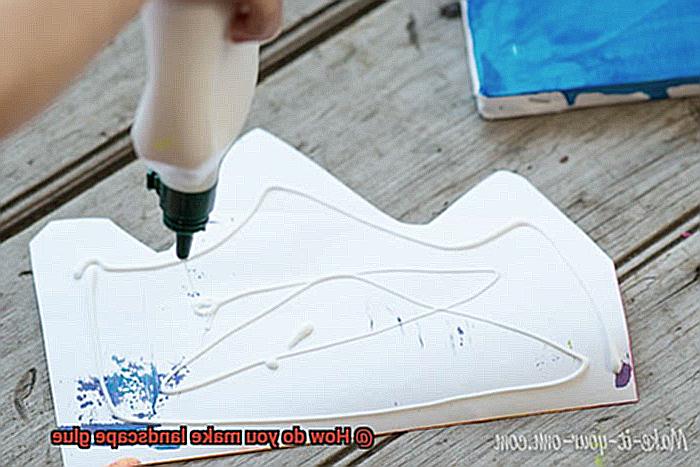
Applying the Glue
When it comes to creating a landscape masterpiece that stands the test of time, applying the glue is a crucial step that should not be overlooked. This small detail can make all the difference in ensuring a long-lasting and beautiful landscape. So, let’s dive into the world of landscape glue and explore how to apply it effectively.
- Prepare the Surface: Before even thinking about applying the glue, take the time to clean the surface thoroughly. Sweep away any debris or loose particles, ensuring a smooth canvas for the glue to work its magic.
- Follow Instructions Carefully: Depending on the type of landscape glue you’re using, there may be specific instructions on how to apply it. Whether it comes in handy tubes or cartridges or requires mixing before application, be sure to read and follow the instructions meticulously.
- Evenly Distribute the Glue: To ensure a strong bond, use a brush or spreader to evenly distribute the glue over the surface. This guarantees that every nook and cranny is covered, leaving no gaps or uneven spots that could weaken the bond.
- Thin Layers for Maximum Adhesion: Thin is in. Applying the glue in thin layers allows for better penetration into the materials and creates a stronger bond. If needed, apply multiple thin layers to ensure maximum adhesion.
- Patience is Key: After applying the glue, exercise patience and allow it ample time to dry and cure. Follow the recommended drying time before proceeding with any further steps. This ensures that the glue fully sets and establishes a rock-solid bond.
- Protect from Disturbances and Moisture: While the glue is drying, take precautions to protect it from any disturbances or exposure to moisture. Cover the area with plastic sheeting or use temporary barriers to keep everything secure.
- Inspect and Reinforce: Once the glue has fully dried and cured, examine the bond closely. Are there any weak spots or areas that could benefit from additional glue? If so, apply more glue and let it dry again. It’s better to be safe than sorry.
- Choose the Right Adhesive: Different landscape projects require different types of glues. Consider the weight and materials involved in your project. Heavy stones or pavers will require a stronger adhesive compared to lightweight materials like artificial grass or decorative pebbles. Choose the right adhesive for your specific needs.
Curing and Drying Time
Creating a breathtaking landscape is more than just a stroke of artistic genius; it requires the perfect tools and techniques. Landscape glue is a key ingredient in ensuring that your masterpiece withstands the test of time.
However, did you know that understanding the magic of curing and drying time is essential for achieving a bond that is as strong as steel? In this blog post, we will delve into the world of landscape glue to shed light on the importance of curing and drying time in your landscaping projects.

Curing Time: Witnessing the Metamorphosis from Liquid to Solid
When it comes to landscape glue, curing time is the transformative period during which the adhesive transitions from a liquid or semi-liquid state to a solid and invincible bond. It’s like watching a work of art come alive before your eyes.
But beware, this process is highly influenced by factors such as temperature and humidity, so it’s crucial to follow the manufacturer’s instructions for the recommended curing time.
Drying Time: Where Evaporation and Bond Formation Unite
While curing time involves mind-bending chemical reactions, drying time is all about evaporation. This stage specifically refers to the removal of solvents or water content present in certain adhesives. Unlike curing time, drying time relies on environmental conditions like temperature, humidity, and airflow.
A well-ventilated environment during this phase expedites the adhesion process by whisking away solvents or moisture, allowing for a strong bond to form.
The Perfect Symphony: Patience and Perfection
To achieve a masterpiece with landscape glue, one must masterfully blend curing and drying time. Rushing this harmonious interplay can weaken the bond during the curing process. Conversely, ensuring proper ventilation during drying prevents trapped moisture from compromising the bond’s strength and durability.
cvAsiIYDswA” >
Conclusion
Creating landscape glue is a simple yet essential task for any DIY enthusiast or professional landscaper. By following these steps, you can make your own landscape glue with ease.
Firstly, gather the necessary materials. You will need a strong adhesive, such as construction adhesive or polyurethane glue, which can be found at your local hardware store. Additionally, have a caulking gun, disposable gloves, and a putty knife on hand.
Next, prepare the area where you will be applying the landscape glue. Ensure that it is clean and free from any debris or loose particles. This will help to ensure a strong bond between the surfaces.
Now it’s time to mix the adhesive. Follow the instructions on the packaging to properly mix the adhesive if required. Some adhesives may require shaking or stirring before use.
Once the adhesive is ready, load it into the caulking gun. Make sure to wear disposable gloves to protect your hands during this process.
Apply a generous amount of landscape glue onto one surface that you wish to bond together. Use steady pressure on the caulking gun to evenly distribute the adhesive along the surface.
Press the two surfaces firmly together and hold them in place for several minutes. This will allow the landscape glue to set and create a strong bond between them.
After allowing sufficient time for drying and bonding, use a putty knife to remove any excess or oozing glue around the edges of the bonded surfaces. This will give your project a clean and professional finish.
Finally, allow ample time for the landscape glue to fully cure before subjecting it to any stress or heavy loads. Refer to the instructions on your chosen adhesive for specific curing times.
In conclusion, making landscape glue is an uncomplicated process that requires just a few materials and some careful application techniques.