Are you ready to embark on a glue gun adventure? Before you dive headfirst into your next project, there’s one burning question that needs answering – How do you know when a glue gun is ready?
Don’t worry, my friend. I’ve got your back. In this article, we’re going to unravel the secrets of the glue gun universe and discover the foolproof ways to determine when your trusty adhesive dispenser is primed and raring to go. We’ll explore visual cues, practical tips, and everything in between to ensure that your glue gun is always in tip-top shape when inspiration strikes.
So buckle up and get ready for a wild ride through the world of glue guns. Together, we’ll unleash your creativity with confidence and precision. Let’s make some magic happen.
What is a Glue Gun?
Contents
With their versatility and ability to tackle a wide range of projects, glue guns have become a must-have in every toolbox. In this comprehensive guide, we will dive into the world of glue guns, exploring what they are, how they work, and why they have gained such popularity among DIYers.
What is a glue gun?
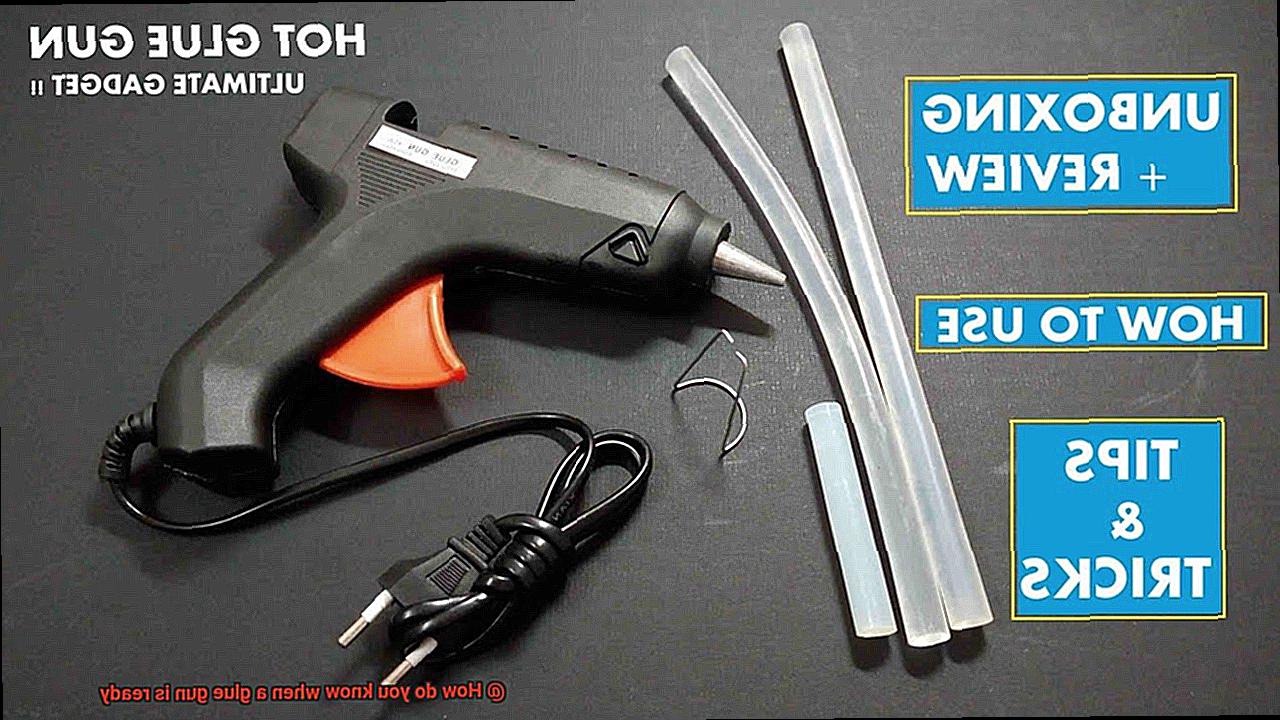
A glue gun is a remarkable tool that dispenses hot adhesive, commonly known as hot glue. It consists of a heating element, a trigger mechanism, and a chamber or nozzle for dispensing melted glue sticks. Available in various sizes and power ratings, glue guns cater to different project needs.
How does it work?
Glue sticks, made of thermoplastic materials, are loaded into the back of the glue gun. The heating element inside the gun melts the glue sticks, transforming them into a liquid state. When the trigger is pressed, the melted glue flows through the nozzle onto the desired surface. Almost instantly, the glue solidifies upon contact, creating a strong bond.
Types of glue guns:
- Mini glue guns: Perfect for delicate or intricate projects.
- Full-sized glue guns: Ideal for larger projects and heavy-duty applications.
- Adjustable temperature glue guns: Enable precise heat control based on the materials being used.
Benefits of using a glue gun:
- Quick heating time: Glue guns heat up in just minutes, allowing you to dive into your project without delay.
- Versatility: Whether you’re bonding wood, fabric, plastic, or other materials, glue guns can handle it all.
- Strong bonds: Hot glue creates robust and durable adhesion.
- Easy to use: With a simple trigger mechanism offering precise control, using a glue gun is a breeze.
Safety tips:
- Always unplug the glue gun when not in use.
- Handle hot glue with caution to avoid burns.
- Keep the glue gun out of reach of children and pets.
- Store glue sticks in a cool, dry place to prevent premature melting.
How Long Does it Take for a Glue Gun to Heat Up?
With its ability to bond materials together using hot melt adhesive sticks, it’s a must-have for any project. But have you ever wondered how long it takes for a glue gun to heat up? Well, wonder no more. We’ve got all the answers you need.
On average, a glue gun takes approximately 3-5 minutes to reach its operating temperature. However, if you’re in a hurry to get started, some high-powered models can heat up in as little as 1-2 minutes. The speed at which a glue gun heats up depends on factors like brand, model, and wattage. Opting for a higher wattage glue gun can significantly reduce the heating time, making it perfect for those urgent projects.
It’s worth noting that the initial heating time mentioned above is just an estimate. Several variables can affect how long it takes for the glue gun to heat up. For instance, the ambient temperature and the thickness of the glue stick being used can influence the heating time. Thicker glue sticks or colder environments may require a bit more patience before the glue gun reaches its optimal temperature.
To determine if your glue gun is ready for action, keep an eye out for some telltale signs. Many glue guns come with an indicator light that changes color or turns off completely when it’s ready to go. It’s a convenient feature that eliminates any guesswork and ensures safe gluing. Additionally, you can gauge the readiness by observing the flow of the glue from the nozzle. Once it starts flowing smoothly and consistently, you know you’re good to go.
Remember, it’s crucial to wait until your glue gun is fully heated before using it. Rushing into bonding before reaching the proper temperature can result in weak bonds and ineffective adhesion. So, be patient and give your glue gun the time it needs to work its magic.
If you’re unsure about the heating time for your specific glue gun model, always refer to the manufacturer’s instructions or user manual. These documents contain valuable information about heating times and indicators specific to each model. By following these guidelines, you can ensure safe and effective use of your glue gun.
Signs That the Glue Gun is Ready to Use
You know the anticipation of waiting for your glue gun to heat up before you can dive into your creative projects. But fear not, fellow crafters. In this article, we’ll explore the telltale signs that indicate your glue gun is ready to go. So grab your glue sticks and let’s get started.
Indicator Light:
The first sign that your glue gun is ready to use is the indicator light. This nifty feature lets you know when the gun is heating up and when it has reached the desired temperature. It’s like a backstage pass to your crafting extravaganza. Once the light goes off, it’s showtime.
Consistency of Glue:
Another sign to look for is the consistency of the glue. When your glue gun reaches its optimal temperature, the glue will become more liquid and easier to dispense. Say goodbye to thick, stubborn glue that just doesn’t want to cooperate. If it’s still thick and gloopy, give it a few more minutes to heat up.
Steady Flow:
A properly heated glue gun will have a steady flow of glue when you pull the trigger. No more awkward pauses or blobs of glue ruining your masterpiece. A smooth and consistent stream of adhesive means that your glue gun is in its groove and ready for action.
Hot Nozzle:
Check the nozzle of your glue gun to see if it’s hot to touch. Once it reaches its operating temperature, you’ll know it’s ready for action. But remember, be cautious when touching the nozzle as it can cause burns. We’re here to create, not get hurt.
Cool-Down Indicator:
Some glue guns have an extra layer of safety with a cool-down indicator. This helpful feature lets you know when it’s safe to unplug and store the gun after use. It’s like a green light signaling the end of a crafting session and ensuring you don’t accidentally burn yourself.
Checking the Temperature Indicator
Before you dive into your next project, let’s ensure that your temperature indicator is giving you the green light for action. After all, we don’t want any glue mishaps ruining our crafting fun.
Now, let’s dive into the world of temperature indicators on glue guns. Depending on the type of glue gun you have, the temperature indicator may come in different forms. Some glue guns have a simple on/off indicator light, while others boast a more advanced temperature display. But fear not, my crafty friends, because I’ve got you covered with the steps to check if your glue gun is good to go.
Let’s start with the glue guns that have a basic on/off indicator light. When you plug in your glue gun and switch it on, the indicator light will usually turn on as well. This means your glue gun is heating up and getting closer to its operating temperature. But hold your horses. Just because the light is on doesn’t mean it’s ready for action. Give it some time to heat up fully before you start gluing.
Keep an eye on that indicator light as it works its magic. You’ll notice that it might change color or even turn off completely when the glue gun reaches its desired temperature. It’s like a secret signal telling you it’s go time. But don’t rush into things just yet. Take a moment to consult the manufacturer’s instructions for your specific glue gun model. They usually give you an estimate of how long it takes for the gun to heat up completely.
Once that indicator light has changed or turned off, give your glue gun a few extra minutes to stabilize at the desired temperature. We want that glue to flow smoothly and consistently, don’t we?
Now, let’s talk about those fancy glue guns with a temperature display. These nifty gadgets show you the exact temperature in degrees, taking all the guesswork out of the equation. Plug in your glue gun, switch it on, and keep your eyes glued to that display (pun intended).
As the glue gun heats up, the temperature display will start showing an increasing value. It’s like watching a thermometer rise on a hot summer day. Wait patiently until the display reaches the desired temperature specified by the manufacturer. Once it hits that sweet spot, give it a few extra minutes to stabilize, just like we did with the indicator light.
But hold on, my crafty comrades. Before you go gluing away, remember that different types of glue require different temperatures for optimal bonding. Always refer to the manufacturer’s instructions or the glue packaging for recommended temperature settings. We want our projects to stick together flawlessly, don’t we?
Safety Features of Glue Guns
Glue guns are not just simple tools; they are incredibly versatile and handy for various crafts and DIY projects. However, it is crucial to remember that glue guns can reach extremely high temperatures, making accidents a risk if proper precautions are not taken. That is why it is essential to consider specific safety features when choosing a glue gun.
First and foremost, a built-in temperature control is one of the most critical safety features to look for. Temperature control allows you to adjust the heat of the glue gun based on the materials you are working with. Lower temperatures are ideal for delicate materials, while higher temperatures are necessary for stronger bonds. By having control over the temperature, you can prevent overheating, reducing the risk of burns or damage to the surrounding area.
Another important safety feature is an insulated nozzle. The nozzle of a glue gun can become scorching hot during operation, and accidental contact can result in severe burns. To mitigate this risk, many glue guns come with an insulated nozzle that stays cool, even when in use. This feature provides an added layer of protection, minimizing the chances of accidental contact with the hot nozzle.
Additionally, many glue guns include a stand or base that allows them to be placed upright when not in use. This prevents the hot nozzle from coming into contact with any surfaces and reduces the risk of accidental burns or fires. Always using the stand or base provided with your glue gun and avoiding laying it flat on a surface is crucial for safety.
Some glue guns also have an automatic shut-off feature. This intelligent function turns off the gun automatically after a certain period of inactivity, typically around 30 minutes. This feature is especially useful for forgetful individuals who often neglect to turn off their glue guns after use. It helps conserve energy and significantly reduces the risk of fire hazards.
Moreover, many glue guns offer a trigger-operated mechanism that helps control the flow of glue. This feature prevents any accidental dispensing of glue when the gun is not in use, reducing waste. The trigger also allows for precise application, making it easier to control where the glue is applied and minimizing the risk of getting it on your skin or unintended surfaces.
Lastly, a comfortable grip is essential when choosing a glue gun. A comfortable grip ensures that you can hold the gun securely, reducing the risk of dropping it or losing control during use. Some glue guns have an ergonomic design with a soft grip handle, making them easier to handle for extended periods without causing hand fatigue.
Different Types of Glues Require Different Temperatures
Let’s dive into the hot topic and explore why the temperature of the glue gun matters for different types of glue.
Low-Temperature Glue Guns: Gentle Heat for Delicate Materials
Low-temperature glue guns operate at around 250°F (121°C). These gentle giants are perfect for delicate materials such as fabric, foam, and paper. The lower temperature helps prevent damage to sensitive surfaces. Imagine using a high-temperature glue gun on your favorite silky fabric – disaster. The low-temperature glue gun comes to the rescue, bonding your materials without any harm.
When working with low-temperature glues, keep in mind that they may take longer to set and harden. You’ll need to hold the glued pieces together for a bit longer to ensure a strong bond. Additionally, low-temperature glues are less likely to cause burns or injuries, making them safer for younger crafters or those new to glue gun usage.
High-Temperature Glue Guns: The Strong Bonding Powerhouse
High-temperature glue guns operate at higher temperatures ranging from 380°F (193°C) to 400°F (204°C). These heat warriors are ideal for heavy-duty materials like wood, metal, and plastic. The higher temperature ensures a stronger bond that can withstand more stress and weight. Picture building a birdhouse with popsicle sticks – you need the high-temperature glue gun to hold it all together securely.
High-temperature glues have a faster setting time compared to their low-temperature counterparts. This means you won’t have to hold the glued pieces for as long before they become firmly bonded. However, caution is necessary when using high-temperature glue guns, as they can cause burns or injuries if not handled with care. Make sure to wear protective gloves and be mindful of the hot glue.
Weak Bonds or Damaged Materials: The Temperature Mismatch
Using the wrong temperature setting can lead to weak bonds or even damage to your materials. Imagine using a high-temperature glue gun on delicate materials like foam or paper – they could melt or warp. On the flip side, using a low-temperature glue gun on heavy-duty materials might result in a bond that easily breaks. It’s like wearing flip-flops in a snowstorm – not a good fit.
The temperature mismatch can also affect the overall effectiveness of the glue. For example, if a high-temperature glue is used at a lower temperature, it may not fully melt and spread evenly, resulting in an incomplete bond. Similarly, a low-temperature glue used at a higher temperature may become too runny and fail to provide a strong bond.
Visual Inspection of the Glue Gun
Visual inspection of a glue gun is a crucial step in ensuring its readiness for use. By carefully examining its physical appearance, you can gather valuable information about its condition and potential issues. Let’s dive into the fascinating world of glue guns and explore the key aspects of visually inspecting them.
First things first, let’s focus on the power indicator light. This little beacon of hope is your guide to knowing if your glue gun is ready to rock and roll. When the light is off, it’s time to investigate further. This could mean that your glue gun isn’t receiving power or isn’t heating up properly.
Now, let’s move on to the nozzle. Take a close look and make sure it’s squeaky clean. Any residue or dried glue could spell trouble for your adhesive flow. Nobody wants an uneven application or a clogged nozzle, right? Keep that flow smooth like a river.
Next up, give the body of your glue gun a good once-over. Look for any cracks, loose parts, or exposed wires. These red flags could indicate that your glue gun is not in tip-top shape and may even pose a safety risk. Safety first, my friends. We don’t want any shocking surprises.
Now, let’s check out the trigger mechanism. It should move smoothly and effortlessly, like a well-oiled machine. If you encounter any stiffness or resistance, it’s time to do some troubleshooting. An unhappy trigger could mean trouble in paradise for your glue gun. Let’s keep that trigger finger happy.
If your glue gun has adjustable temperature settings (fancy.), make sure they match the requirements of your project. You don’t want to be using high heat on delicate materials or low heat on heavy-duty projects. Temperature matters, people. Let’s find that perfect balance.
Lastly, let’s talk cleanliness. A clean glue gun is a happy glue gun. Remove any excess glue or debris from the body and nozzle before you get down to business. A well-maintained glue gun is more likely to function properly and give you those beautiful bondings you desire. Let’s keep it clean and tidy.
Also Read: How Much Weight Can Hot Glue Hold?
Conclusion
Determining when a glue gun is ready for use is crucial to ensure successful and efficient crafting projects. So, how can you tell if your glue gun is good to go?
Firstly, pay attention to the indicator light on the glue gun. Most models have a small light that turns on when the gun is heating up. When the glue gun reaches its optimal temperature, this light will typically turn off or change color.
Additionally, you can check the consistency of the glue itself. If the glue appears thick and gooey, it’s likely that the gun hasn’t reached its desired temperature yet. On the other hand, if the glue flows smoothly and has a runny consistency, it indicates that the glue gun is ready for action.
Another way to determine readiness is by touching the nozzle of the glue gun lightly. If it feels hot to touch, then it’s a sign that the gun has reached its operating temperature. However, be cautious not to burn yourself in this process.
Lastly, some advanced glue guns come with adjustable temperature settings. In such cases, refer to the manufacturer’s instructions or guidelines to set and monitor the desired temperature before starting your project.
In conclusion, knowing when a glue gun is ready involves observing indicators like lights turning off or changing color, checking for proper consistency of melted glue, testing heat through gentle touch (with caution), and following any specific instructions provided by the manufacturer.