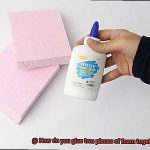
Crafting, sewing, or tackling DIY projects with fabrics often calls for a seamless fusion of two fabric pieces without the hassle of threading a needle. That’s where the enchantment of fabric gluing comes in. Whether you’re jazzing up your wardrobe, sprucing up your living space, or simply patching up a tear, gluing fabric can be a total game-changer.
In this blog post, we’re about to embark on an adventure into the captivating realm of fabric bonding. We’ll dive deep into various techniques, materials, and essential tips to keep in mind. From no-sew fabric magic to picking the perfect adhesive and insider secrets for picture-perfect results – we’ve got you covered. So buckle up and let’s unravel the exciting world of fabric gluing together.
Using Fabric Glue to Bond Fabrics
Contents
- 1 Using Fabric Glue to Bond Fabrics
- 2 Hot Glue – The Basics of Gluing Fabrics
- 3 Using Fusible Web for Permanent Bonds
- 4 Adhesive Tape – A Quick and Easy Alternative
- 5 Specialty Glues for Delicate and Sheer Fabrics
- 6 Considerations When Gluing Fabric to Each Other
- 7 Tips for Successful Bonding with Fabric Glue
- 8 Tips for Successful Bonding with Hot Glue
- 9 Conclusion
Bonding fabrics together using fabric glue is a versatile and effective method that provides a strong and durable bond. In this guide, we will walk you through the process of using fabric glue step by step, ensuring that your projects turn out professional and long-lasting.
Step 1: Prepare Your Fabrics
To ensure optimal adhesion and durability, it is crucial to prepare your fabrics before applying fabric glue. Make sure they are clean, dry, and free from any dirt or oils that may hinder the bonding process. This simple step sets the foundation for a successful fabric bond.
Step 2: Test Compatibility
Before proceeding with the fabric glue application, it’s always wise to test a small, inconspicuous area of your fabric. By doing so, you can ensure that the glue is compatible with your fabric and avoid any unpleasant surprises later on. This quick test can save you time and frustration.
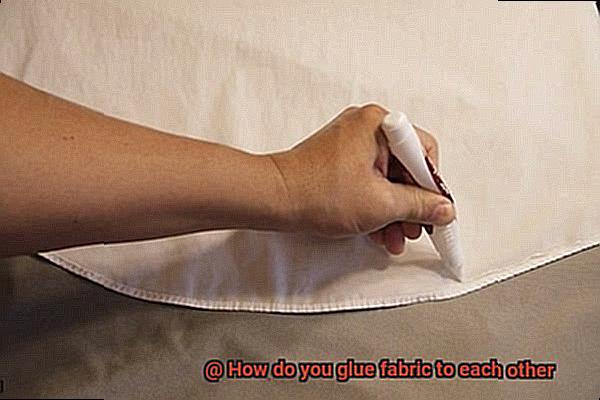
Step 3: Apply a Thin and Even Layer
Using a small brush or even a toothpick, apply a thin and even layer of fabric glue to one of the fabric surfaces. Remember, less is more in this case. Applying excessive amounts of glue can lead to seepage or clumping, compromising the overall aesthetics and integrity of your project.
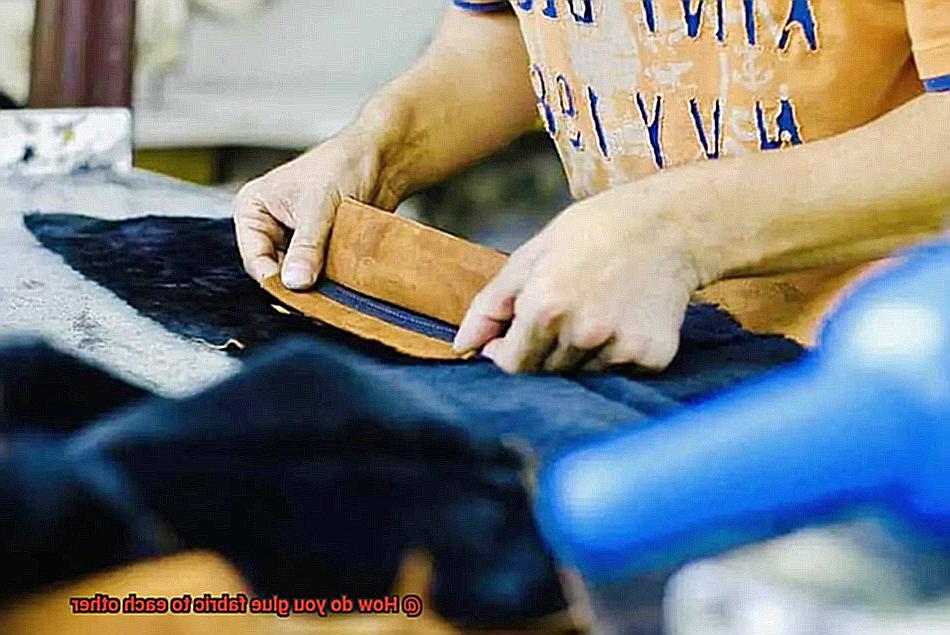
Step 4: Press Firmly
Once you’ve applied the glue, carefully align the edges or surfaces of the fabrics to be bonded together. Once in place, press them firmly together. Applying pressure ensures proper contact between the fabrics and allows the glue to create a strong bond. Don’t be afraid to put some muscle into it.
Step 5: Let It Set
Hold the fabrics in place for a few minutes to allow the bond to set. The specific drying time may vary depending on the fabric glue you are using, so refer to the manufacturer’s instructions for guidance. Some fabric glues may require additional time for optimal bonding, so exercise patience.
Step 6: Enhance Stability (Optional)
For added strength and stability, consider reinforcing the fabric bond using other methods such as sewing or ironing. These techniques can provide extra support and durability to your project, especially if you’re working with fabrics that will undergo frequent use or stress.
Step 7: Compatibility Considerations
It’s essential to keep in mind that fabric glue may not be suitable for all types of fabrics. Delicate or synthetic fabrics may not adhere well to fabric glue, so always conduct a compatibility test beforehand. This precaution ensures that you achieve the desired results without compromising the integrity of your fabric.
Hot Glue – The Basics of Gluing Fabrics
When it comes to bonding fabrics quickly and reliably, hot glue is the go-to adhesive solution. Perfect for temporary projects or creating strong bonds between fabrics, hot glue is a popular and effective method. In this comprehensive guide, we will walk you through the basics of using hot glue to glue fabrics together.
Before you dive into gluing, it’s essential to gather the necessary materials. You’ll need a hot glue gun, hot glue sticks, and the fabrics you want to glue together. But remember, not all hot glues are suitable for fabrics. Look for hot glue sticks specifically designed for fabric or those with high temperature resistance. This ensures a strong bond that can withstand wear and tear.
Before applying hot glue to your fabric, always perform a test on a small, inconspicuous area. This precautionary step ensures that the glue won’t damage or discolor your fabric.
Now, let’s get to the gluing process. Start by plugging in your hot glue gun and allowing it to heat up. Once the gun is hot, insert a hot glue stick and wait for it to melt completely. When the glue is melted, carefully squeeze the trigger of the gun to apply a thin, even line of glue along one edge of the fabric.
Immediately press the second piece of fabric onto the glued area, aligning it meticulously. Apply firm pressure for a few seconds to ensure a strong bond. Continue gluing along the edges of the fabric until all desired areas are bonded together.
Remember, work quickly because hot glue cools and hardens rapidly. If any excess glue seeps out from between the fabrics, gently remove it with a small tool or your fingers before it fully dries.
Allow the fabric to dry completely before handling or using it. This ensures a strong and secure bond. However, it’s important to note that hot glue may not be suitable for all fabrics. Delicate or heat-sensitive fabrics, like silk or synthetics, can be damaged by the high temperature of the glue. In such cases, it’s best to opt for a fabric glue specifically designed for these materials.
Additionally, hot glue may not be the ideal choice for fabrics that require frequent washing or exposure to moisture. In these situations, consider using a waterproof fabric adhesive or sewing as an alternative.
Using Fusible Web for Permanent Bonds
Fusible web is the perfect adhesive solution for bonding fabric pieces together. This thin, web-like sheet is designed to create a permanent bond by melting when heat is applied. In this guide, we’ll walk you through the process of using fusible web to achieve professional-looking results in your fabric projects.
First, it’s crucial to choose the right type of fusible web for your project. There are different varieties available, including paper-backed and adhesive-backed fusible web. Select the one that suits your needs and preferences.
Once you have your fusible web ready, it’s time to cut it into the desired shape or size. Make sure it’s slightly smaller than the fabric pieces you want to bond together. This will prevent any excess adhesive from seeping out and creating a messy look.
Next, place the fusible web between the two layers of fabric, with the adhesive side facing one of the fabrics. Align the edges of the fabric pieces properly to ensure a neat and seamless bond.
Now comes the exciting part – applying heat to activate the fusible web. Set your iron to the appropriate temperature for your fabric and gently press it onto the fabric for a few seconds. This will allow the adhesive in the fusible web to melt and create a strong bond between the layers of fabric.
After applying heat, give the fabric some time to cool completely before handling or moving it. This ensures that the bond is fully set and durable.
One of the best things about fusible web is its ability to provide a permanent bond that’s machine-washable and durable. However, it’s essential to follow any specific care instructions provided by the manufacturer to ensure longevity.
Keep in mind that fusible web may not be suitable for all fabrics. Delicate or heat-sensitive fabrics may not react well to the heat required for activation. In such cases, alternative bonding methods like sewing or fabric glue may be more appropriate.
Adhesive Tape – A Quick and Easy Alternative
When it comes to bonding fabric together, many people automatically think of using glue. However, adhesive tape is a quick and easy alternative that offers several advantages. Whether you’re working on a sewing project or need a temporary fix, adhesive tape can save you time and hassle. Let’s explore the benefits of using adhesive tape and discover why it has become such a popular choice for fabric bonding.
- Easy to Use: Adhesive tape is incredibly convenient and user-friendly. Unlike glue, which requires careful application and drying time, adhesive tape is ready to use right out of the box. Simply cut the desired length, peel off the backing, and apply it to one side of the fabric. Press the two fabric pieces together firmly for a few seconds, and voila. Your fabric is securely bonded.
- Strong Bond: One of the greatest advantages of adhesive tape is its ability to provide a strong bond. Double-sided tape, in particular, is known for its excellent adhesive properties. It creates a reliable connection between fabric pieces, ensuring they stay in place even with regular wear and tear.
- Variety of Options: There are different types of adhesive tapes available in the market, each designed for specific purposes. Fabric tape, for example, is specifically made for bonding fabric together. It is commonly used in sewing and crafting projects where a temporary bond is required. Duct tape, although not specifically designed for fabric bonding, can also be used in a pinch. However, it may not offer the same level of reliability or durability as other adhesive tapes.
- Temporary Solution: Adhesive tape is an ideal solution for temporary fabric bonding needs or lightweight fabrics. If you’re working on a project that requires frequent adjustments or alterations, adhesive tape allows you to easily remove and reposition fabric pieces without leaving a sticky residue.
- Easy Removal: Unlike glue, which can be difficult to remove from fabric, adhesive tape can be easily peeled off. However, it’s important to note that some adhesive residue may be left behind. To clean the fabric, use a mild solvent or rubbing alcohol to remove any leftover adhesive.
Specialty Glues for Delicate and Sheer Fabrics
Look no further. Specialty glues for delicate and sheer fabrics are here to save the day. These glues are specifically designed to adhere without causing damage or discoloration. Let’s dive into the different types and their importance.
First up, we have fabric glue. This versatile option bonds fabric to fabric or even fabric to wood or plastic. It dries clear and flexible, eliminating visible glue lines.
Next on the list is fabric adhesive tape. This nifty alternative comes in strips or rolls with adhesive on one side. Peel off the backing and stick the fabric together for quick fixes or temporary bonds.
Lastly, we have fusible web, also known as iron-on adhesive. Place it between two layers of fabric and apply heat with an iron to create a strong bond. It’s perfect for delicate fabrics.
Now, an important tip – follow the manufacturer’s instructions when using these glues. Apply thin layers, allow sufficient drying time, and avoid excessive heat that could damage the fabric. Test on a scrap piece before committing.
To reinforce bonds and prevent fraying, consider using fabric sealants along the edges. These sealants provide extra protection.
Handle delicate fabrics with care and avoid excessive pulling or stretching. This maintains integrity and ensures successful bonding with specialty glues.
Considerations When Gluing Fabric to Each Other
Gluing fabric together opens up a world of possibilities for unique and beautiful projects. But before you dive in, there are important considerations to keep in mind. In this article, we will explore the key factors to consider when choosing the right glue for your fabric project.
Type of Fabric:
Different fabrics have different characteristics, requiring different types of glue or adhesive. Lightweight fabrics like silk or chiffon may need delicate fabric glue, while heavier fabrics like denim or upholstery may require a stronger adhesive. Consider weight, texture, and weave when selecting the appropriate glue.
Intended Use:
Think about how you plan to use the fabric after gluing it together. For temporary projects or costumes, a temporary fabric adhesive may be sufficient. For long-lasting hold, opt for a permanent adhesive that can withstand regular wear and washing.
Color and Transparency:
Consider the color and transparency of the glue. Some glues dry clear, while others leave behind visible residue. Choose clear-drying glue when working with light-colored or sheer fabrics to avoid visible marks.
Drying Time:
Drying time is crucial for intricate or time-sensitive projects. Quick-drying adhesives allow you to continue working without waiting for hours, while others may require longer drying times. Plan accordingly and ensure the fabric remains in place until the glue is completely dry.
Surface Preparation:
Properly prepare the fabric surface before applying any glue. Thoroughly clean the fabric to remove dirt, dust, or oils that could interfere with bonding ability. Washing and drying beforehand may be necessary.
Compatibility Testing:
Always test the glue on a small, inconspicuous area of the fabric before applying it to the entire piece. This determines compatibility and desired results, preventing potential mishaps or damage.
Suitability of Fabric:
Not all fabrics are suitable for gluing due to their delicate nature or texture. Fabrics like lace or mesh may not adhere well and require alternative methods such as sewing or using fusible interfacing.
Follow Manufacturer’s Instructions:
Always follow the instructions provided by the glue manufacturer. Different glues may have specific application techniques or drying requirements. Understanding these instructions ensures the best results and longevity of your fabric project.
Tips for Successful Bonding with Fabric Glue
If sewing isn’t your forte, fabric glue can be your new best friend. It’s a magical adhesive that can bond fabric pieces together without the need for needle and thread. In this article, we’ll share some fantastic tips for successful bonding with fabric glue. So grab your glue and let’s dive in.
Prepare Your Fabric:
To ensure a successful bond, it’s crucial to start with clean fabric. Dirt, stains, or oils can hinder the adhesive’s effectiveness. Give your fabric a good wash according to its care instructions and let it dry completely before applying the glue. Clean fabric sets the foundation for a strong bond.
Test Before Bonding:
Just like trying on clothes, it’s essential to test fabric glue on a small, hidden area of your fabric before committing to a larger project. This way, you can check if the glue reacts negatively with the fabric or causes any unwanted discoloration or damage. Testing ensures that you’re using the right glue for your fabric and project.
Apply Glue Sparingly:
When it comes to fabric glue, less is more. Apply a thin and even layer of glue on both sides of the fabric that needs to be bonded. Using too much glue can create a sticky mess and may take longer to dry. A small brush or a cotton swab can help with precise application, especially for delicate fabrics.
Press and Hold:
Once you’ve applied the glue, press the fabric pieces firmly together. Applying pressure helps the glue bond effectively with the fabric fibers. Hold the pieces in place for a few seconds to allow the glue to set. If needed, use clips or pins to secure the fabric while it dries.
Let It Dry:
Patience is key when working with fabric glue. Avoid pulling or stretching the fabric while the glue is drying, as this can weaken the bond. Place the glued fabric pieces on a flat surface and let them sit undisturbed for at least 24 hours to ensure a strong and durable bond. Be sure to follow the manufacturer’s instructions regarding drying times.
Tips for Successful Bonding with Hot Glue
Bonding fabric with hot glue can be a creative and efficient way to bring your fabric projects to life. Hot glue is known for its strength and quick drying time, but there are certain techniques that can ensure successful bonding. In this article, we will explore five important tips for using hot glue with fabric.
Choose the right glue:
When working with fabric, it is crucial to select a hot glue that is specifically designed for fabric bonding or labeled as safe to use on fabric. These glues are formulated to provide a strong bond without causing damage or discoloration to the fabric. By using the appropriate glue, you can ensure that your fabric pieces will adhere securely without compromising their integrity.
Test it out:
Before applying hot glue to your fabric project, it is always a good idea to test the adhesive on a small, inconspicuous area of the fabric. This test will help you determine if the glue is compatible with the fabric and if any adverse reactions occur. Additionally, it allows you to assess the glue’s drying time and strength, ensuring that it meets your project’s requirements.
Apply it thin and even:
To achieve optimal results, apply hot glue to your fabric in thin lines or dots. Avoid using excessive amounts of glue as this can create a messy appearance and potentially weaken the bond. Start with a small amount of glue and add more if necessary, ensuring that the adhesive is evenly distributed along the bonding area.
Work quickly:
Hot glue dries rapidly, so it is essential to work swiftly once you apply it to your fabric. Position the fabric pieces together immediately after applying the glue to ensure a strong and secure bond. Waiting too long can result in a weaker bond as the glue starts to cool and harden.
Press and hold:
After aligning the fabric pieces, apply firm pressure for a few seconds. This pressing action helps the hot glue penetrate the fabric fibers, creating a stronger bond. Use your fingers or a smooth, flat object to evenly distribute the pressure across the bonded area. Remember to exercise caution and protect your hands with gloves or other suitable safety measures.
2uJcqSsSPCQ” >
Also Read: Can I use normal glue to stick fabric?
Conclusion
Gluing fabric to each other may seem like a daunting task, but with the right techniques and materials, it can be done easily. One of the most common methods is using fabric glue.
This adhesive is specifically designed for bonding fabric and dries clear, ensuring a seamless finish. To use fabric glue, start by applying a thin layer to one of the fabric surfaces you want to join.
Press the two pieces together firmly and let them dry for the recommended time. Another option is using fusible webbing or iron-on adhesive tape. These products are activated by heat and create a strong bond when pressed between layers of fabric with an iron.
Simply cut the webbing or tape to the desired size, place it between the fabrics, and apply heat with an iron according to the manufacturer’s instructions.
If you prefer a more traditional approach, sewing can also be used to glue fabrics together. Using a needle and thread, stitch along the edges of the fabrics or create decorative patterns that not only secure them but also add a stylish touch. The advantage of sewing is that it provides extra durability and flexibility compared to gluing alone.
When gluing fabrics together, it’s essential to choose the right adhesive for your project. Some adhesives work better on certain types of fabric than others, so make sure to read product labels and test on scrap pieces before committing to gluing your final project.
In conclusion, gluing fabric to each other can be achieved through various methods such as using fabric glue, fusible webbing or tape, or even sewing. Each technique offers its own benefits in terms of ease of use, strength of bond, and aesthetic appeal.