Looking to add a splash of coastal charm or a touch of nature to your projects? Well, gluing oyster shells to wood is the way to go. It’s like bringing the beach right into your workshop. Whether you’re jazzing up furniture or creating one-of-a-kind home décor, this technique opens up a world of creative possibilities.
In this guide, we’ll walk you through each step of the process for gluing oyster shells to wood. From picking the perfect adhesive to prepping those shells and wood surfaces, we’ve got you covered. Get ready to dive into this mesmerizing journey of turning plain ol’ wood into extraordinary works of art.
How do you glue oyster shells to wood?
Contents
- 1 How do you glue oyster shells to wood?
- 2 Preparing the Oyster Shells and Wood for Gluing
- 3 Types of Adhesives Suitable for Gluing Oyster Shells to Wood
- 4 How to Apply Epoxy Resin for Gluing Oyster Shells to Wood
- 5 How to Apply Polyurethane Glue for Gluing Oyster Shells to Wood
- 6 How to Apply Cyanoacrylate Glue (Super Glue) for Gluing Oyster Shells to Wood
- 7 Tips on Applying Adhesive Evenly and Securing the Bond
- 8 Enhancing the Bond by Applying a Sealant Over the Shells
- 9 Conclusion
Step 1: Gather Your Gear
First things first, let’s make sure you have everything you need. Grab some cleaned and dried oyster shells, an adhesive that can handle the job (like epoxy resin or waterproof wood glue), a disposable mixing container, a stirring stick, gloves, sandpaper (300-grit), and a trusty paintbrush.
Step 2: Prep Those Shells and Wood
Smooth out any rough edges on your oyster shells using sandpaper. This step is key for getting that snug fit against the wood surface. Don’t forget about the wood either. Give it a good sanding in the areas where you plan to attach those beautiful shells.
Step 3: Mix It Up
Follow the instructions from your adhesive’s manufacturer for proper mixing. Usually, it involves combining equal parts resin and hardener in that handy disposable mixing container.
Step 4: Apply with Care
Grab that paintbrush and start applying a thin, even layer of adhesive onto either the prepared wood surface or directly onto the backside of each shell. Remember, less is more here – no need for excessive globs of glue.
Step 5: Positioning is Key
Place the shell onto the wood surface, aligning it just right. Give it a gentle press and hold it in place for a few moments to let that adhesive work its magic. Repeat this process for each shell, making sure they’re evenly spaced and perfectly aligned.
Step 6: Time to Cure
Now, here’s where patience becomes your best friend. Follow the manufacturer’s instructions for curing time. It could take a few hours or even overnight, but trust us, it’ll be worth the wait. Just
Preparing the Oyster Shells and Wood for Gluing
Gluing oyster shells to wood is a captivating way to incorporate nature into your crafts or home decor. However, achieving a strong and durable bond requires proper preparation of both the shells and wood surfaces. This guide will provide you with step-by-step instructions on how to prepare oyster shells and wood for gluing.
Step 1: Cleaning the Oyster Shells
- Collect fresh oyster shells, ensuring they are free from dirt, debris, or organic matter.
- Rinse the shells thoroughly with clean water to eliminate loose particles and residue.
- For stubborn stains or barnacles, gently scrub the shells using a soft brush or toothbrush.
- Allow the shells to completely dry before proceeding with gluing.
Step 2: Sanding the Wood Surfaces
- Create a smooth bonding surface by sanding the wood areas that will come into contact with the oyster shells.
- Begin with coarse-grit sandpaper (around 80-100 grit) to remove rough spots and old finishes.
- Progress to medium-grit sandpaper (around 120-150 grit) for further smoothening.
- Finish with fine-grit sandpaper (around 220-240 grit) for a polished appearance.
- Use a clean cloth or brush to wipe away any dust.
Step 3: Priming the Wood
- Enhance adhesion and bonding by applying a primer on the sanded wood surfaces.
- Choose a primer suitable for your project and follow the manufacturer’s instructions for application.
- Apply a thin, even coat of primer onto the wood surfaces using a brush or roller.
- Allow the primer to dry completely before proceeding.
Step 4: Selecting the Right Glue
- Ensure a successful bond by selecting the correct adhesive for oyster shells and wood.
- Common options include epoxy resin, marine-grade adhesive, or cyanoacrylate (super glue).
- Carefully read the manufacturer’s instructions for application techniques and curing times.
Step 5: Applying the Glue
- Apply the glue once the shells and wood surfaces are prepared.
- Use a small brush or applicator to spread a thin, even layer of glue onto the wood surface where the shells will be attached.
- Similarly, apply a thin layer of glue on the backside of each oyster shell.
- Work quickly and efficiently, considering fast-drying glues.
Types of Adhesives Suitable for Gluing Oyster Shells to Wood
Gluing oyster shells to wood is an exciting and creative way to bring the beach to your projects. However, with a plethora of adhesive options available, it can be challenging to determine which one is best for securing those shelly treasures in place. But fear not. In this shell-tastic guide, we will explore the different types of adhesives suitable for gluing oyster shells to wood.
Epoxy Resin – The Mighty Bond:
When it comes to bonding oyster shells to wood, epoxy resin reigns supreme. This adhesive acts as a superhero, forming an incredibly strong and durable bond that can withstand moisture and temperature changes. Simply mix the resin and hardener, following the provided instructions, and watch as your shells become securely attached to the wood.
Polyurethane Adhesive – The All-Rounder:
Another exceptional choice for gluing oyster shells to wood is polyurethane adhesive. This versatile adhesive bonds effectively with both porous and non-porous surfaces and is highly resistant to water and temperature changes. Apply it using a brush or spreader, allowing it to work its magic.
Construction Adhesive – The Heavyweight Champ:
For larger projects or when extra strength is required, construction adhesive is the heavyweight champ you need. Designed specifically for bonding heavy objects, this adhesive can withstand the weight of oyster shells on wood. Select a formula that is compatible with both the shells and the wood, and prepare yourself for some serious sticking power.
Silicone Adhesive – The Flexibility Expert:
If flexibility and moisture resistance are your top priorities, silicone adhesive will be your new best friend. This adhesive creates a flexible bond that can withstand movement and temperature changes. Additionally, it dries clear, ensuring that your oyster shell creations look absolutely stunning.
Hot Glue – The Quick Fix:
When it comes to temporary projects or decorative purposes, hot glue can be a handy option. It is easy to use and dries quickly. However, keep in mind that hot glue may not offer the same level of strength and durability as other adhesives. For long-lasting bonds, consider the previous options.
How to Apply Epoxy Resin for Gluing Oyster Shells to Wood
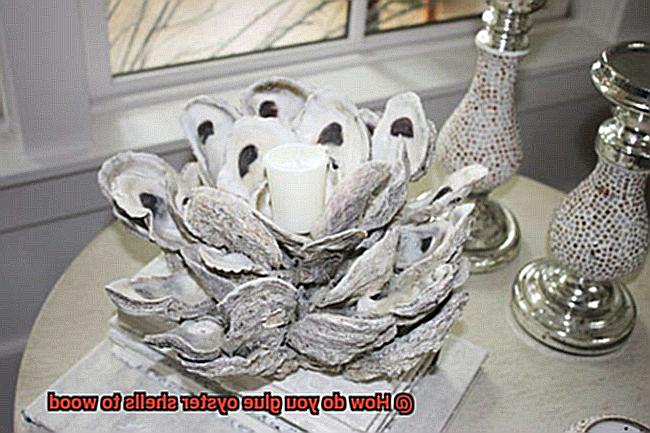
Oyster shell art is the perfect way to achieve that. With their natural beauty and texture, oyster shells can be transformed into stunning pieces of art when glued to wood using epoxy resin. In this guide, we will take you through the step-by-step process of applying epoxy resin for gluing oyster shells to wood, allowing you to create beautiful and impressive works of art.
Gather Your Materials:
Before diving into your oyster shell art project, ensure you have all the necessary materials within reach. You’ll need high-quality epoxy resin, clean and dry oyster shells, a wooden surface, a mixing container, stirring sticks, disposable gloves, and a brush or spatula for application.
Prepare the Work Area:
To avoid any messy mishaps, set up your work area properly. Find a well-ventilated space and cover your work surface with plastic or newspaper to protect it from spills or drips.
Mix the Epoxy Resin:
Follow the manufacturer’s instructions to mix the epoxy resin and hardener in precise proportions. Stir vigorously until the two components are fully blended. Wearing disposable gloves is essential during this process to protect your hands.
Apply a Base Layer:
Using a brush or spatula, gently apply a thin layer of epoxy resin onto the prepared wooden surface. This base layer forms a strong bond between the oyster shells and wood.
Arrange the Oyster Shells:
It’s time for creativity. Carefully arrange the oyster shells on top of the wet epoxy resin layer, pressing them lightly into place. Let your imagination guide you as you create a design, ensuring even spacing and proper contact with the wood.
Pour More Epoxy Resin:
Once the shells are arranged to your liking, pour additional epoxy resin over them, ensuring all the shells are fully covered. Use a stirring stick to spread the resin evenly and fill any gaps between the shells, enhancing their adhesion.
Remove Air Bubbles:
To achieve a flawless finish, eliminate any air bubbles that may have formed during the application. Gently blow on the surface or use a low-heat heat gun or torch to move across the resin, releasing trapped air bubbles.
Allow Curing Time:
Patience is key. Follow the manufacturer’s instructions for the recommended curing time of the epoxy resin. Generally, it takes around 24-48 hours for the resin to fully cure. During this time, avoid touching or disturbing your project.
How to Apply Polyurethane Glue for Gluing Oyster Shells to Wood
Look no further. In this comprehensive guide, we will walk you through the process of applying polyurethane glue to bond oyster shells to wood. With its strong adhesive properties, polyurethane glue ensures that your creations will stand the test of time. So let’s dive in and discover the secrets to making something truly special.
Step 1: Prepare the Surfaces
Before diving into the gluing process, it’s crucial to prepare both the oyster shells and the wood surfaces. To ensure a clean bond, wipe down both surfaces with a damp cloth or use a mild detergent if necessary. For a smoother application, lightly sand the wood surface to create a rough texture. This texture will provide better adhesion for the glue.
Step 2: Apply the Glue
Now comes the exciting part – applying the polyurethane glue. Remember, a little goes a long way. Squeeze a small amount onto a disposable surface like cardboard or a plastic plate. With vivid precision, use a brush or a toothpick to pick up some glue and spread it evenly on the back of each oyster shell. Make sure every inch is coated with this magical adhesive.
Step 3: Position and Press
With your artistic vision in mind, carefully position each oyster shell onto the wood surface in your desired pattern or arrangement. This is where your creativity truly shines. Once in place, press firmly. Feel the satisfying connection as each shell makes full contact with the adhesive. To guarantee no movement during drying, employ clamps or weights as allies. These steadfast companions will ensure that your masterpiece remains intact.
Step 4: Allow Time to Dry
Ah, patience is truly a virtue when working with polyurethane glue. The drying time may vary depending on factors such as temperature and humidity. To unveil the optimal drying time, consult the manufacturer’s instructions.
Now, my friend, resist the temptation to disturb your glued oyster shells for at least 24 hours. This sacred time allows the glue to cure fully and form an unbreakable bond with the wood.
Step 5: Check for a Strong Bond
Finally, the moment of truth has arrived. After giving the glue ample time to work its magic, gently tap or press on the oyster shells. Feel the security and strength of a perfect bond. If they remain steadfast and show no signs of separation, congratulations.
Your adhesive prowess has triumphed, and your oyster shells are now forever united with the wood.
How to Apply Cyanoacrylate Glue (Super Glue) for Gluing Oyster Shells to Wood
Get ready to embark on a creative adventure as we explore the art of gluing oyster shells to wood using cyanoacrylate glue, also known as super glue. This craft project allows you to infuse nature’s beauty into your home decor with stunning oyster shell arrangements. In this comprehensive guide, we will walk you through the step-by-step process of achieving a strong bond between oyster shells and wood surfaces. Let’s dive in and create something beautiful.
Step 1: Cleanliness is Key
Before beginning the gluing process, it is crucial to prepare both the oyster shells and the wood surface. Ensure that they are free from any dirt, grease, or moisture that could hinder the adhesive bond. Use a brush or cloth to remove debris from the shells and wipe down the wood surface.
Step 2: Plan Your Design
Take a moment to unleash your creativity by laying out the oyster shells on the wood surface. Visualize different arrangements and experiment with various placements to find a design that suits your style and preferences.
Step 3: Apply the Super Glue
Now it’s time to apply the glue. Use a small amount of cyanoacrylate glue and apply it to one side of each oyster shell. Remember, less is more in this case. Using too much glue can cause excess to squeeze out when pressing the shells onto the wood.
Step 4: Press and Hold
Gently but firmly press each oyster shell onto the desired spot on the wood surface. Apply gentle pressure for a few seconds, allowing the glue to establish a strong bond between the shell and the wood. Take your time with this step to ensure each shell is securely attached.
Step 5: Space it Out
Continue gluing the oyster shells onto the wood, leaving some space between each shell. This spacing not only adds an aesthetic touch but also prevents overcrowding, allowing each shell to stand out and shine.
Step 6: Wipe Away Excess Glue
If any excess glue seeps out from between the shells or onto the wood surface, don’t panic. Grab a clean cloth or paper towel and wipe it off immediately. Cyanoacrylate glue dries quickly, so it’s important to clean up any spills promptly to avoid unwanted marks or residue.
Step 7: Let It Dry
Allow the glued oyster shells to fully dry and cure according to the manufacturer’s instructions. Typically, this process takes around 24 hours, but drying times may vary depending on the brand of cyanoacrylate glue used. Exercise patience during this time as it is crucial for a strong and lasting bond.
Tips on Applying Adhesive Evenly and Securing the Bond
Look no further. We have gathered some valuable tips to ensure your bond is strong and secure, resulting in a beautiful and long-lasting masterpiece.
Start with a Clean Slate:
To achieve a solid bond, it’s crucial to remove any dirt, dust, or grease from both the wood and oyster shells. Imagine trying to stick something on a dirty surface – it just won’t hold. Use a mild detergent and water to gently clean the wood surface, and give the oyster shells a good scrub. Let everything dry completely before moving on.
Choose the Perfect Adhesive:
Not all adhesives are created equal when it comes to bonding porous materials like wood and shells. Opt for a waterproof adhesive that is designed specifically for these surfaces, such as epoxy or marine-grade adhesive. These options provide excellent durability and resistance to moisture, ensuring your bond will last.
Apply with Precision:
The key to an even and effective bond is applying the adhesive evenly. Avoid going overboard with the glue – a thin and uniform layer is all you need. Use a small brush or spatula to spread the adhesive on both the wood and shell surfaces. This will create better contact and enhance bonding strength.
Patience is Key:
After applying the adhesive, patience is crucial. Allow ample time for the adhesive to cure fully according to the manufacturer’s instructions. Avoid any temptation to touch or apply pressure on the glued surfaces before they are ready. Remember, good things come to those who wait.
Add Some Weight:
To ensure your bond is rock-solid, consider adding some pressure or weight to the glued surfaces while they dry. Place heavy objects or clamps on top of the shells to exert even pressure across the entire surface area. This will help the adhesive create a strong connection between the wood and oyster shells.
Mechanical Fasteners for Extra Reinforcement:
For an added layer of security, you can also consider using mechanical fasteners like screws or nails. These can provide extra reinforcement to the bond, especially for larger or heavier oyster shells. Just make sure to drill small pilot holes in the wood before attaching the shells and be careful not to damage or crack them.
Enhancing the Bond by Applying a Sealant Over the Shells
If so, you’ve probably come across the idea of gluing oyster shells to wood. It’s a fantastic way to add a touch of coastal charm to your home decor or create stunning pieces of art. But how do you ensure that those shells stay firmly in place? The answer lies in applying a sealant over the shells. In this article, we’ll guide you through the process step-by-step, ensuring a bond that will stand the test of time.
Step 1: Choose the Perfect Sealant:
To achieve a strong bond between oyster shells and wood, selecting the right sealant is crucial. Look for one specifically designed for wet environments, such as epoxy resin or marine-grade sealants. These sealants offer exceptional adhesion and protection against moisture, heat, and physical stress.
Step 2: Cleanliness is Key:
Before applying the sealant, cleanliness is paramount. Give your oyster shells a thorough cleaning by gently scrubbing away any debris or loose particles with a brush. Rinse them with water and let them dry completely. A pristine surface is essential for a robust bond.
Step 3: Apply the Sealant:
With clean and dry shells, it’s time to apply the sealant. Use a brush or small sponge to spread a thin, even layer over each shell. Ensure complete coverage of all areas that will come into contact with the wood. Aim for a seamless coat without gaps or excess sealant.
Step 4: Secure the Shells:
Place each shell carefully onto the desired location on the wood surface. Press down firmly to promote proper adhesion between the shell and the wood. Consider using clamps or weights for added security while the sealant cures. Patience is key; avoid moving or disturbing the shells until the sealant has fully cured.
Step 5: Time to Cure:
Follow the manufacturer’s instructions for curing time. Typically, it is necessary to leave the glued shells undisturbed for at least 24 to 48 hours. During this period, protect the shells from excessive moisture or temperature changes that could compromise the bond.
Step 6: Inspect and Touch Up:
Once the sealant has fully cured, inspect the bond between the shells and the wood. It should be secure and free from any signs of separation or weakening. If needed, apply additional sealant or touch-ups to ensure a flawless finish.
bs7vvVgC8WA” >
Conclusion
When it comes to gluing oyster shells to wood, there are a few key steps you need to follow.
First, make sure the shells are clean and dry. Any dirt or moisture can affect the adhesive’s effectiveness.
Next, choose an appropriate adhesive for the job. Epoxy resin is a popular choice due to its strong bond and durability.
Apply the adhesive to both the shell and the wood surface, ensuring even coverage. Press the shell firmly onto the wood and hold it in place for several minutes to allow the adhesive to set.
Finally, let the glue cure completely before handling or moving the glued shells.