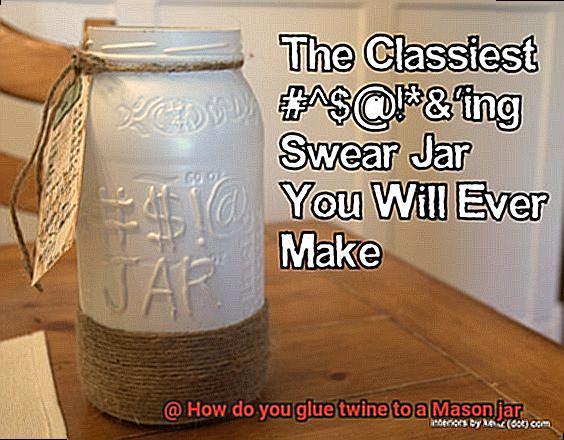
Want to give your home decor a cozy, farmhouse-inspired vibe? Look no further than gluing twine to a Mason jar. This simple and exciting craft project allows you to transform an ordinary jar into an eye-catching centerpiece or candle holder. Get ready to unleash your creativity and create a beautiful, personalized gift for your loved ones.
In this blog post, we’ll walk you through the step-by-step process of gluing twine to a Mason jar. You’ll learn how to achieve a secure bond that will stand the test of time, even if you’re new to crafting. So grab your materials and let’s get started.
Materials you’ll need:
- Mason jar – make sure it’s clean and dry for a smooth gluing surface.
- Twine – choose a sturdy twine that matches your desired style and color scheme.
- Glue – go for a strong adhesive that dries clear. E6000 or hot glue with suitable glue sticks are great options.
- Scissors – for cutting the twine to your desired length.
But before we dive in, here are some tips for success:
- Clean your Mason jar thoroughly to remove any dust or grease that could affect the adhesive’s effectiveness.
- If you want colorful twine, try dyeing it with fabric dyes or food coloring. Just make sure it’s completely dry before starting.
- Work in a well-ventilated area when using strong adhesives.
- If you’re planning on creating a pattern with the twine, lightly sketch it on the jar before gluing as a guide.
Now that we’ve got everything sorted, let’s turn that plain Mason jar into an enchanting decorative piece.
What Materials Are Needed to Glue Twine to a Mason Jar?
Contents
- 1 What Materials Are Needed to Glue Twine to a Mason Jar?
- 2 Cleaning the Mason Jar
- 3 Applying the Glue
- 4 Wrapping the Twine Around the Jar
- 5 Creating Patterns or Designs with the Twine
- 6 Securing the End of the Twine
- 7 Adding Embellishments to Enhance Your Design
- 8 Considerations for Long-Term Durability and Use
- 9 Conclusion
Look no further. Transforming a plain Mason jar into a stunning decorative piece with twine is an easy and delightful DIY project. In this article, we will guide you through the necessary materials and step-by-step process to create your very own twine-wrapped Mason jar.
Materials Needed:
- Mason jar: Select a clean and dry jar from a craft store or online to serve as the foundation for your project.
- Twine: Opt for jute or hemp twine, as they exude a rustic allure that perfectly complements the Mason jar aesthetic.
- Glue: Utilize a robust adhesive like craft glue or E6000 to ensure a secure bond between the twine and the glass.
- Scissors: A sharp pair of scissors is indispensable for cutting and trimming the twine to achieve the desired length and neatness.
- Optional embellishments: Unleash your creativity by incorporating ribbons, charms, or other decorative items to personalize your twine-wrapped masterpiece.
Step-by-Step Process:
Thoroughly clean the Mason jar using rubbing alcohol or glass cleaner to establish a pristine surface for adhesion.
Apply a small amount of glue to one end of the twine, working in manageable sections to prevent premature drying.
Press the glued end firmly onto the jar and continue wrapping the twine tightly around it, periodically adding glue as needed.
Experiment with diverse wrapping techniques to fashion captivating patterns or designs that reflect your unique style.
Upon reaching your desired height or coverage, carefully cut the twine and secure its end with additional glue.
Allow the glue to dry completely according to the manufacturer’s instructions, ensuring a robust and enduring bond.
For an added touch, affix optional embellishments such as ribbons or charms using the same adhesive.
Cleaning the Mason Jar
Cleaning a Mason jar is an essential task to achieve a flawless finished project. To help you master this process like a pro, we have compiled a comprehensive guide that covers all the necessary steps.
- Remove those pesky labels and stickers: Begin by soaking the jar in warm soapy water for a few minutes. This gentle soak will loosen the adhesive, making it easier to remove the labels. Once soaked, use a sponge or scrub brush to gently scrub off any residue. Bid farewell to those unsightly labels.
- Don’t neglect the inside: While the outside may steal the spotlight, don’t forget about the inside of the jar. Rinse it with warm water and dish soap to remove any residue or leftover food. For those hard-to-reach areas, a trusty bottle brush will come to your aid.
- Say goodbye to stains and odors: Stubborn stains and pesky odors don’t stand a chance against a simple paste made from baking soda and water. Apply this magical mixture to the affected areas, let it sit for a few minutes, and then scrub it off. Your jar will emerge fresh as a daisy, free from any lingering stains or unpleasant smells.
- Conquer hard water stains with vinegar: If you’re battling mineral deposits or hard water stains, fear not. A solution of equal parts vinegar and water is your secret weapon. Soak the jar in this potent mixture for approximately 30 minutes, then rinse thoroughly. Behold as your jar transforms into a sparkling clean masterpiece.
- Dry it like a pro: After all your hard work, ensure your Mason jar is completely dry to ensure proper adhesion of twine or any other embellishments. You can either air dry it upside down on a clean towel or grab a soft cloth to gently wipe away any lingering moisture.
Applying the Glue
In this section, we will explore the art of applying glue to your Mason jar before attaching twine. Whether you’re creating a rustic centerpiece or a charming DIY gift, mastering this process is essential for achieving a secure and professional-looking result. Let’s dive in and discover the secrets to expertly applying glue to your Mason jar.
Choosing the Right Glue:
To begin, it’s crucial to choose the right glue for this project. Opt for a strong adhesive that can bond different materials like glass and twine. Popular options include E6000, hot glue, or super glue. Each glue has its own application method and drying time, so carefully read the instructions.
Prepping the Surface:
Achieving flawless adhesion starts with cleaning the Mason jar’s surface thoroughly. Remove any dirt, dust, or grease that may hinder the glue’s effectiveness. Wipe down the jar with a mild detergent or glass cleaner, ensuring it is completely dry before proceeding.
Applying the Glue:
Now comes the fun part. Begin by applying a small amount of glue onto the desired area where you want to attach the twine. Start with a small section at a time to maintain control and proper placement.
Spread the glue evenly using a brush, toothpick, or even your finger (if using a non-toxic adhesive). Be sure to cover the entire area where the twine will be placed.
Attaching the Twine:
With the glue applied, it’s time to attach the twine. Press one end of the twine firmly onto the glued surface and work your way around, ensuring it is tightly secured and adhered to the jar.
For hot glue, work swiftly as it dries fast. Apply a line of hot glue onto the jar and immediately press the twine onto it, taking care not to burn yourself.
If using E6000 or super glue, allow it to set before moving on to another section. Follow the recommended drying time in the product instructions for a sturdy bond.
Repeat the Process:
Continue applying glue and attaching twine until you have covered the desired area on the jar. Take your time to ensure each section is securely glued and aligned, resulting in a polished finish.
The Finishing Touch:
Exercise patience and let the twine-wrapped jar dry completely before handling or further decorating. This guarantees that the adhesive has fully cured and the twine is firmly attached.
Handle with Care:
Finally, remember to handle your twine-wrapped Mason jar with care after it has dried. Avoid excessive pulling or tugging on the twine, as this may weaken the adhesive over time.
Wrapping the Twine Around the Jar
Look no further than the art of wrapping twine around a Mason jar. This seemingly simple technique has the power to transform an ordinary glass jar into a stunning centerpiece or a unique gift. In this comprehensive guide, we will take you through the step-by-step process of wrapping twine around a Mason jar, ensuring a secure and polished finish every time. So, gather your materials and prepare to embark on a journey of creativity and rustic beauty.
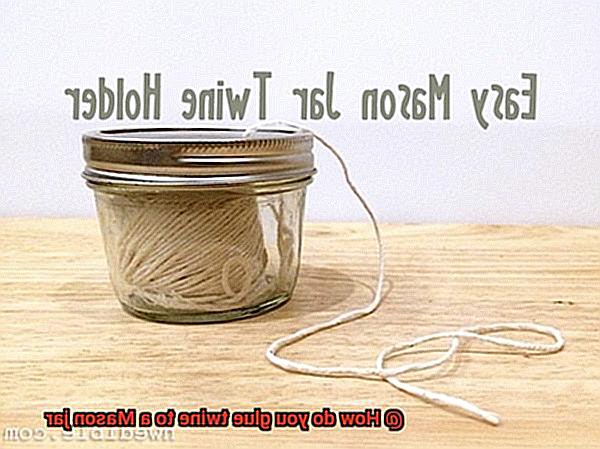
Step 1: Gather Your Materials
Before commencing this creative endeavor, ensure you have all the necessary materials within arm’s reach. You will need a clean Mason jar, twine or jute rope, scissors, and a strong adhesive such as a hot glue gun or sturdy craft glue.
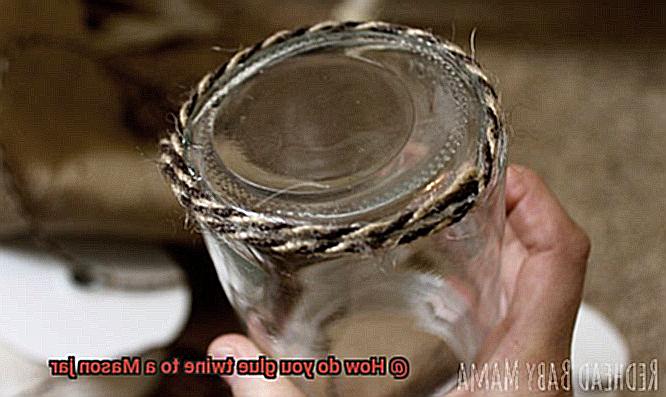
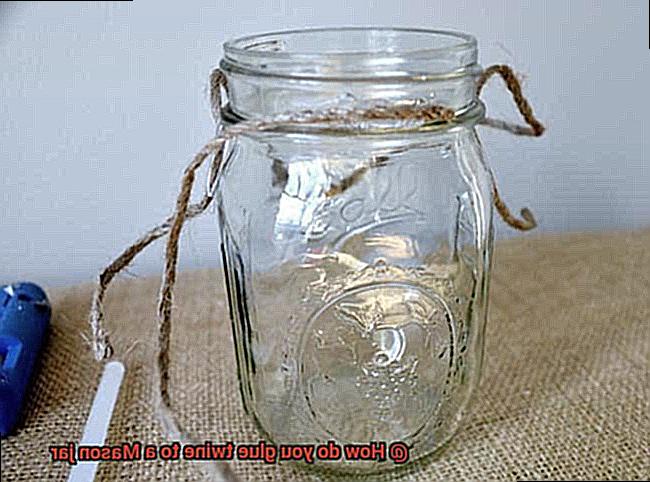
Step 2: Secure the Twine
Begin by applying a small amount of glue to the bottom of the jar, near its base. Press the end of the twine firmly onto the adhesive to anchor it in place. Hold it for a few seconds, allowing the glue to dry and set.
Step 3: Embark on Your Wrapping Journey
Now, it’s time to embark on your twine-wrapping journey. Clutch the twine tightly and commence wrapping it around the jar in an elegant spiral motion. Ensure each loop is snugly wound and huddle closely together, leaving no room for gaps. Every few loops, apply a small dollop of glue to the jar’s surface to keep the twine securely in place.
Step 4: Mindful Wrapping for Flawless Results
As you continue wrapping, be vigilant of any curves or indents on the jar’s surface. Adjust the tension of the twine accordingly to maintain a seamless and refined appearance. If necessary, apply additional glue to secure any loose ends or areas where the twine may be prone to slipping.
Step 5: Attending to the Finishing Touches
Continue wrapping until you reach the zenith of the jar. Once you’ve achieved your desired height, snip the twine, leaving a small tail. Apply a generous amount of glue to this end piece and press it firmly onto the jar, ensuring it adheres securely.
Step 6: Patience is Key
Give the adhesive ample time to dry completely before handling or exhibiting your beautifully wrapped Mason jar. This will safeguard the twine’s integrity, preventing any unwelcome unraveling and ensuring a professional-looking finish that will dazzle all who behold it.
Creating Patterns or Designs with the Twine
Look no further. Creating captivating patterns or designs with twine on a Mason jar is the perfect do-it-yourself project for you. Not only is it simple and cost-effective, but it also allows you to unleash your creativity and personalize your living space.
So, how exactly do you go about creating these exquisite patterns or designs? Let’s break it down into simple, easy-to-follow steps:
- Gather your materials: Begin by collecting all the necessary materials, such as a Mason jar, twine of your choice, scissors, and a robust adhesive or glue. Having everything prepared before you commence will ensure a smoother process.
- Choose your pattern: The initial step is to determine the pattern or design you desire to create. Are you partial to vertical stripes? Crisscross patterns? Or perhaps something more intricate, like hearts or initials? The decision is entirely up to you.
- Apply the glue: Once you have settled on a pattern, apply a minute amount of glue at the desired starting point on the jar. It is crucial to use a sturdy adhesive that will securely hold the twine in place.
- Begin wrapping: Take the end of the twine and press it onto the glued area, holding it firmly for a few seconds to ensure proper adhesion. Now, commence tightly wrapping the twine around the jar, following your chosen pattern. Remember to intermittently apply a thin line of glue along the way to firmly secure the twine in place.
- Switch colors or textures: If you yearn to introduce new colors or incorporate different textures into your design, simply cut off the existing twine and start anew with a fresh piece. Again, secure it in place with glue as previously instructed.
- Trim and secure: Once you have completed your pattern or design, trim off any excess twine and secure the end firmly with glue. By doing so, your design will remain intact and unfazed by the test of time.
- Allow it to dry: Permit the glue to dry completely before handling or utilizing the Mason jar. This will ensure that the twine adheres steadfastly and never comes loose.
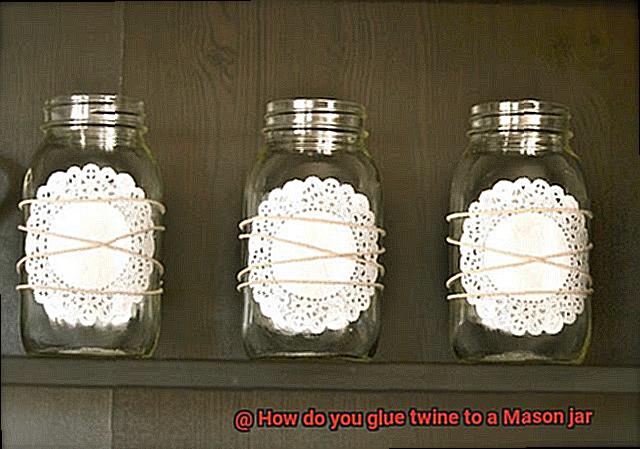
- Add embellishments: Lastly, if you wish to elevate your design to the next level, consider embellishing it with ribbons, flowers, or charms. This will bestow your Mason jar with a personalized and distinctive touch.
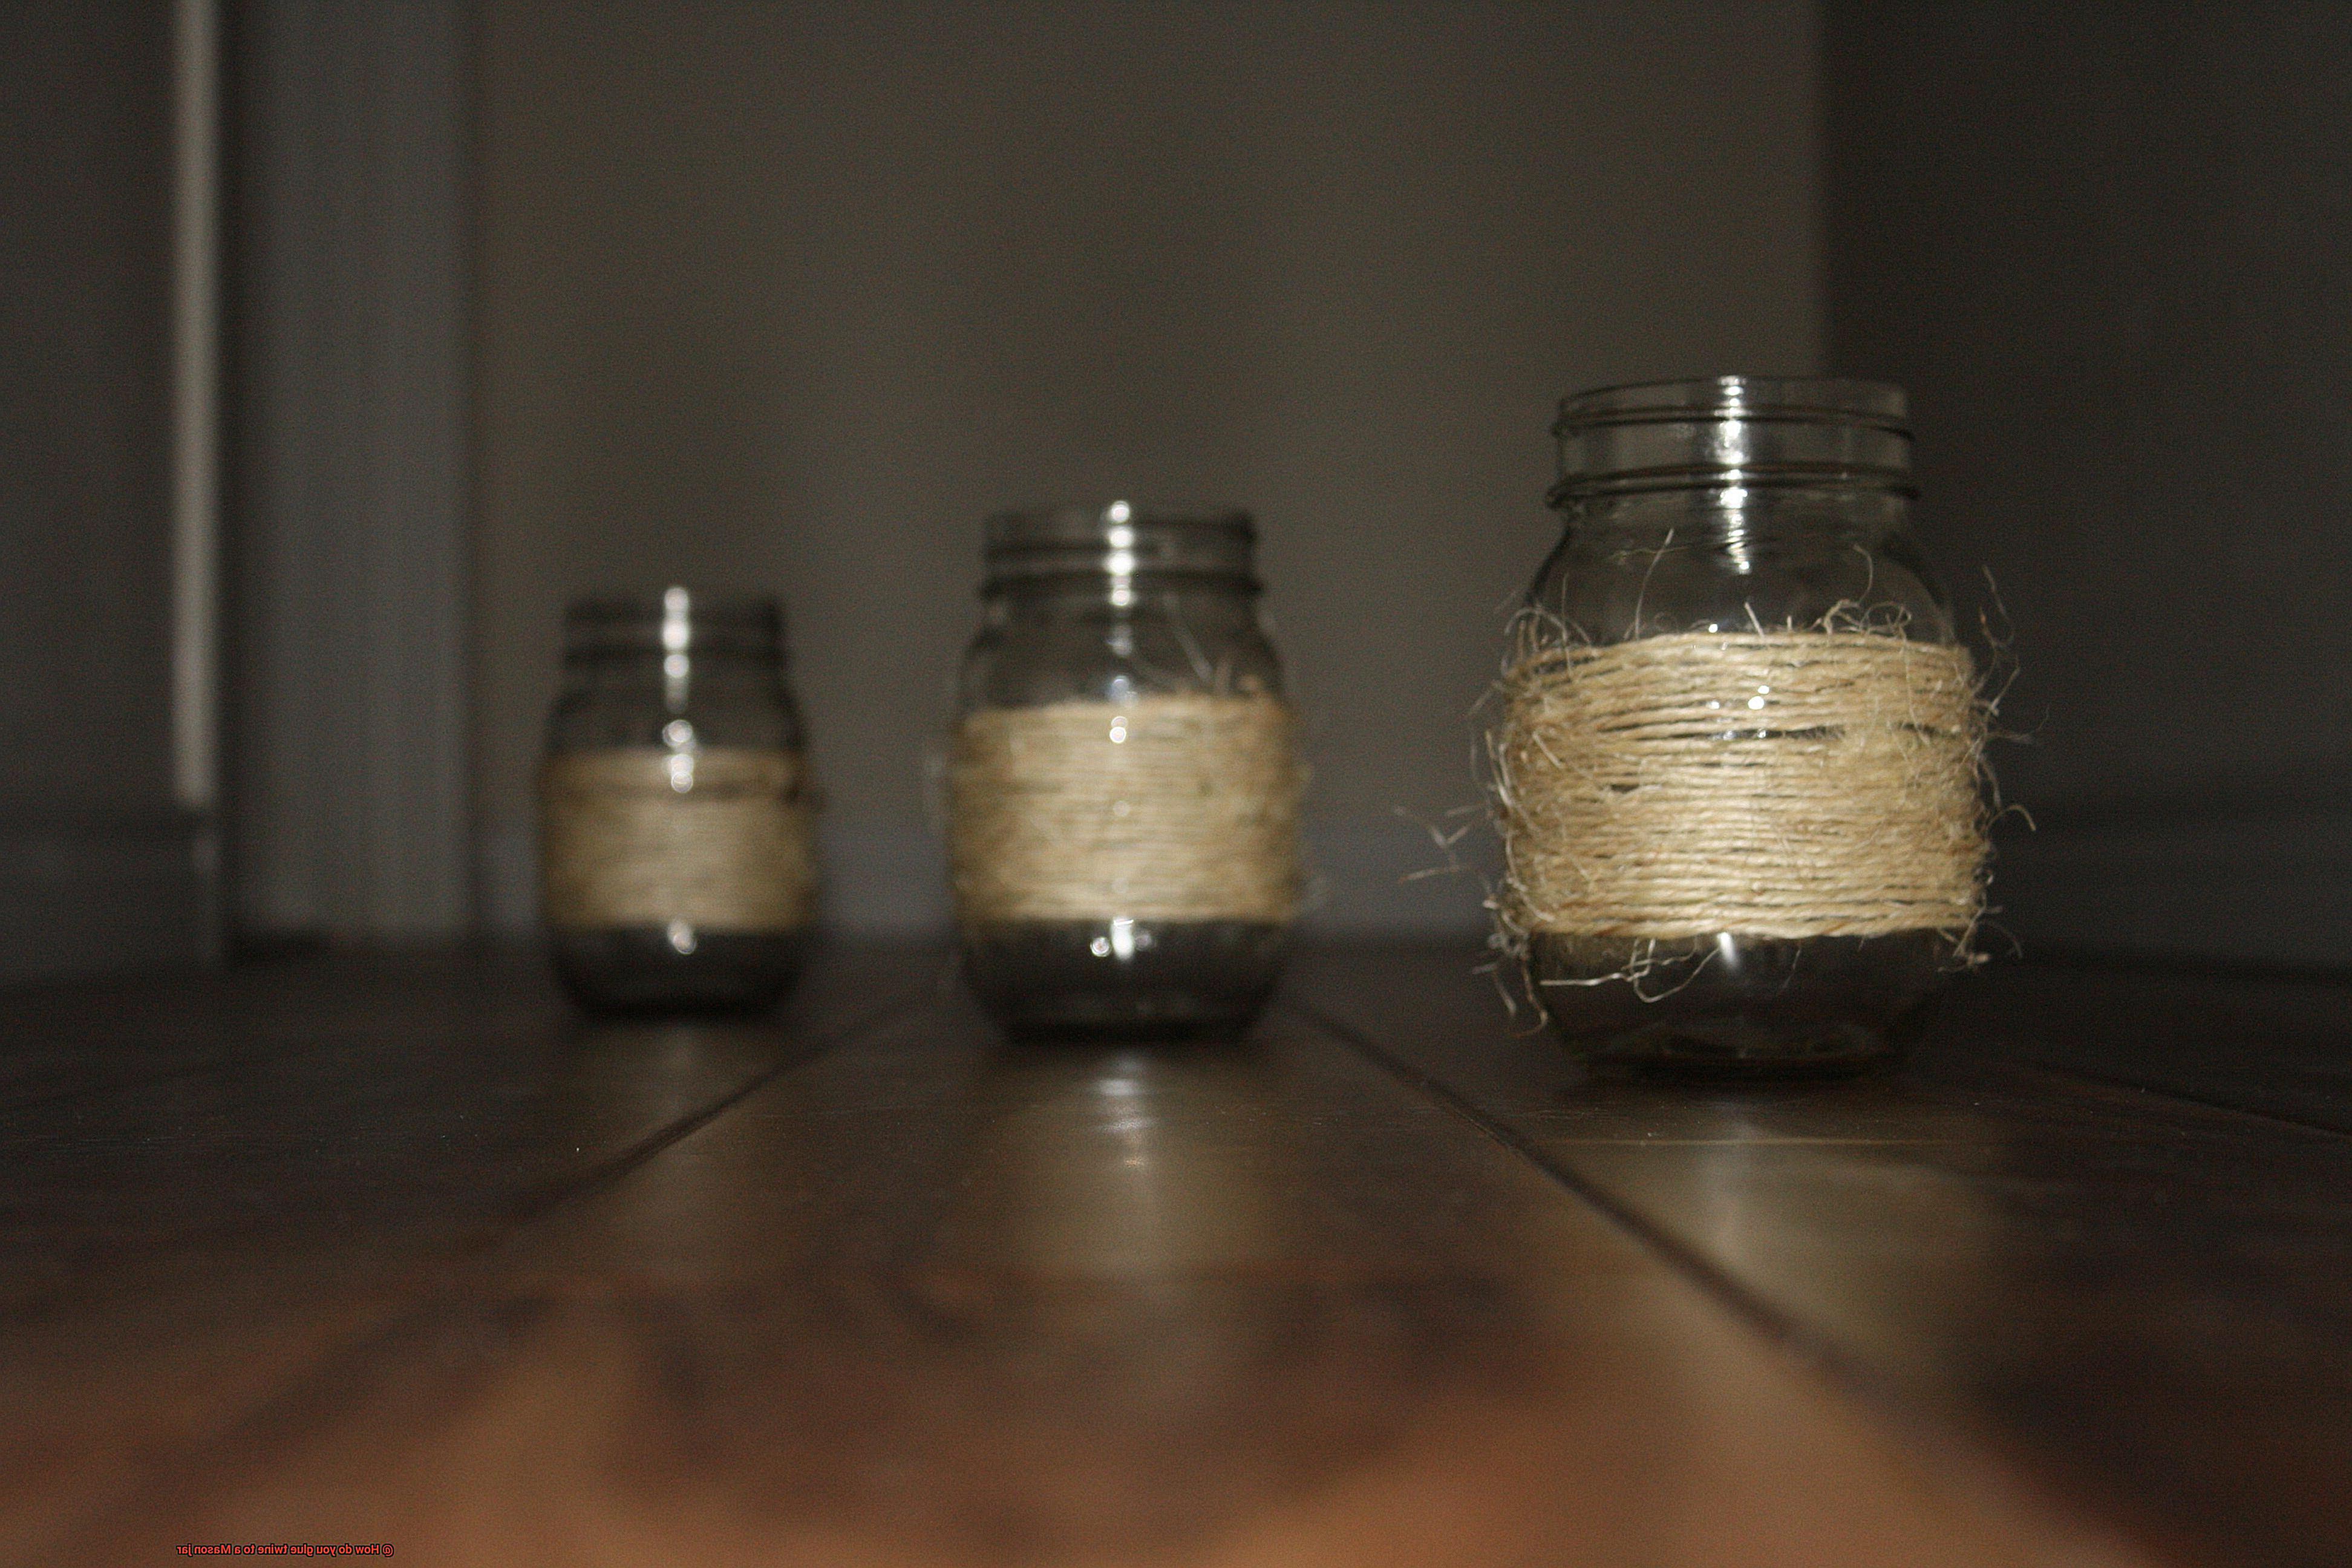
And voila. You have successfully crafted a breathtaking pattern or design with twine on a Mason jar. Whether you employ it as a centerpiece, a flower vase, or even a candle holder, rest assured it will become an exquisite focal point in your home.
Securing the End of the Twine
This project is perfect for you – gluing twine to a Mason jar. With this simple yet effective technique, you can create stunning patterns and designs that will transform your home into a cozy farmhouse hideaway.
But before you dive headfirst into this project, let’s talk about securing the end of the twine. We don’t want all your hard work unraveling, do we? Here are three methods that will ensure your twine stays put:
- Tie a knot: This classic technique involves tying a knot at the end of the twine before applying any glue. It’s simple yet effective, providing a secure hold that won’t come loose once the glue dries.
- Create a stiff tip: For a more seamless look, try this method. Apply a small dot of glue to the end of the twine and roll it between your fingers to create a pointed tip. Once the glue dries, this stiff tip will keep the twine secure and prevent it from unraveling.
- Adhesive tape: If you’re aiming for a clean finish, adhesive tape is your best friend. Cut a small piece of clear tape and wrap it tightly around the end of the twine. This method provides a secure hold without any visible knots or glue.
No matter which method you choose, ensure that the end of the twine is firmly secured before applying any glue. Trust me, you don’t want your masterpiece falling apart.
Adding Embellishments to Enhance Your Design
Look no further than the world of embellishments. These small details have the power to transform a simple design into something captivating and memorable. In this article, we will explore the art of adding embellishments to enhance your design, guiding you through the process step by step.
Embellishment Options:
Before diving into the process, let’s explore some popular embellishment options that can elevate your design:
- Rhinestones and Sequins: Add a touch of glamour and sparkle to your designs with these dazzling embellishments. Perfect for adding a touch of elegance to garments, accessories, or even home decor items.
- Lace and Ribbon: These delicate materials are perfect for adding a touch of romance and sophistication to your designs. Whether used as trimmings or incorporated into the fabric itself, lace and ribbon can instantly enhance the overall aesthetic.
- Beads and Pearls: Create a sense of luxury and opulence by incorporating beads and pearls into your design. Whether you choose to use them sparingly as accents or as intricate patterns, these embellishments can add depth and texture.
- Embroidery and Appliques: For a more intricate and personalized touch, consider embroidery or appliques. These techniques allow you to add unique patterns, motifs, or even your own artwork to your designs.
Step 1: Planning Your Design
Before adding any embellishments, it is crucial to have a clear vision of your desired outcome. Take some time to sketch out your design or create a mood board for inspiration. This will help you determine where and how to incorporate the embellishments effectively.
Step 2: Selecting the Right Embellishments
Once you have a clear plan in mind, it’s time to select the perfect embellishments for your design. Consider factors such as color, texture, size, and theme to ensure that the embellishments complement the overall aesthetic.
Step 3: Placement and Application
Now comes the exciting part – applying the embellishments. Start by marking the desired placement of each embellishment on your design. Use fabric chalk or pins to ensure accuracy. Then, depending on the type of embellishment, you can choose from various application methods such as sewing, gluing, or ironing.
Step 4: Attention to Detail
The key to successful embellishment is paying attention to the small details. Take your time and ensure that each embellishment is securely attached and aligned with your design. Use a steady hand and precision tools to achieve the desired outcome.
Step 5: Experiment and Play
Don’t be afraid to experiment and play with different combinations and placements of embellishments. Sometimes, unexpected pairings can lead to stunning results. Trust your instincts and let your creativity shine through.
Considerations for Long-Term Durability and Use
Before embarking on this exciting project, let’s delve into the essential considerations for achieving long-term durability and use. After all, your masterpiece deserves to withstand the test of time.
First and foremost, let’s talk about the glue. When it comes to securing twine to glass surfaces like Mason jars, two options reign supreme: epoxy or super glue. These powerhouses boast incredible bond strength and steadfastness, ensuring that your twine remains securely attached to the jar for years on end.
But wait, don’t overlook the importance of prepping the surface. Before applying any glue, it’s crucial to clean your Mason jar thoroughly. Grab a mild soap and water solution, give it a good scrub, and ensure it’s completely dry. Trust me, a pristine surface is paramount for achieving that unyielding adhesive bond.
Now, let’s tackle the glue application process. Take it slow and steady, my friends. Start with a small amount of glue on one end of the twine and work in manageable sections. This method provides better control and prevents premature drying, allowing you to attach the twine seamlessly to the jar.
Once each section of twine is flawlessly glued onto the jar, exercise patience. Allow ample drying time as specified by the glue manufacturer. Resist the urge to touch or fiddle with the jar during this pivotal period – we wouldn’t want to compromise that hard-earned bond.
Once the glue has dried completely, scrutinize your creation for any signs of weakness. Should you discover any loose spots, fear not. Simply reapply a small amount of glue and press the twine firmly against the jar to fortify that bond once more.
Now, let’s discuss the handling and maintenance aspect. Treat your Mason jar with twine like the delicate work of art it is. Avoid dropping or subjecting it to impact, as this can loosen or damage the twine. Additionally, shield the jar from extreme temperatures and excessive moisture, as these factors can compromise the adhesive bond.
Last but not least, regular cleaning and maintenance are key. Gently wipe away any accumulated dirt or dust on the twine using a soft cloth or sponge. Remember to bypass harsh chemicals and abrasive materials – we aim to protect both the twine and the glue bond.
abOq9od4qs8″ >
Conclusion
When it comes to gluing twine to a Mason jar, there are a few simple steps you can follow.
First, gather your materials: a clean Mason jar, twine of your choice, and a strong adhesive like E6000 or hot glue. Next, start by applying a small amount of glue to the bottom of the jar.
Then, carefully wrap the twine around the base of the jar, making sure to press it firmly into the glue. Continue wrapping the twine around the jar in a spiral motion, adding more glue as needed to secure it in place.
Once you’ve covered the entire jar with twine, trim any excess and secure the end with another dab of glue. Finally, allow the adhesive to dry completely before using or displaying your beautifully decorated Mason jar.
With just a little patience and some crafty know-how, you can create stunning twine-wrapped jars that add a rustic touch to any space.