Are you ready to take your staircase from drab to fab? Look no further. Gluing vinyl plank flooring to stairs is the secret sauce that will transform your home into a jaw-dropping masterpiece. Join us on this thrilling journey as we unlock the magic of this process step by step.
Hook:
Imagine walking into a house where every detail screams elegance and style. As you climb the stairs, your eyes are immediately captivated by the flawlessly crafted steps, adorned with vinyl plank flooring that flawlessly mimics the look of real wood or stone. It’s pure visual poetry, and we’re about to make it happen.
Main Points:
- Vinyl Plank Flooring 101: To ensure your project stands the test of time, let’s dive into the nitty-gritty of vinyl plank flooring. From its durability and luxurious appearance to its water-resistant superpowers, vinyl is the smart choice for stair makeovers.
- Prep Like a Pro: Before diving headfirst into gluing, proper preparation is key. We’ll guide you through must-do steps like measuring and cutting the vinyl planks, giving your staircase a thorough cleaning, and ensuring a smooth surface for flawless results.
- Mastering the Art of Gluing: Now comes the fun part. Discover top-notch adhesive options for gluing vinyl plank flooring to stairs, along with pro tips like spreading glue evenly and letting it cure like a boss.
- Tackling Tricky Terrain: No project is without its challenges, but fear not. We’ll show you how to conquer curved stairs, deal with existing nosing like a champ, and handle any other potential hurdles that come your way.
- The Finishing Flourish: Once those vinyl planks are securely glued in place, it’s time for the grand finale. Explore options like molding, stair edging, and eye-catching color combinations to achieve a seamless and professional finish.
Glue, groove, and go. Gluing vinyl plank flooring to stairs is a game-changer that will revolutionize your home’s vibe. By following our expert tips and guidelines, you’ll be stepping onto a work of art every time you ascend your staircase. So let your creativity run wild and embark on this transformative project today.
Preparing the Stairs for Glue Application
Contents
Achieving a flawless installation of vinyl plank flooring on stairs requires meticulous preparation. In this comprehensive guide, we will walk you through the step-by-step process of preparing your stairs for glue application, ensuring a secure and visually stunning result. Get ready to transform your staircase with these expert tips.
Step 1: Say Goodbye to Existing Flooring or Carpeting
Before diving into the preparation process, bid farewell to any remnants of old flooring or carpeting. Gently remove them, employing a scraper or pry bar to eliminate any stubborn adhesive or debris. This crucial step sets the foundation for a clean and adhesive-friendly surface.
Step 2: Inspect and Repair Imperfections
Spare no effort in examining your stairs for imperfections or damage that may compromise the longevity of your vinyl plank installation. Address any loose or squeaky steps by tightening screws or nails and reinforcing weak areas. A solid and stable foundation is vital for a successful installation.
Step 3: Embrace the Sanding Process
To pave the way for optimal adhesion, lightly sand the surface of your stairs. Equip yourself with a sanding block or an orbital sander featuring a fine-grit sandpaper to create a slightly roughened texture. Be meticulous in removing all dust and debris generated during sanding.
Step 4: Thoroughly Cleanse and Purge
After sanding, embark on a thorough cleansing mission to eradicate any remaining dust or debris. Employ a vacuum or broom to eliminate every last particle. Leaving no trace behind ensures that the glue adheres flawlessly, safeguarding the integrity of your installation.
Step 5: Seal the Deal with Primer
A primer is an excellent ally in establishing a strong bond between vinyl planks and your stairs. Select a primer specifically designed for use with vinyl flooring, meticulously following the manufacturer’s instructions. Apply a thin, even coat of primer using a brush or roller, allowing it to dry completely.
Step 6: Invest in Quality Adhesive
Make no compromises when choosing your adhesive. Opt for a high-quality product specially formulated for vinyl flooring. Follow the manufacturer’s instructions for mixing and application, working in small sections to ensure comprehensive coverage.
Measuring and Cutting the Vinyl Planks
In our journey to transform your staircase with vinyl plank flooring, we’ve tackled bidding farewell to old flooring and prepping the surfaces. Now, it’s time to dive into the precision-filled adventure of measuring and cutting vinyl planks. This crucial step ensures a perfect fit and a flawless finish. So grab your measuring tape and utility knife as we embark on this fascinating process.
Gather Your Tools:
Before we dive into the exciting world of measurement, let’s make sure we have all the necessary tools by our side. Grab a trusty measuring tape, a pencil or marker if you’re feeling bold, and a high-quality utility knife or vinyl cutter. These tools will be your companions as we conquer any measurement challenge that comes our way.
Measure Twice, Cut Once:
Now that we’re armed with the right tools, it’s time to measure those stairs like true professionals. Start by measuring the width of each stair tread, from edge to edge. Take your time and ensure that you account for any nosing or overhang that might be present.
Next, let’s measure the length of each stair tread, starting from the riser to the edge of the nosing or overhang. Remember, each stair may have slight variations in size, so measure each one individually with utmost accuracy. Precision is the name of the game here.
Transfer and Mark:
Once you have obtained those precise measurements, it’s time to transfer them onto your vinyl planks. Grab your trusty pencil or marker and mark the measurements directly on the planks. Here’s a pro tip for you: add an extra half-inch or so to each measurement to allow room for adjustments during installation. It’s always better to be safe than sorry.
Slice and Dice:
Now comes the thrilling part – cutting those vinyl planks. For straight cuts, use a straightedge or a T-square as your faithful guide while wielding your trusty utility knife or vinyl cutter. Apply firm pressure while cutting to ensure a clean and precise cut. You’ve got this.
But what about those irregular shapes and angles, you ask? Fear not. Equip yourself with a template or create a cardboard cutout of the shape you need. Use this guide to trace the shape onto the vinyl plank and then carefully cut along the traced line. Your precision will be your superpower in this task.
Applying Adhesive to the Vinyl Planks
In our previous adventure, we conquered the art of measuring and cutting vinyl planks for your staircase. Now, brace yourselves as we dive headfirst into the captivating realm of applying adhesive to vinyl plank flooring on stairs. Prepare to witness a stunning transformation as your staircase becomes the talk of the town. Let’s roll up our sleeves and embark on this exciting journey together.
Step 1: Prepare the Surface
Before we embark on our adhesive adventure, let’s ensure our staircase is pristine. Grab your trusty broom or vacuum cleaner and banish any trace of dust, debris, or grease. A clean canvas sets the stage for a flawless finish that will leave everyone in awe.
Step 2: Choose the Perfect Adhesive
Not all adhesives are created equal, my friends. Take a moment to consult the manufacturer’s guidelines or seek professional advice to find the ideal adhesive for your vinyl plank flooring and stairs. With options like pressure-sensitive adhesives (PSA) or solvent-based adhesives, choose wisely to ensure a bond that stands the test of time.
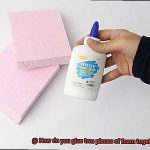
Step 3: Apply the Adhesive with Precision
Now comes the fun part – applying the adhesive like a seasoned pro. Follow the manufacturer’s instructions carefully as you spread the adhesive evenly on the back of each vinyl plank. Whether you opt for a trusty trowel or a recommended application tool, let your expertise shine in this crucial step.
Step 4: Work in Small Sections for Optimal Results
Patience is a virtue when it comes to applying adhesive on stairs. To achieve perfection, tackle your staircase in small sections. This ensures that no adhesive dries out before you’ve had a chance to install the planks. Start at the bottom and work your way up, devoting ample time to each section to guarantee a flawless finish.
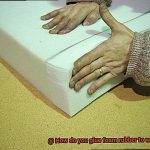
Step 5: Firmly Press Each Plank into Place
As you place each vinyl plank onto the stairs, unleash your inner strength and press firmly into the adhesive. This step ensures a strong bond between the plank and the stair surface, leaving no room for doubts or loose ends. Utilize a roller or a weighted object to apply even pressure on each plank, creating a connection that will withstand the test of time.
Pressing the Vinyl Planks onto the Stairs
In our previous section, we explored the world of gluing vinyl plank flooring to stairs. Now, it’s time to unveil the secret to creating a flawless staircase – the art of pressing vinyl planks with precision. So grab your tools and let’s dive into this crucial final step.
The Power of Pressing:
Imagine a puzzle missing that final piece or a symphony without its crescendo. Pressing the vinyl planks onto the stairs is like adding that finishing touch, completing the masterpiece. This step ensures a secure bond, prevents lifting or peeling, and guarantees a seamless and durable finish that will leave everyone in awe.
Timing Is Everything:
Before you embark on your pressing journey, allow the adhesive enough time to dry properly. Remember, each adhesive has its own set of instructions for drying time, so consult the manufacturer’s guidelines carefully. Patience will be rewarded with a long-lasting bond that stands the test of time.
Start from the Bottom:
Begin your pressing adventure from the bottom of the stairs and work your way up. This strategic approach not only makes alignment a breeze but also minimizes the chances of annoying air bubbles forming beneath your stunning vinyl surface.
Firmness Is Key:
To achieve optimal contact between the planks and adhesive, wield the power of a hand roller or a heavy object like a tile spacer. Each press you make creates a connection that is as strong as it is beautiful.
Show Edges and Corners Extra Care:
Edges and corners are notorious troublemakers when it comes to lifting or peeling. Give these areas some extra love as you press down on the planks, applying additional pressure to ensure they stay firmly in place and maintain their flawless appearance.
Banish Wrinkles and Bubbles:
Should you encounter any unsightly air bubbles or wrinkles during the pressing process, fear not. With a steady hand and a delicate touch, gently lift the affected area using a utility knife or a small needle. Smooth it out to restore perfection, being careful not to damage the vinyl surface.
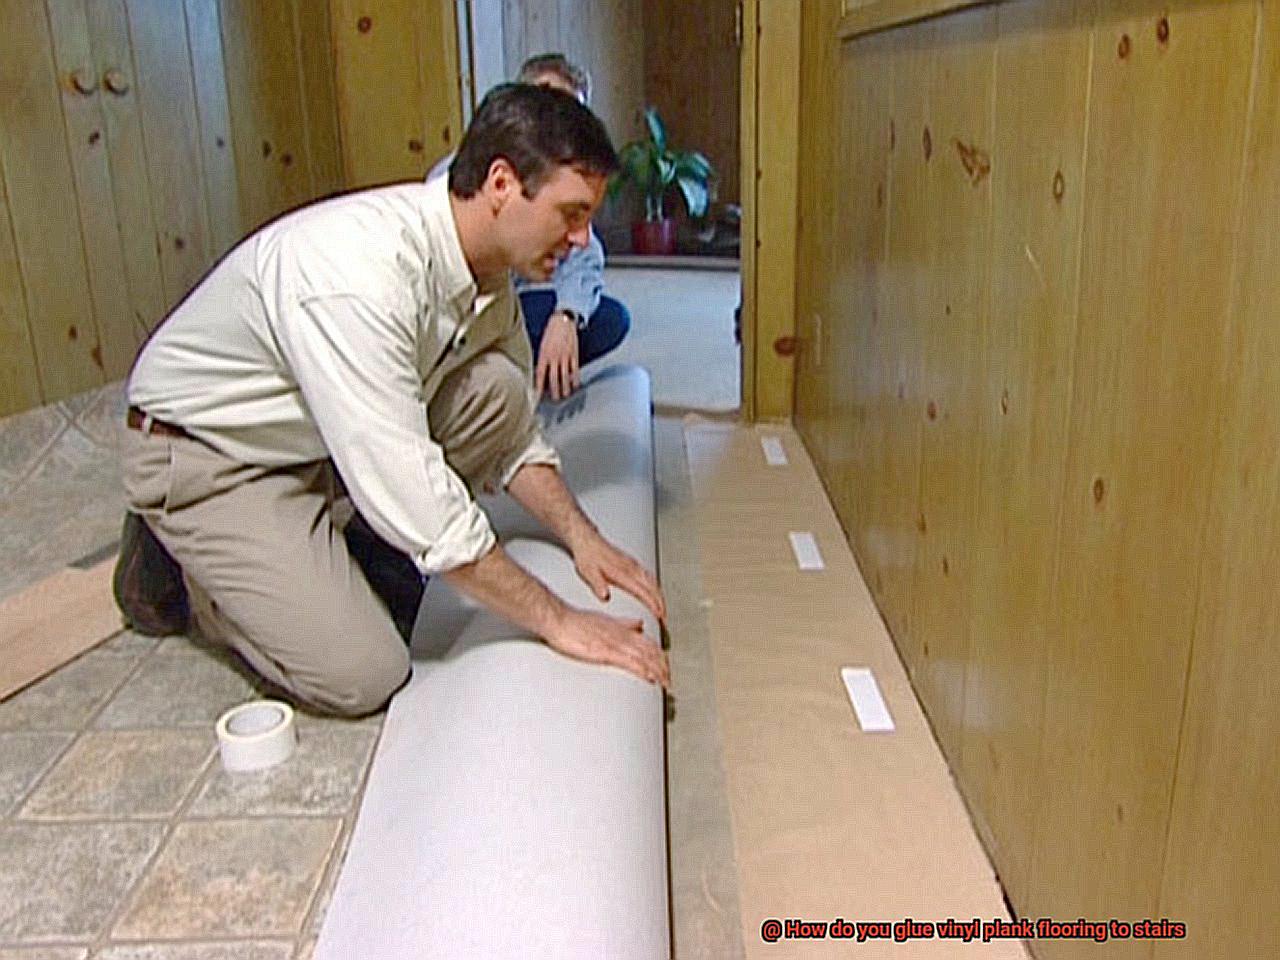
Rolling the Vinyl Planks into Place
Today, we embark on the final step of our stair installation journey: rolling the vinyl planks into place. This is where the real magic happens – where those planks become one with your stairs, creating a seamless and durable masterpiece that will leave everyone in awe. So grab your tools and let’s dive into the art of rolling.
Preparation is key, my friends. Before we can begin rolling, we must ensure our stairs are ready for this bonding experience. Give them a thorough cleaning, banishing any dirt, dust, or debris that might hinder the adhesive’s grip. A pristine surface is vital for a successful installation. Once your stairs are sparkling clean, make sure they’re bone dry before proceeding. Moisture and adhesive are not a match made in heaven.
Now that our stairs are prepped and primed, let’s measure and cut our vinyl planks with precision. Each step deserves its own perfectly tailored plank. And don’t forget, we must leave a small gap between each plank for expansion – we want these beauties to have room to breathe and settle.
With our planks cut to perfection, it’s time to roll up our sleeves and get rolling. We start at the bottom of the stairs, working our way up like artists creating a masterpiece stroke by stroke. Take your trusty trowel or roller and apply a thin layer of adhesive to the back of each plank, spreading it evenly like butter on warm toast. No lumps or bumps allowed – we want a smooth canvas for our planks to adhere to.
Once the adhesive is delicately applied, it’s time for the moment of truth. Carefully position the plank onto the stair, starting from one side and elegantly rolling it towards the other side. Imagine you’re unfurling a luxurious carpet fit for royalty. To ensure a bond that lasts a lifetime, apply gentle pressure with a roller or hand tool. We want these planks to become one with the stairs, inseparable and unyielding.
As we ascend the stairs, let’s not forget about the importance of alignment and visual harmony. Each plank should seamlessly flow into the next, creating a symphony of patterns and designs. Take your time during this step – perfection cannot be rushed.
Allowing the Adhesive to Dry Completely
Now, it’s time to revel in the beauty and reliability of your masterpiece. But, before you embark on this newfound journey, there’s a vital step that demands your attention: allowing the adhesive to dry completely. In this captivating guide, we will delve into the significance of this process and equip you with invaluable tips to ensure your vinyl planks stand strong for years to come.
The Importance of Allowing the Adhesive to Dry Completely:
Preserving the Bond:
The adhesive serves as the lifeline that secures the vinyl planks, forging an unbreakable connection between them and the staircase surface. By giving the adhesive ample time to dry, you safeguard this bond, preventing loose or damaged flooring from haunting your steps.
Respect the Manufacturer’s Instructions:
Each adhesive boasts unique drying times, influenced by variables like humidity and temperature. Respect and adhere to the manufacturer’s guidelines meticulously. Cutting corners is not an option; instead, grant the adhesive its rightful time to dry completely, as specified.
Evading Foot Traffic Mishaps:
Resist the temptation to test your new stairs prematurely. Walking on them before the adhesive has fully dried can disrupt the bonding process, potentially leading to peeled or shifted planks. Protect your investment by refraining from foot traffic during this drying phase.
Masterful Tips for Allowing Adhesive to Dry Completely:
Embrace Patience:
Drying times for adhesive span a spectrum from a few hours to several days. Embrace patience as your guiding virtue and offer the adhesive abundant time to dry thoroughly before embarking on your stairway adventures.
Airflow Alchemy:
Unleash the power of optimal airflow in expediting the drying process. Ensure your stairwell enjoys adequate ventilation by opening windows or employing fans and dehumidifiers. These allies will help moisture evaporate swiftly, expediting the adhesive’s transformation into a rock-solid foundation.
The Art of Curing:
Certain adhesives come with a recommended curing time, which signifies the duration required for the adhesive to achieve its maximum strength. Exercise prudence by waiting until the curing time has elapsed before gracing your stairs with foot traffic. This ensures that the adhesive has fully set, fortifying its bond.
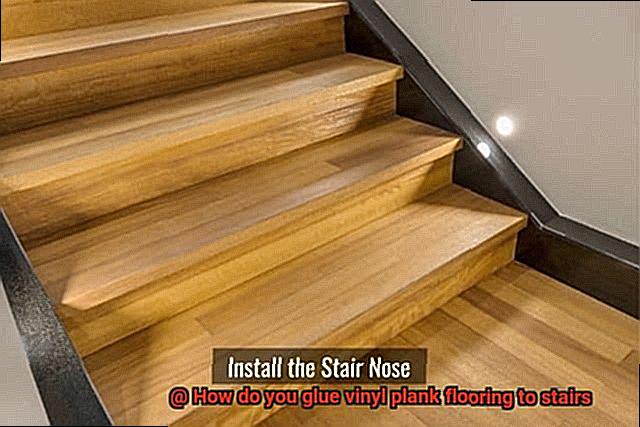
Installing Trim Pieces on Edges of Stairs
Step 1: Measure and Prep – Precision is Key
Begin by meticulously measuring the length and width of each stair tread and riser where the trim pieces will be installed. This crucial step guarantees a perfect fit and flawless finish. Once measured, prep the surface by thoroughly cleaning it, ensuring a strong bond between the adhesive and your stairs.
Step 2: Choose the Perfect Trim Piece
With an array of options available, such as stair nosing, stair bullnose, and stair edge trim, select the trim piece that complements your staircase’s style and design. This is your opportunity to make a statement and elevate the overall appearance of your stairs.
Step 3: Apply Adhesive with Precision
Using a trowel or roller, apply a thin and even layer of adhesive to the back of each trim piece. Take your time during this step to achieve proper adhesion, ensuring a secure and long-lasting bond between the trim piece and your stairs.
Step 4: Securely Attach for Lasting Beauty
Delicately place each trim piece on its corresponding stair edge, pressing it firmly into place. To ensure an impeccable fit, employ the assistance of a rubber mallet or a block of wood to firmly secure the trim piece. Remember, attention to detail is paramount when striving for professional-looking results.
Step 5: Account for Expansion and Contraction
Allow for the natural expansion and contraction of vinyl flooring by leaving a small gap between each trim piece. This thoughtful inclusion prevents unsightly buckling or warping over time. Fill this gap seamlessly with color-matched caulk or filler, achieving a flawless finish that seamlessly blends with your vinyl plank flooring.
m12eyIs0Kws” >
Conclusion
When it comes to gluing vinyl plank flooring to stairs, there are a few key steps you need to follow.
First, make sure your stairs are clean and free of any debris. Next, measure and cut your vinyl planks to fit each step precisely.
Then, apply a high-quality adhesive to the back of each plank, ensuring full coverage. Press the planks firmly onto the stairs, making sure they are securely bonded.
Finally, allow sufficient time for the adhesive to dry before using the stairs.